Update Meeting Minutes
Update Meeting Minutes
OVERVIEW
After the meeting is held it needs to be documented and the record sent out to all appropriate parties. This guide walks through those steps. Note, best practice is to distribute meeting minutes within 24 hours of when then meeting was held.
Go to the Daily Documentation page on SwinNet for more information and best practices related to Meeting Minutes
STEP 1: Click on Communication Management
STEP 2: Click on Meeting Minutes
STEP 3: Locate the meeting you want to update and click on it
STEP 4: Click Edit
Now to update each section.
STEP 5: Review the Top Meeting Detail section. Update any field that is not correct (location, Meeting Date, Meeting Start & End Times, and Next Meeting Info)

STEP 6: Update the Attendance section:
- Add any attendees not listed
- Names in Blue mean they attended. If someone did not attend, click on their name to turn it white.
- If an attendees is no longer on the project or no longer expect to come to this meeting series, click on the x next to their name to remove them from the attendance section.

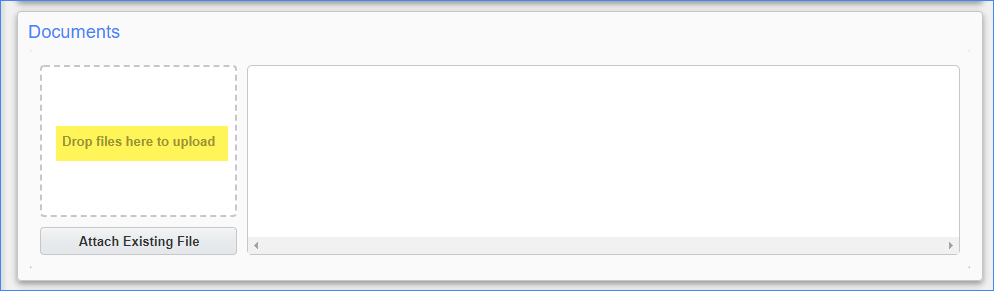
STEP 7: Upload any documents that were reviewed in the meeting such as the 3-Week Look Ahead schedule, RFI Log, Submittal Log, PCI Log, etc. If a job walk was done as part of the meeting you can also include photos taken while on the walk. All documents uploaded here will also be listed on the Attachments tab.
STEP 8: Review and update each Item in the the Agenda section:
-
Status: Update/Edit as needed
- Responsibility: Update/Edit as needed
- Due Date: Add as needed
-
Minute: Enter details related to the Agenda Item and any action item. If the Agenda Item has too many tasks in it, consider adding a New Item in the same topic to cover each task.
Repeat 8a – 8d for each item until all items are updated

STEP 9: Add any new items/topics to the meeting as needed (see steps 12-17 of the how-to guide for Creating a New Meeting Track with Agenda)
STEP 10: If any previous minute notes need to be edited, click on the pencil icon in the history box.

STEP 11: Click Save
STEP 12: Click Publish. This allows Collaborators view the meeting minutes.

STEP 13: Click the Print Report button in the upper right hand corner to print the meeting minutes for distribution.
NEXT STEPS:
Create the Next Meeting in a Series and Close a Meeting