Process a new MSA into CMiC
Process a new MSA into CMiC
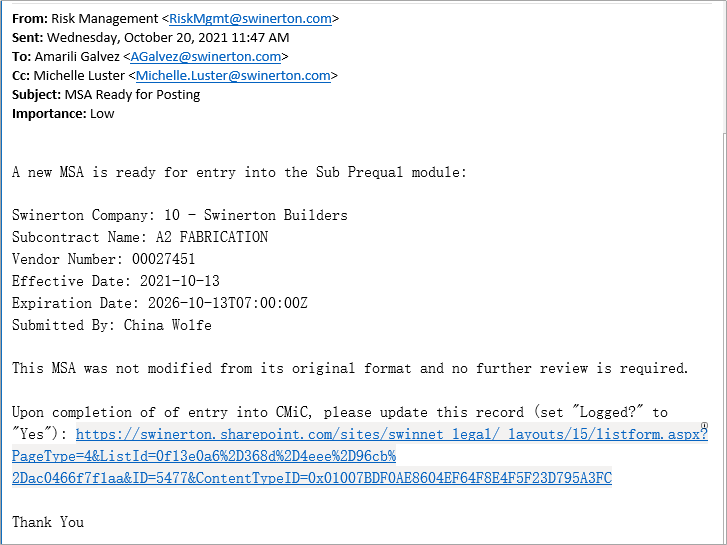
An email comes into the Risk Department to alert them a new MSA needs to be added into CMiC.
STEP 1: Click the URL to get to the SwinNet SharePoint page that has the MSA(.PDF)
STEP 2: Open the MSA and save it to Z Drive/SI/MSA/2017/Executed MSAs
Go To CMIC FIELD (Project Management)
NOTE: These next steps are only available to the Risk Management Department
STEP 1: Go to the email and find the Vendor # (aka Partner Code)
STEP 2: In CMiC click on the 4 next to Subcontractor Prequalification
STEP 3: Click on Subcontractors
STEP 4: Search for Vendor # (Partner Code) by entering it into the Search Box and clicking enter
STEP 5: Click on the name of the Subcontractor or their Partner Code to open their record

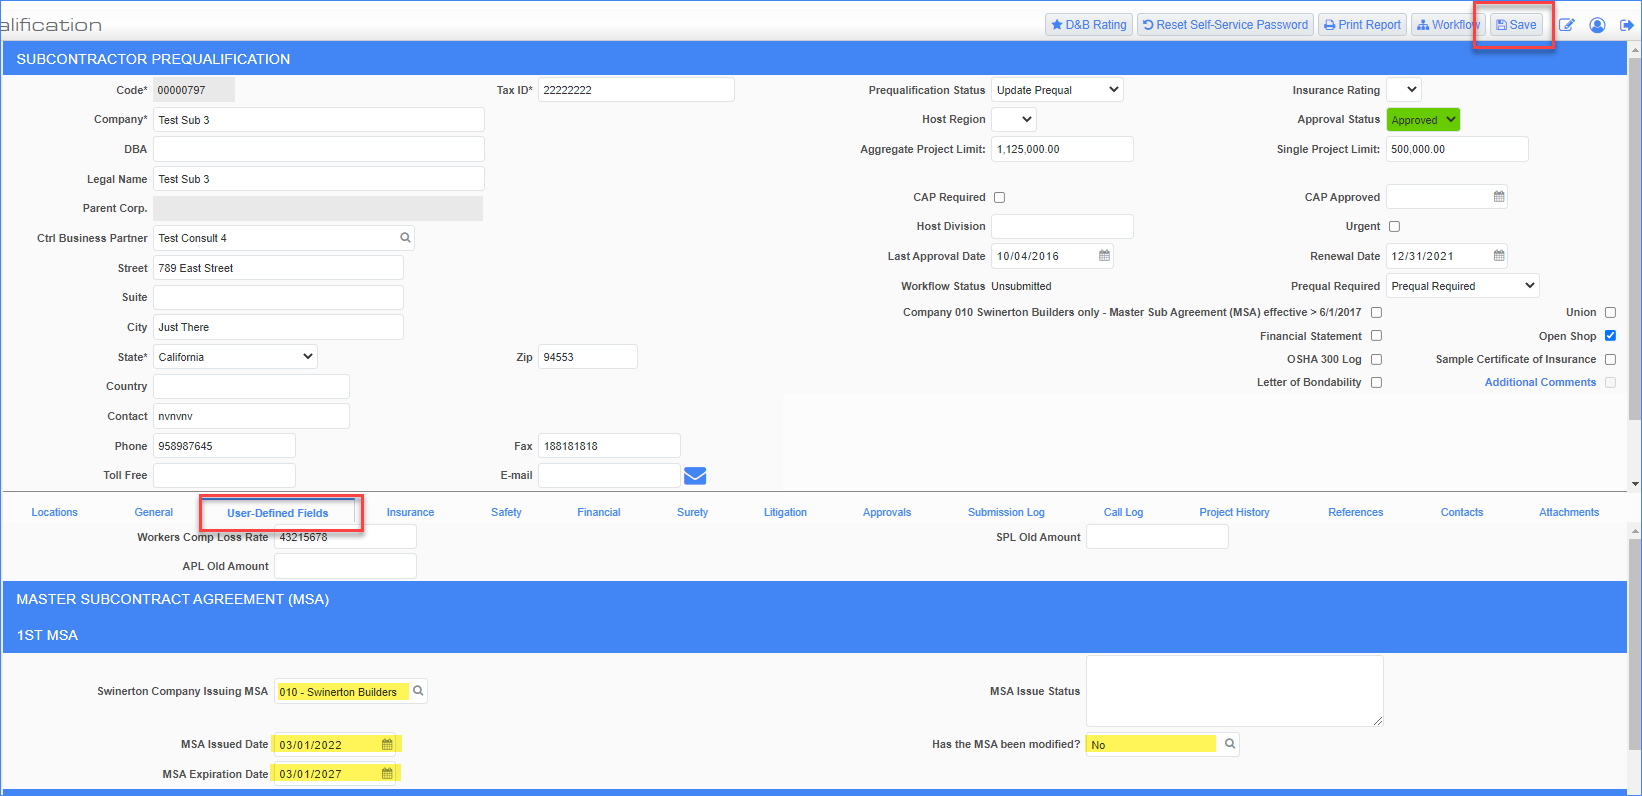
STEP 6: Go to the User Defined Fields Tab and update the following fields:
- Swinerton Company Issuing MSA (Find from drop down list. It will usually be Swinerton Builders)
- MSA Issued Date
- MSA Expiration Date (typically 5 years later)
- Has the MSA been modified (Yes/No) reference email
STEP 7: Click Save at the top right hand corner
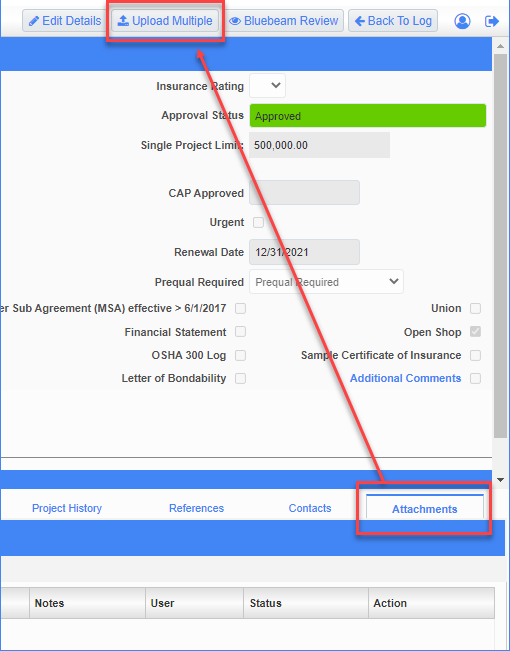
STEP 8: Click on the Attachments Tab on the far right to attach actual MSA
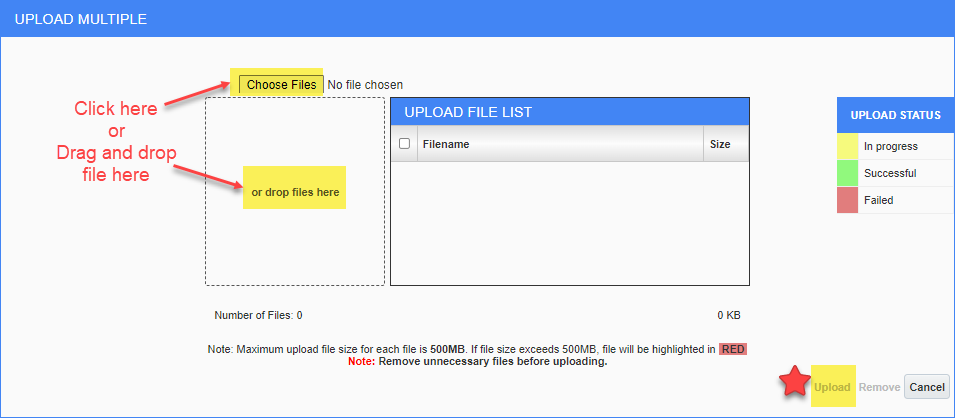
STEP 9: Click on “Upload Multiple"
STEP 10: Click "Choose File" or Drag and Drop the Fully Executed MSA / MPSA into the box that says "or drop files here" and click Upload
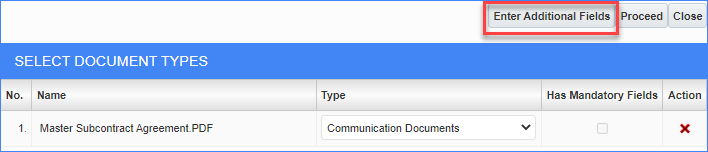
STEP 11: Click Enter Additional Fields
STEP 12: Update the Document Information
a. Review and update the Received Date if needed (default will be today's date)
b. Change the description to say "Master Subcontract Agreement"
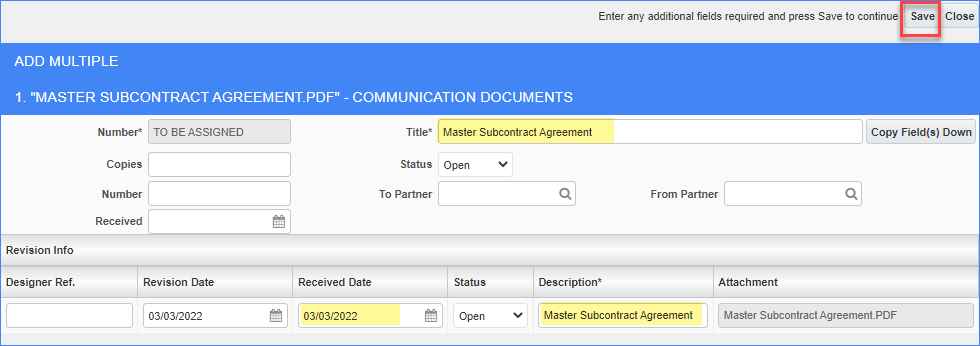
STEP 13: Click Save. The MSA should now show up on the Attachments tab

STEP 14: Go back to email (see above)
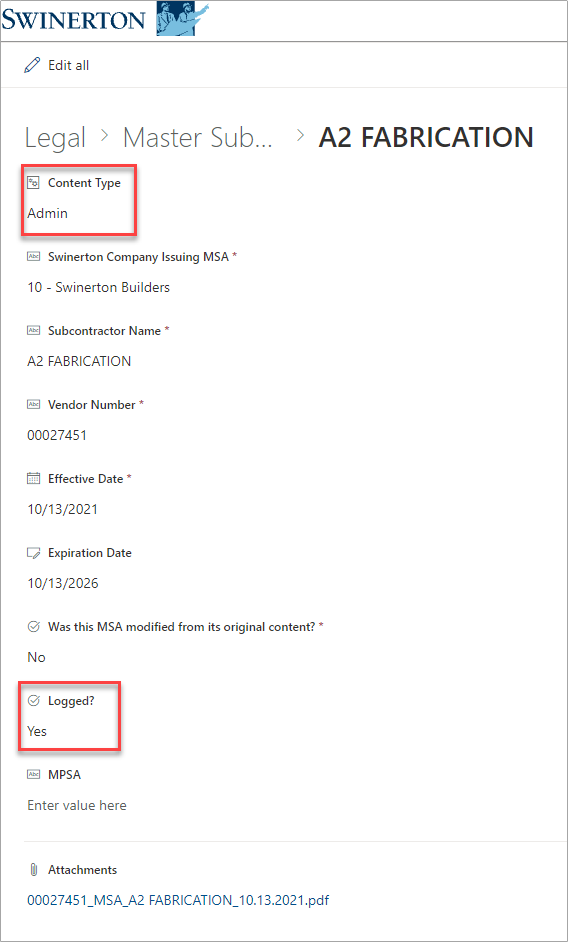
STEP 15: Click on the URL. A Sharepoint file should come up – Answer the question “Yes” to Logged?
STEP 16: Click SAVE
STEP 17: Delete email to complete this process