Search Tips and Tricks
Search Tips and Tricks
Learn how to use SwinNet Search with some useful tips and tricks. Search is located at the top middle of every page in SwinNet.
For some mobile devices, you will need to open up the blue bar at the top of your screen and then click the magnifying glass icon to search.
PART 1: Search Bar Suggestions
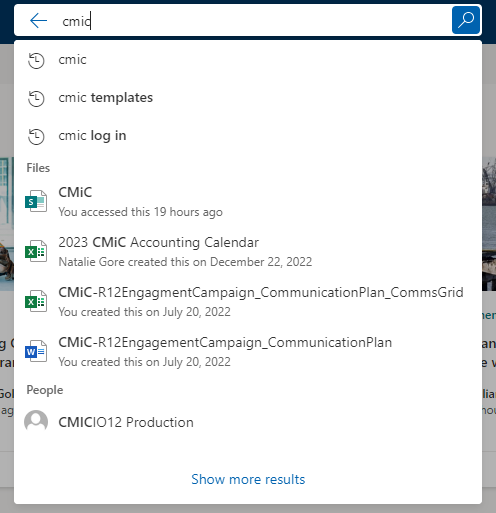
STEP 1: Enter a popular search term, like CMiC, into the Search field.

STEP 2: You will see suggestions (pages, files, people, etc.) before you even go to the Search page. If you see what you are looking for, you can click on it and go.
PART 2: Narrow Down Your Search Results by File Type
STEP 1: If you click on the magnifying glass icon, you will go to the Search page and see all of your search results.

STEP 2: You will see two filters. Select File Type and check the file extension you are looking for (PowerPoint, Word, Excel, etc.). You may choose more than one.
If you are looking for a Web Page, scroll down on the right side of the File Type menu and check that box. News articles are considered web pages.
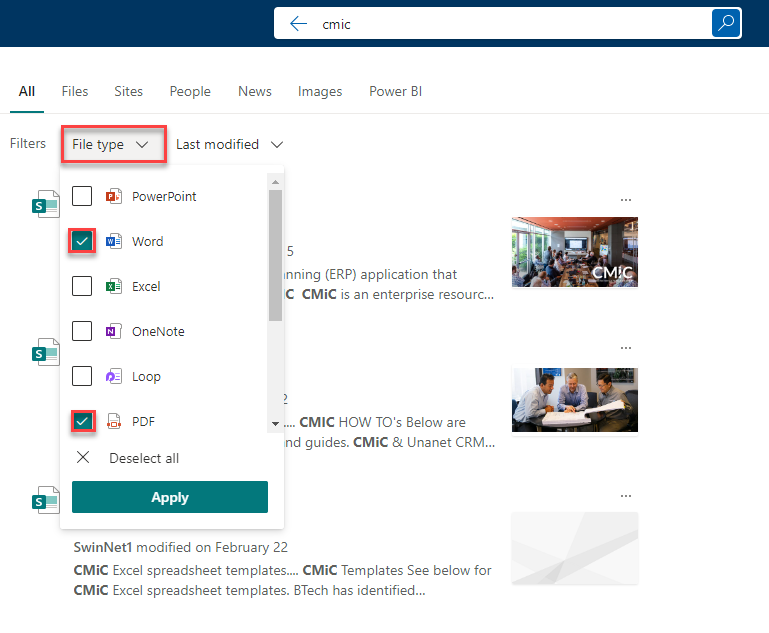
STEP 3: When done, click the green Apply button. You should see fewer, more targeted search results.
PART 3: Narrow Down Your Search Results by Last Modified
STEP 1: You can also select the Last Modified filter to narrow down results. Last Modified is a time-based filter. You can make a selection going back several days or put in specific dates.
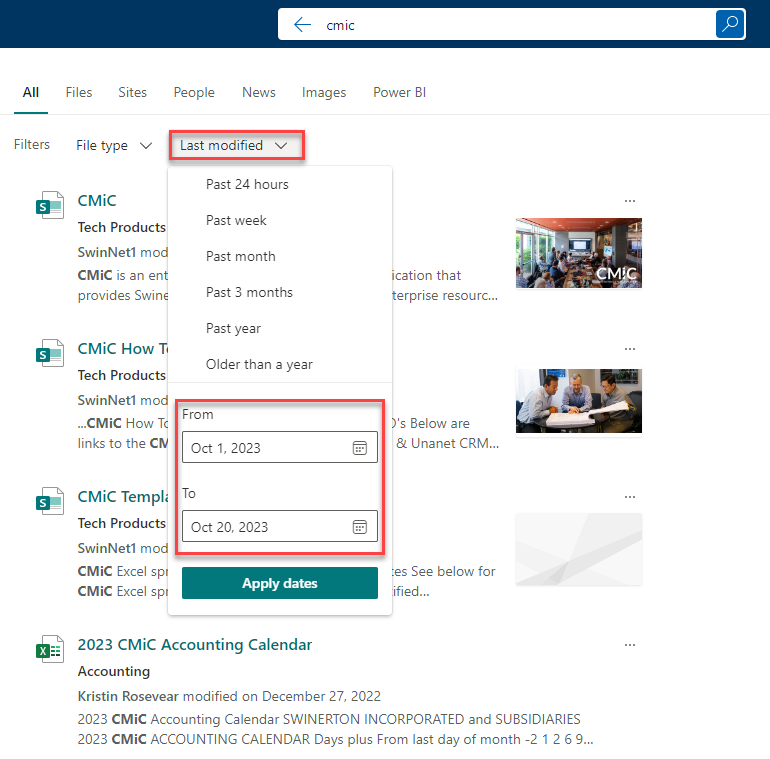
STEP 2: When done, click the green Apply button. You should see fewer, more targeted search results.
PART 4: Narrow Down Your Search Results by Tabs
STEP 1: In addition to the two filters, there are several tabs at the top that can help you with your search. These include Files, Sites, People, News, Images, and Power BI. These act as filters as well.
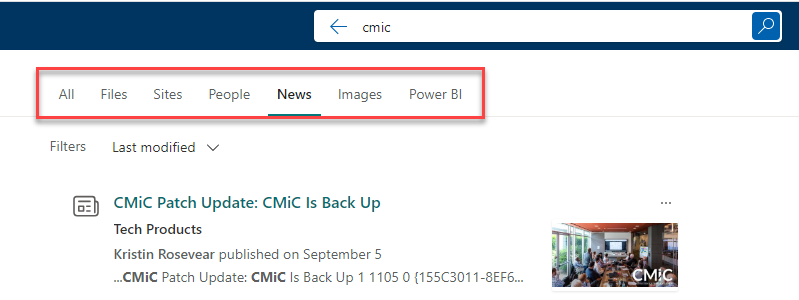
STEP 2: For example, if you want to find a news article in the last month, you could click on the News tab first, and then use a second filter, Last Modified, to narrow your results even more.
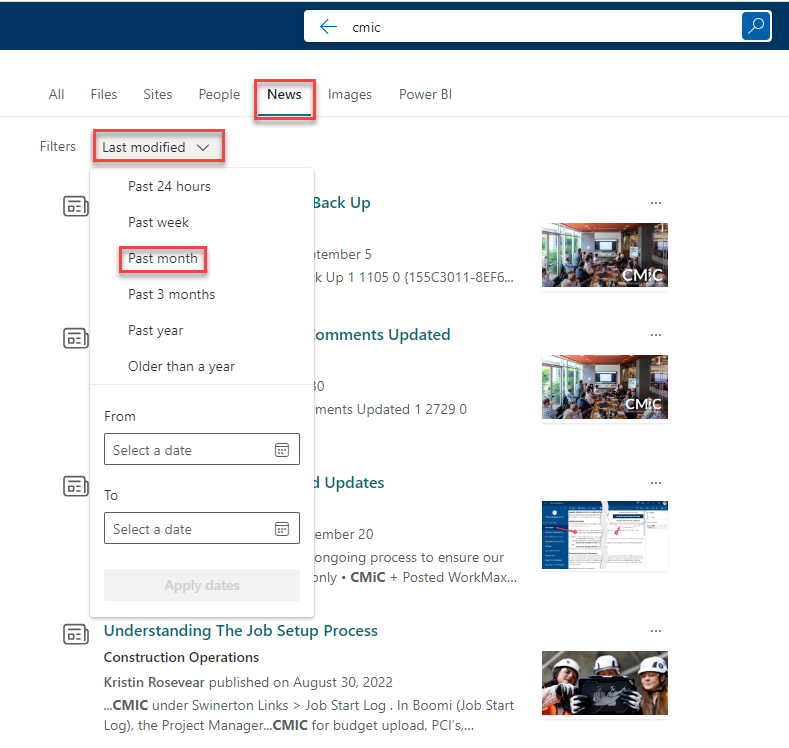
STEP 3: Be sure to click the green Apply button as needed.