Create a New RFI or Modify an Existing RFI
How To Create a New RFI or Modify an Existing RFI
OVERVIEW
This document is a guide for how to both Add New RFI’s and Modify RFI’s for your project. RFI’s can only be created from Project Contacts therefore, Project Contacts MUST be set up first prior to associating them with RFI’s.
Go to the Daily Documentation page on SwinNet for more information and best practices related to RFIs
REQUEST FOR INFORMATION
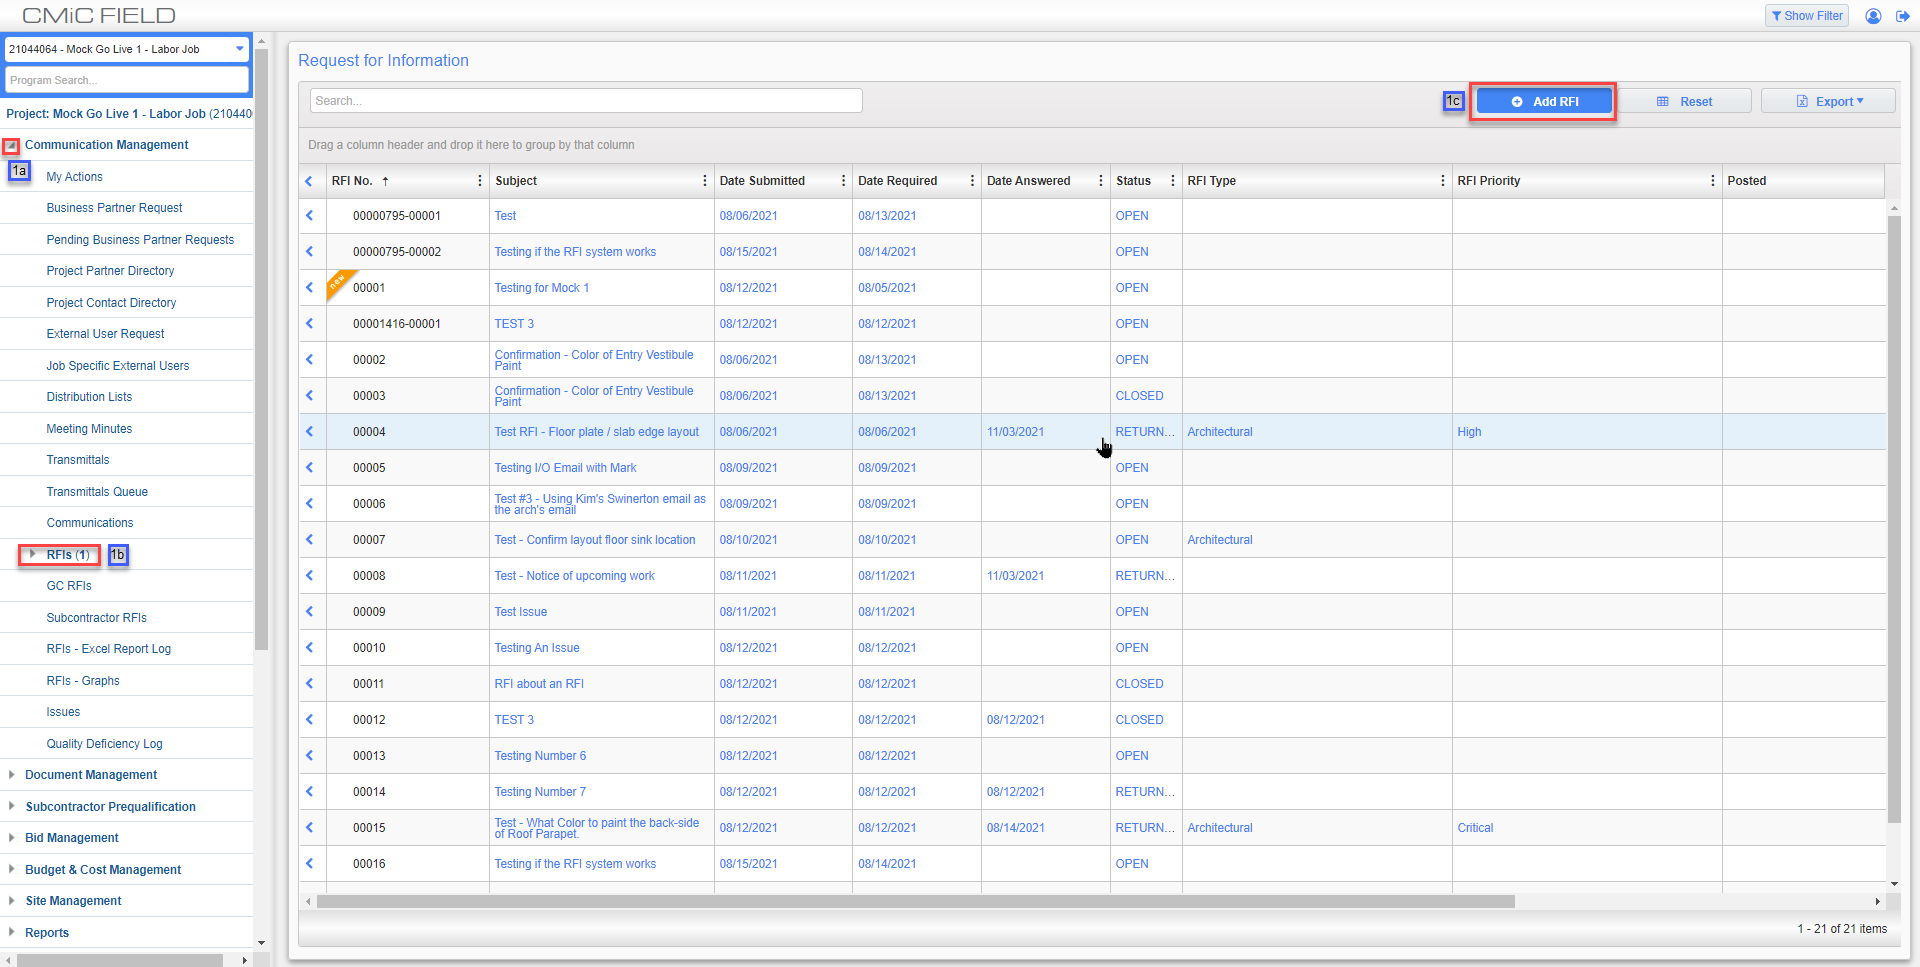
STEP 1: Log in to CMiC
a. Click the Arrowhead ( ) to the left of Communication Management.
b. Click the RFIs link.
c. Click the Add RFI button in the upper right of the screen to add a new RFI
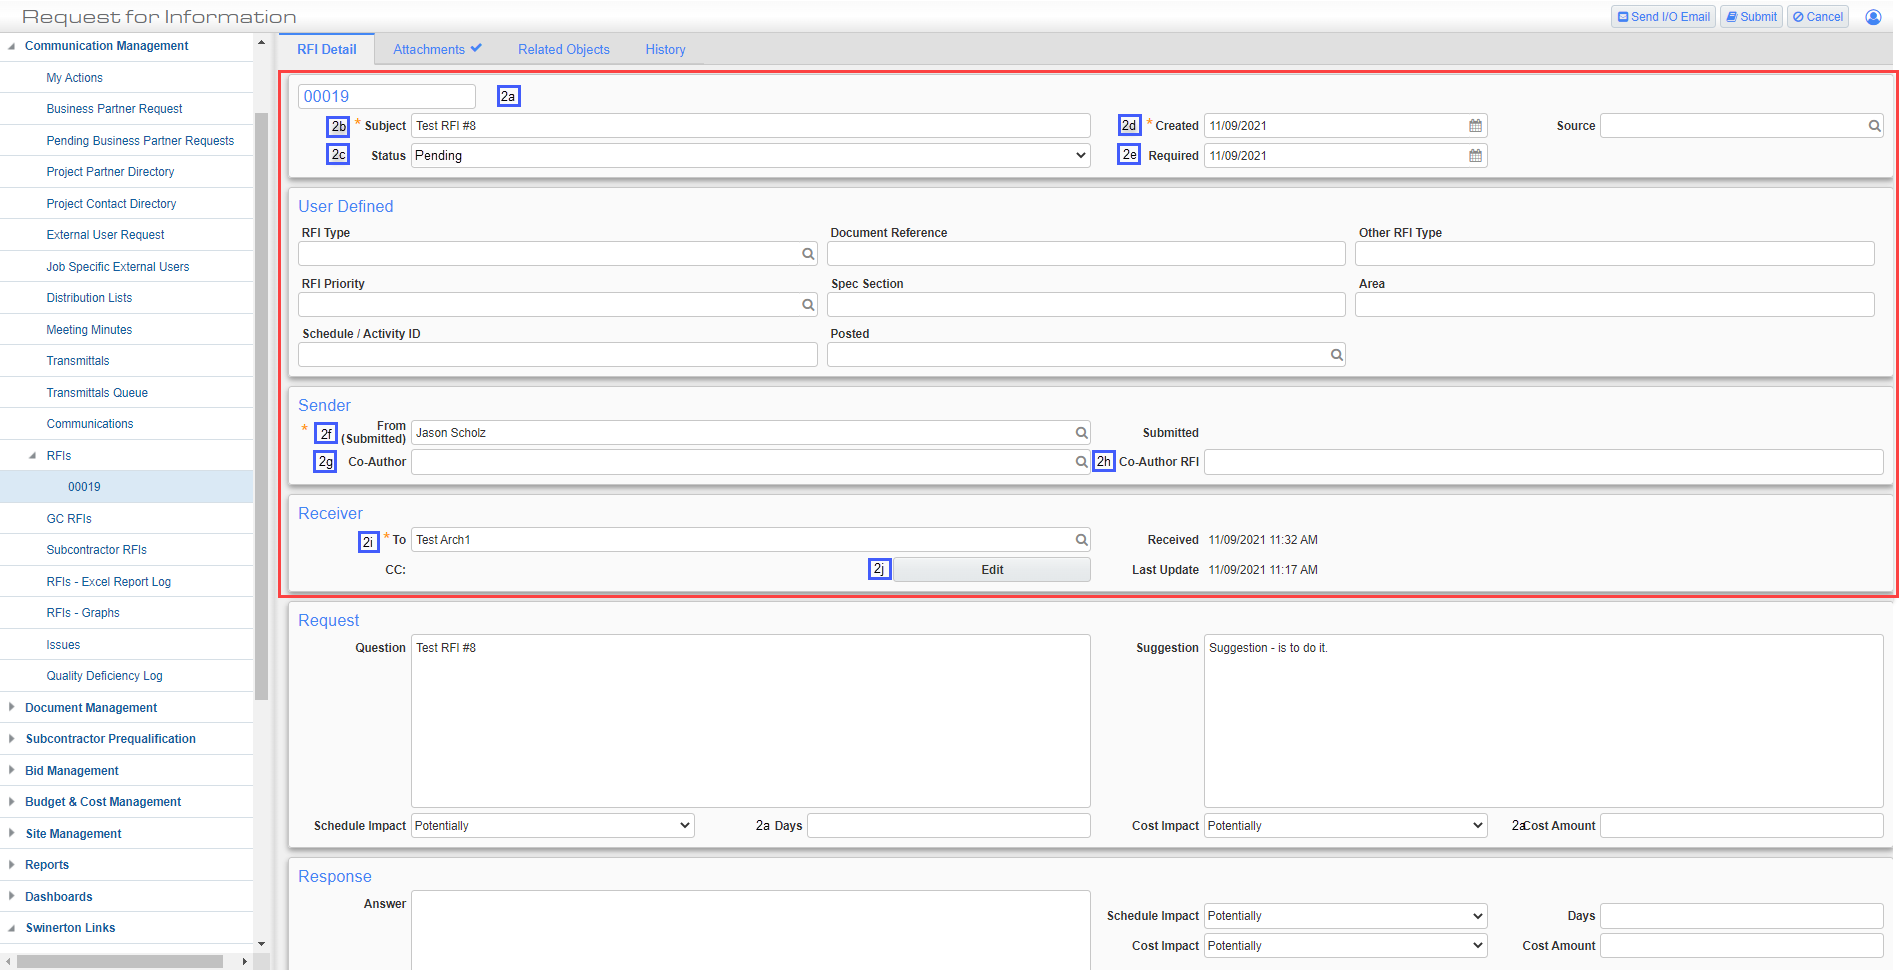
STEP 2: RFI Detail Tab
a. RFI No: The RFI No. is pulling next number on your Project
NOTE: This field CAN be modified at any time to accommodate any owner required custom numbering or numbering mistakes
For RFIs that need to be Revised and Resubmitted, go to THIS HOW-TO GUIDE
b. Subject: Enter the RFI short description in the Subject field.
c. Status: Accept default Status of Pending.
d. Created (date): Enter date of RFI, accept default current date.
e. Required (date): Enter date Answer is required by.
f. From (Submitted): The From (Submitted) field defaults in current user/self.
g. Co-Author: (optional) Co-Author can be another entity (subcontractor, tier-sub, etc.) that generated the RFI. If applicable, click on the Magnifying Glass in the Co-Author field to select the Co-Author from the Project Partner List of Values (LOV)
h. Co-Author RFI: (optional) If Co-Author is used and Co-Author has their own RFI No., enter it here.
i. To: The To field defaults in from the Project Maintenance Screen, if you need to modify, you can do so by clicking on the Magnifying Glass to display/select from the Project Partner List of Values (LOV)
j. Click the Edit button in the CC: field to add CC’s to your RFI.
NOTE: Be sure to setup your RFI Distribution List to quickly add all necessary contacts.

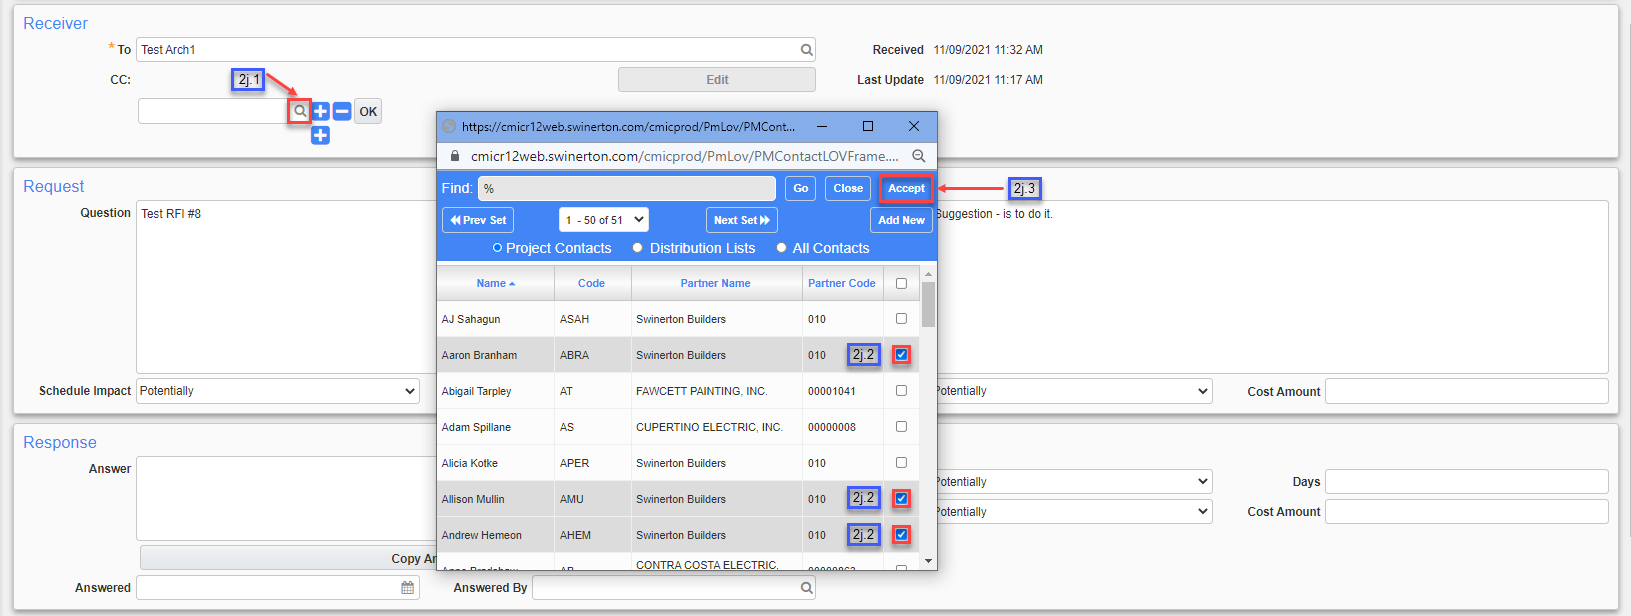
j.1 In the CC field, click the Magnifying Glass to display the List of Values (LOV) to select from. Click Distribution Lists if applicable. Go to this how-to guide to setup your RFI Distribution List.
j.2 Click the checkbox beside the person(s) name you would like to CC on this Communication.
j.3 Click the Accept button to save your CC selection.
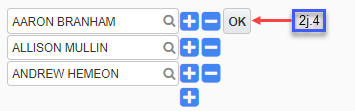
j.4 Click the OK button to save your CC selection.
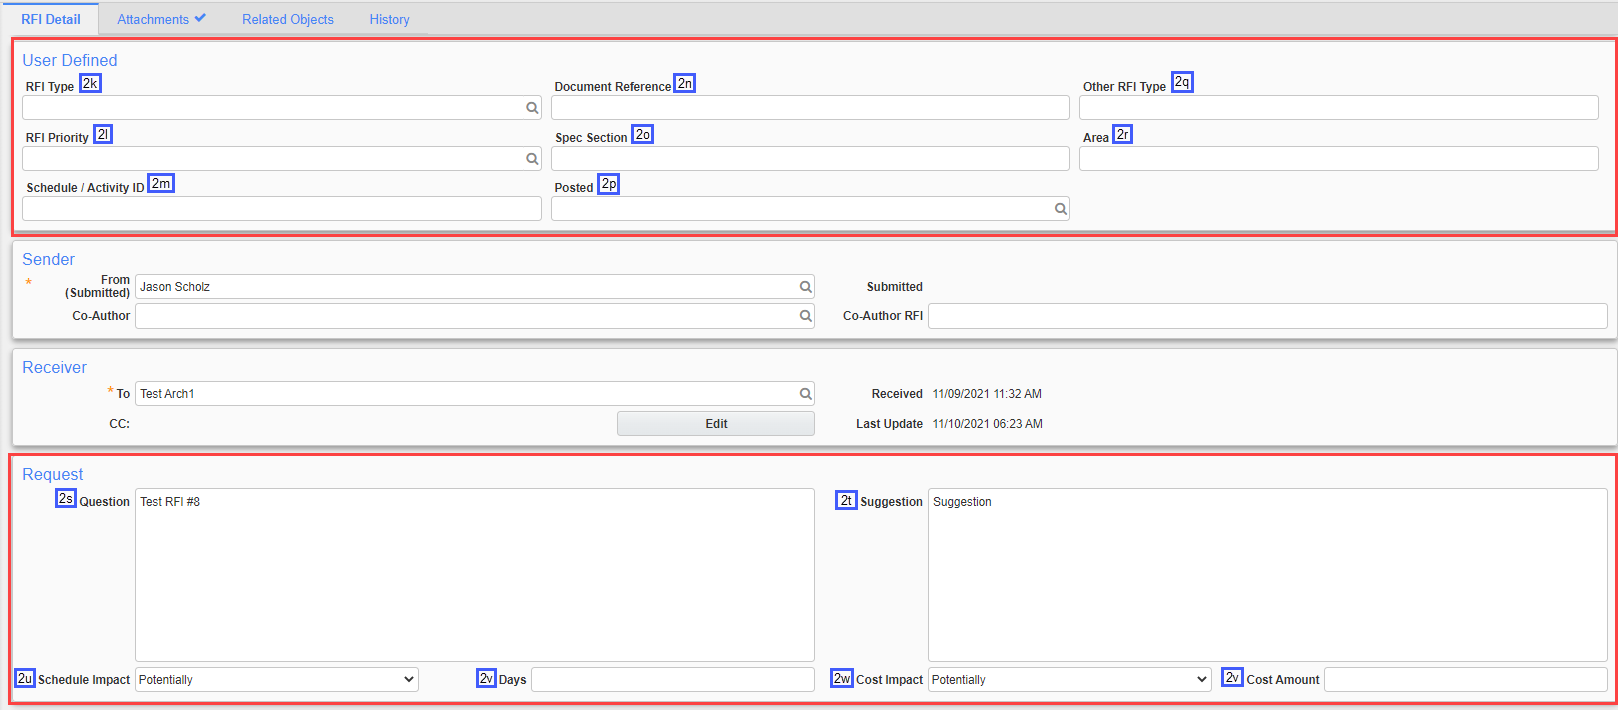
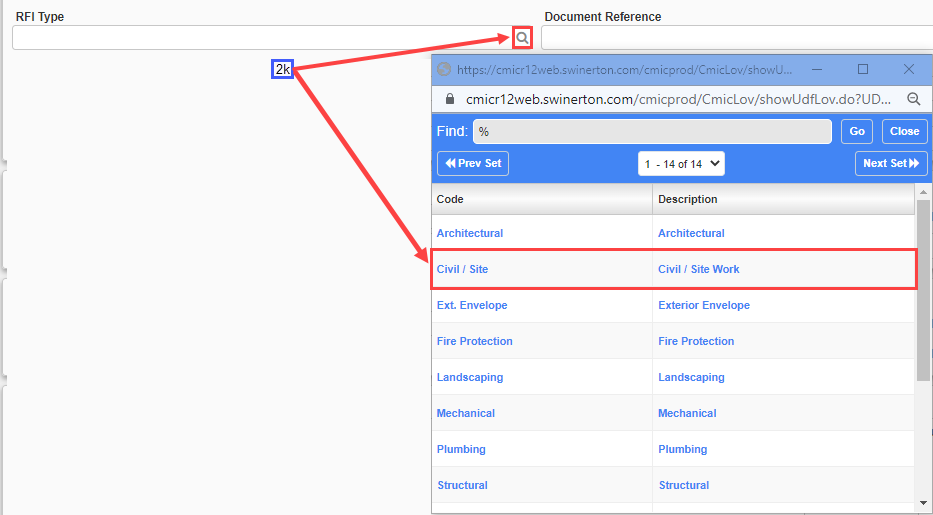
k. RFI Type: Click on the Magnifying Glass to display the RFI Type List of Values (LOV) Click on the Code or Description applicable to RFI Type.
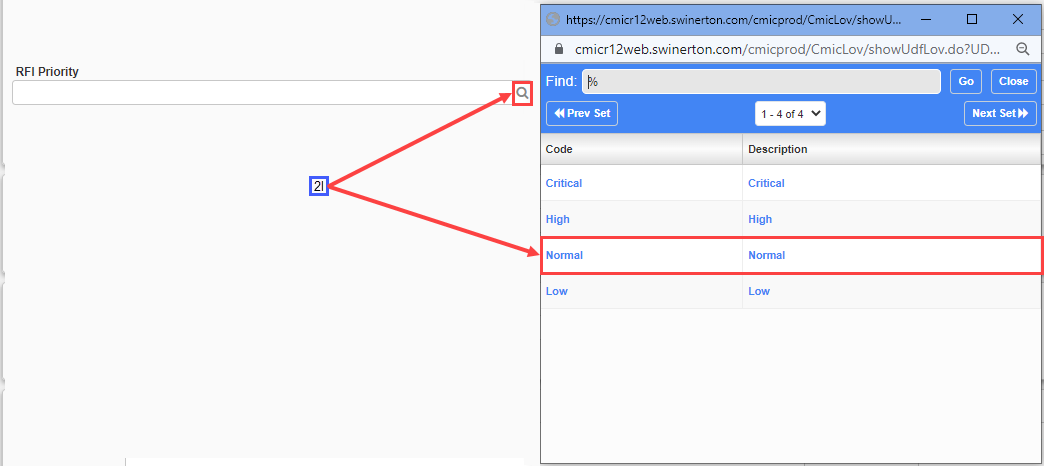
l. RFI Priority: Click on the Magnifying Glass to display the RFI Priority List of Values (LOV) Click on the Code or Description applicable to RFI Priority.
m. Schedule/Activity ID: Enter Schedule/Activity ID associated with this RFI scope of work.
n. Document Reference: Sheet Number, Prod. Data etc. can be referenced in Document Reference.
o. Spec Section: Enter Specification Section related to this RFI.
p. Posted: Posted is left blank until answer is received. Depending on answer, Was change posted to Drawings? Yes or No.
q. Other RFI Type: Enter Other RFI Type. (sub-set of RFI Type)
r. Area: Enter Area this RFI impacts. (i.e., room #, floor, direction)
s. Question: Enter the Detailed Question you are asking on this Request for Information.
t. Suggestion: If we would like a Suggestion considered for the answer. Enter it in the Suggestion Field.
u. Schedule Impact: Click the down arrow button for the Possible Time Impact as a result of this RFI. /Potentially, /Yes, /No
v. Days: If there is a potential time impact enter the estimated amount of time in the Days field.
w. Cost Impact: Click the down arrow button next to Possible Cost Impact as a result of this RFI. /Potentially, /Yes, /No
x. Cost Amount: If there is a potential cost impact enter the actual or estimated amount in the Cost Amount field.
STEP 3: Click the Save button in the upper right corner of the screen to save the RFI Details.

STEP 4: If Attachments should be added to this RFI.
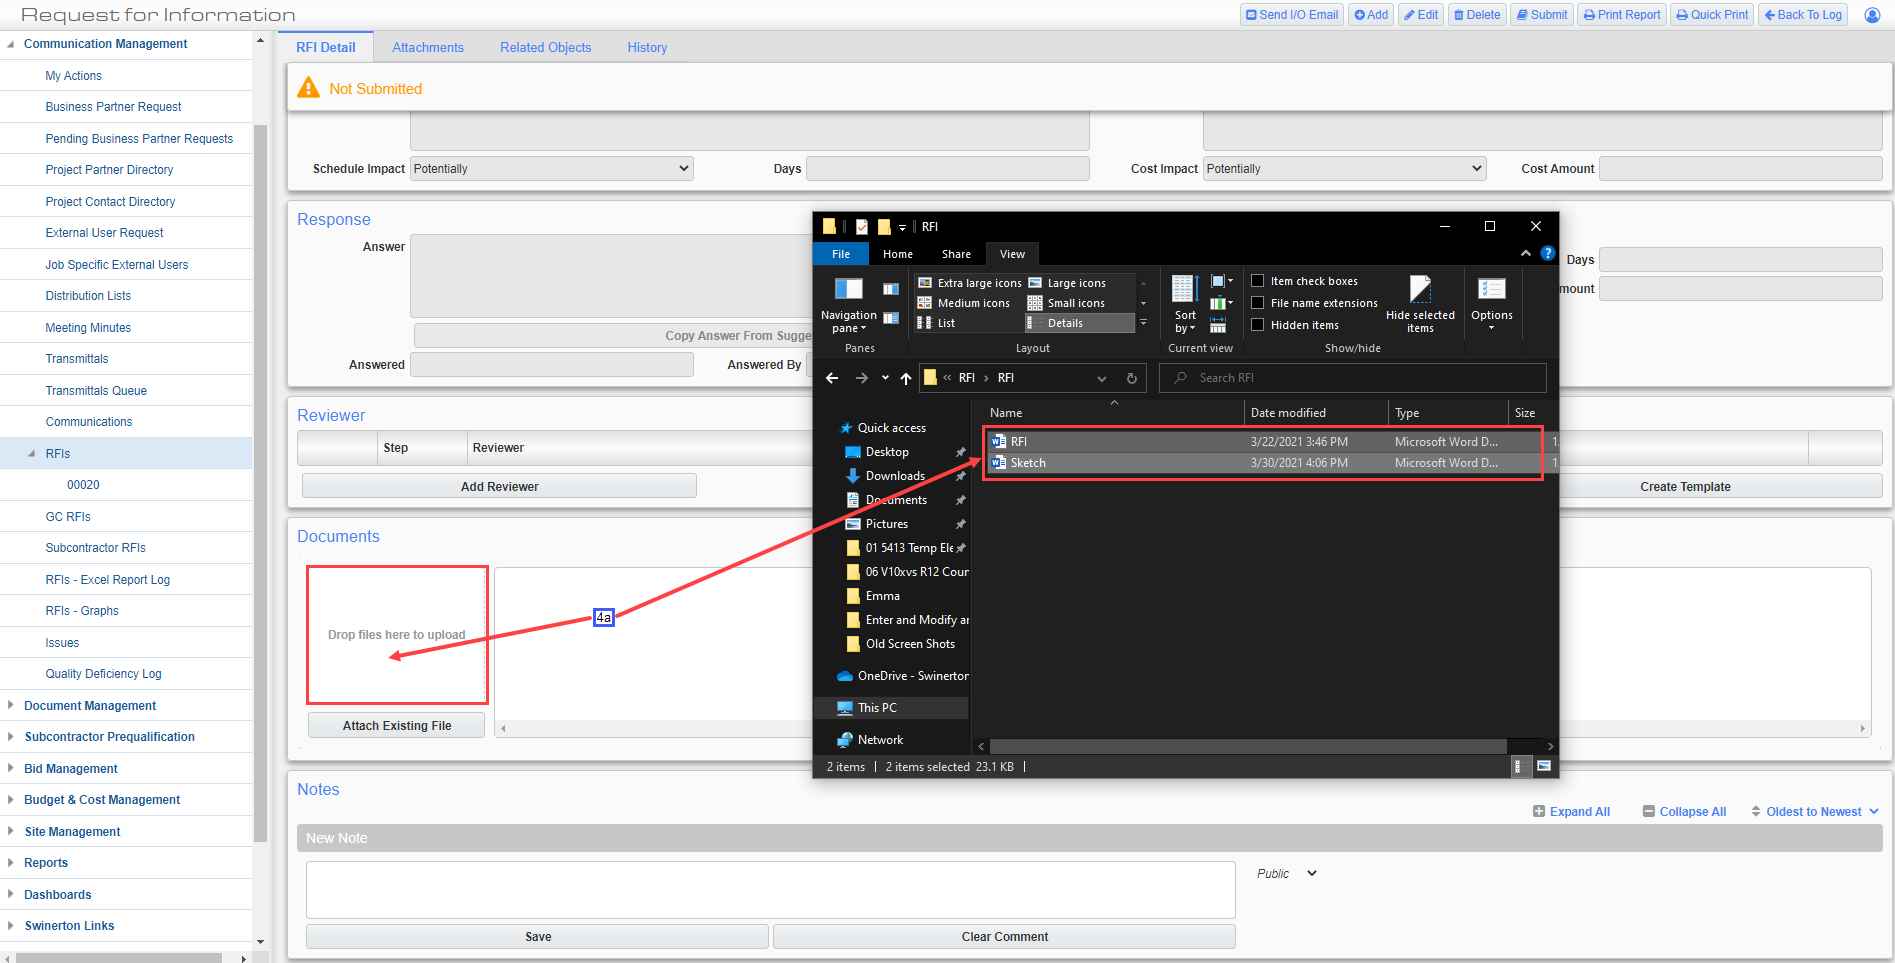
a. Use the drag and drop method
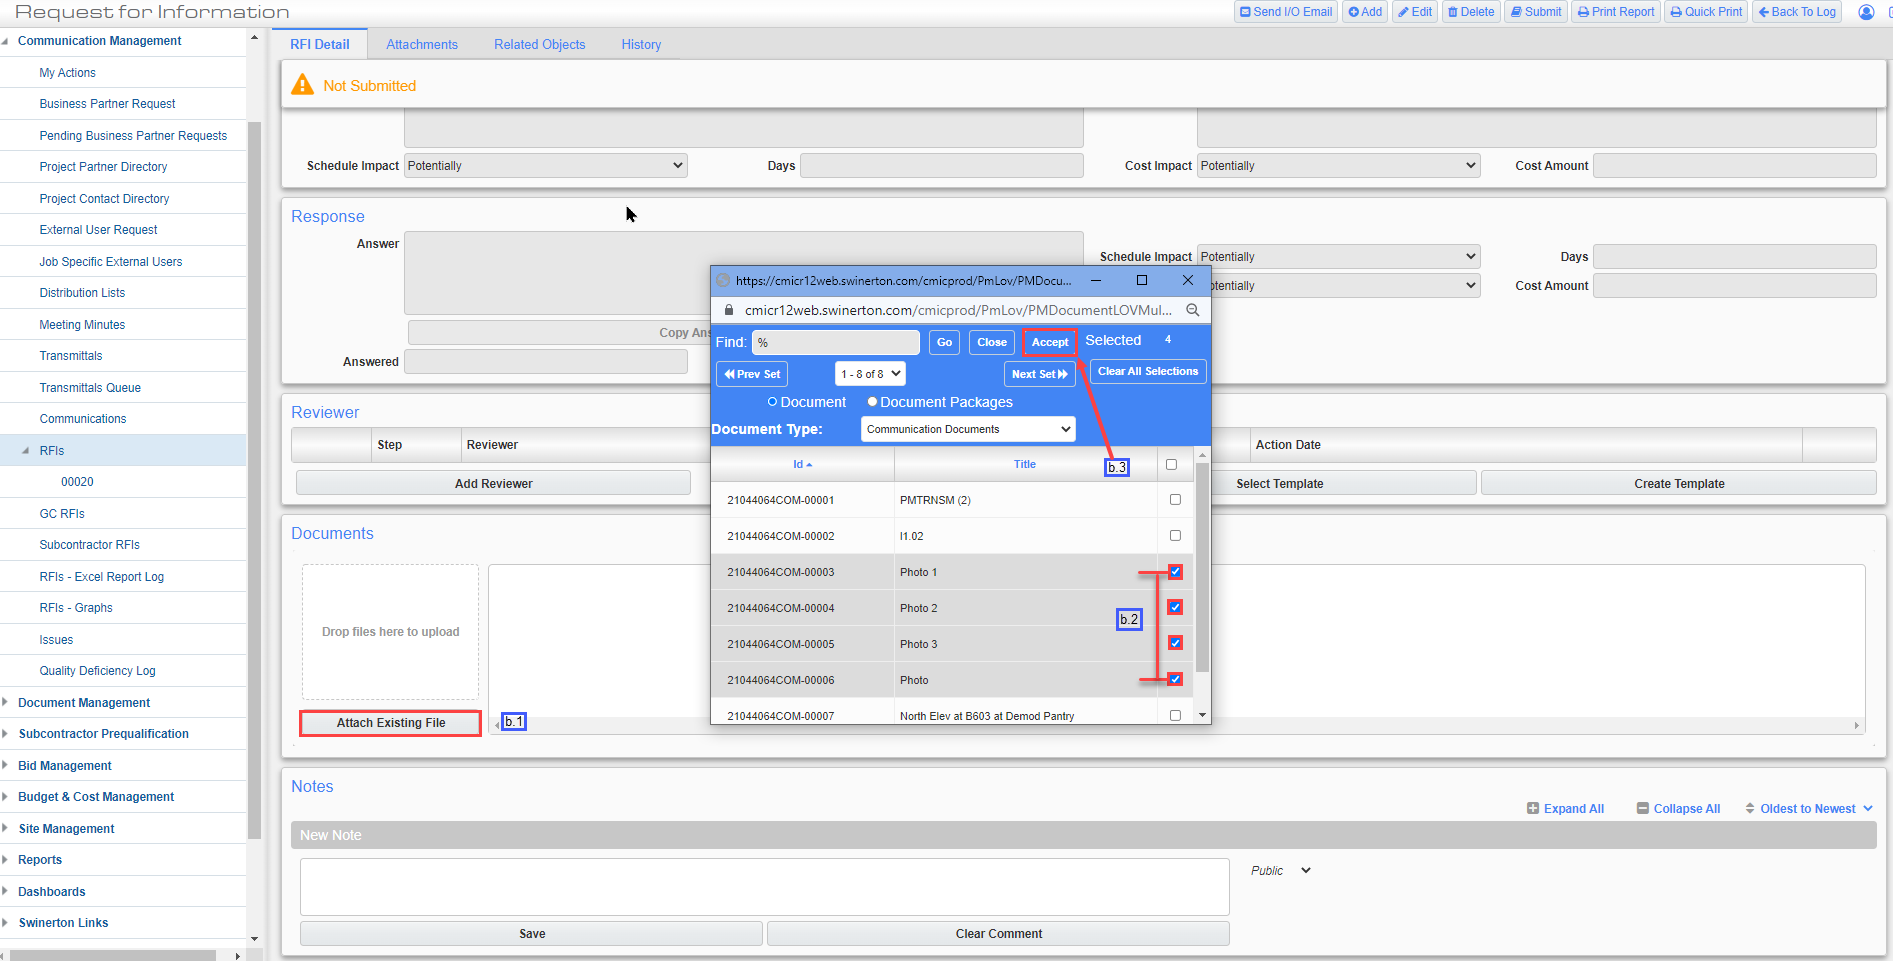
b. Attach Existing Files button, for files previously attached in CMIC
b.1 Click Attach Existing Files button
b.2 Check all the boxes that apply
b.3 Click Accept
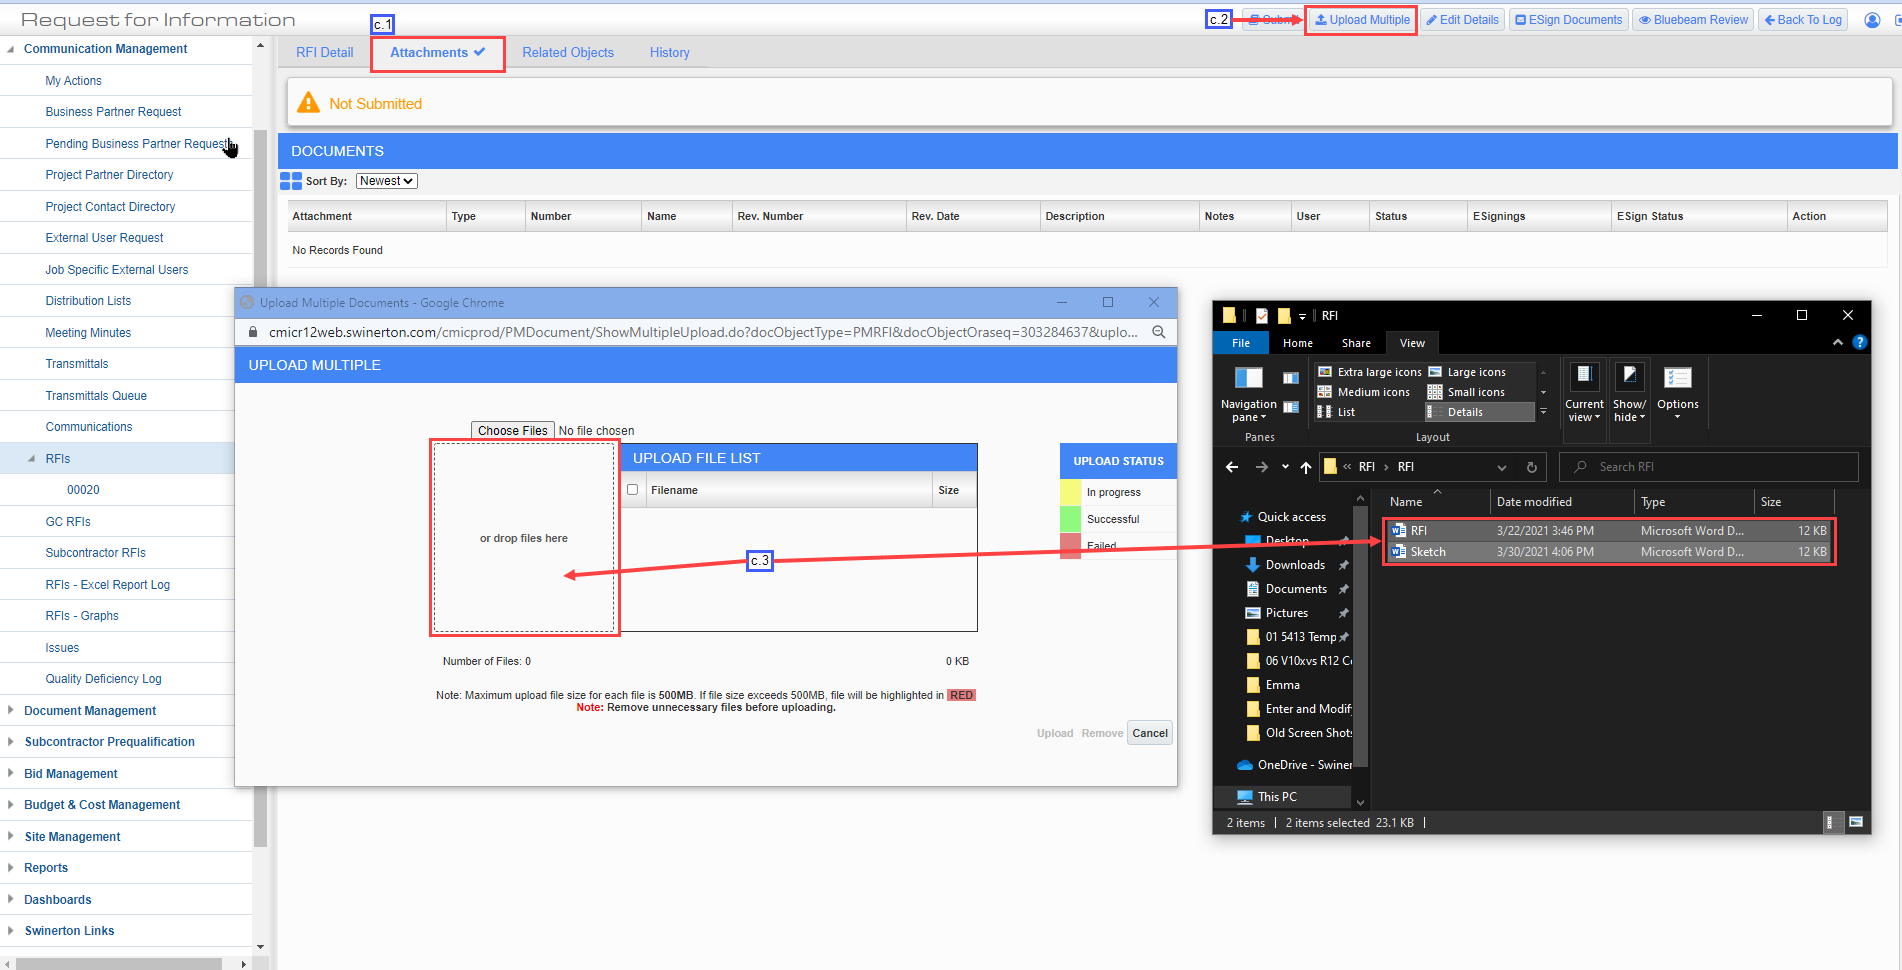
c. Using Upload Multiple in the Attachments Tab (The Bluebeam Review button does not work. Click HERE for more info.)
c.1 Click Attachments Tab
c.2 Click Upload Multiple Button
c.3 Drag and drop files
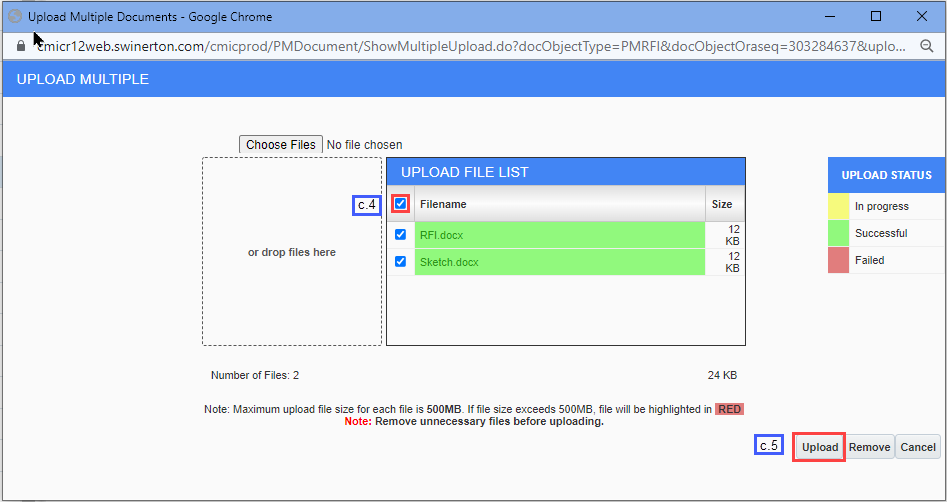
c.4 Click on the check box next to Filename
c.5 Click on Upload
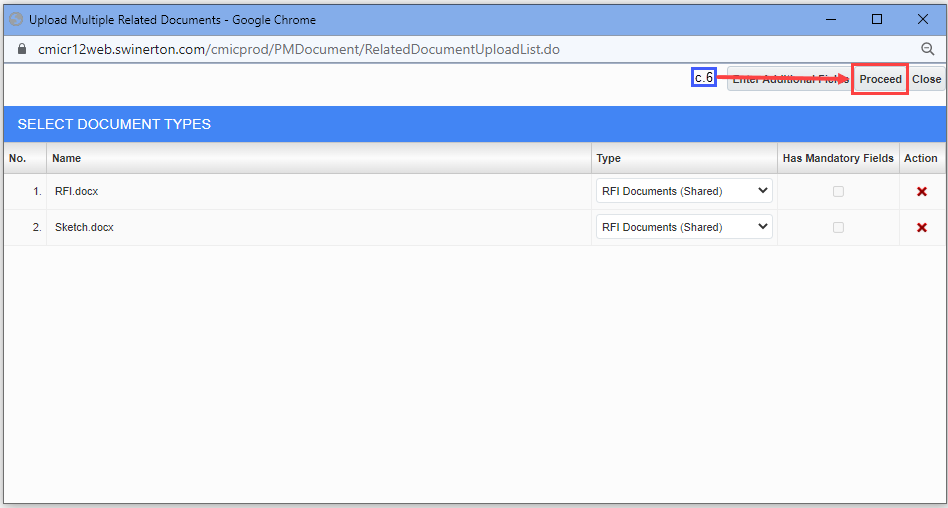
c.6 Click on Proceed
STEP 5: If Relating Objects (Internal CMiC Forms) are to be assigned this RFI.
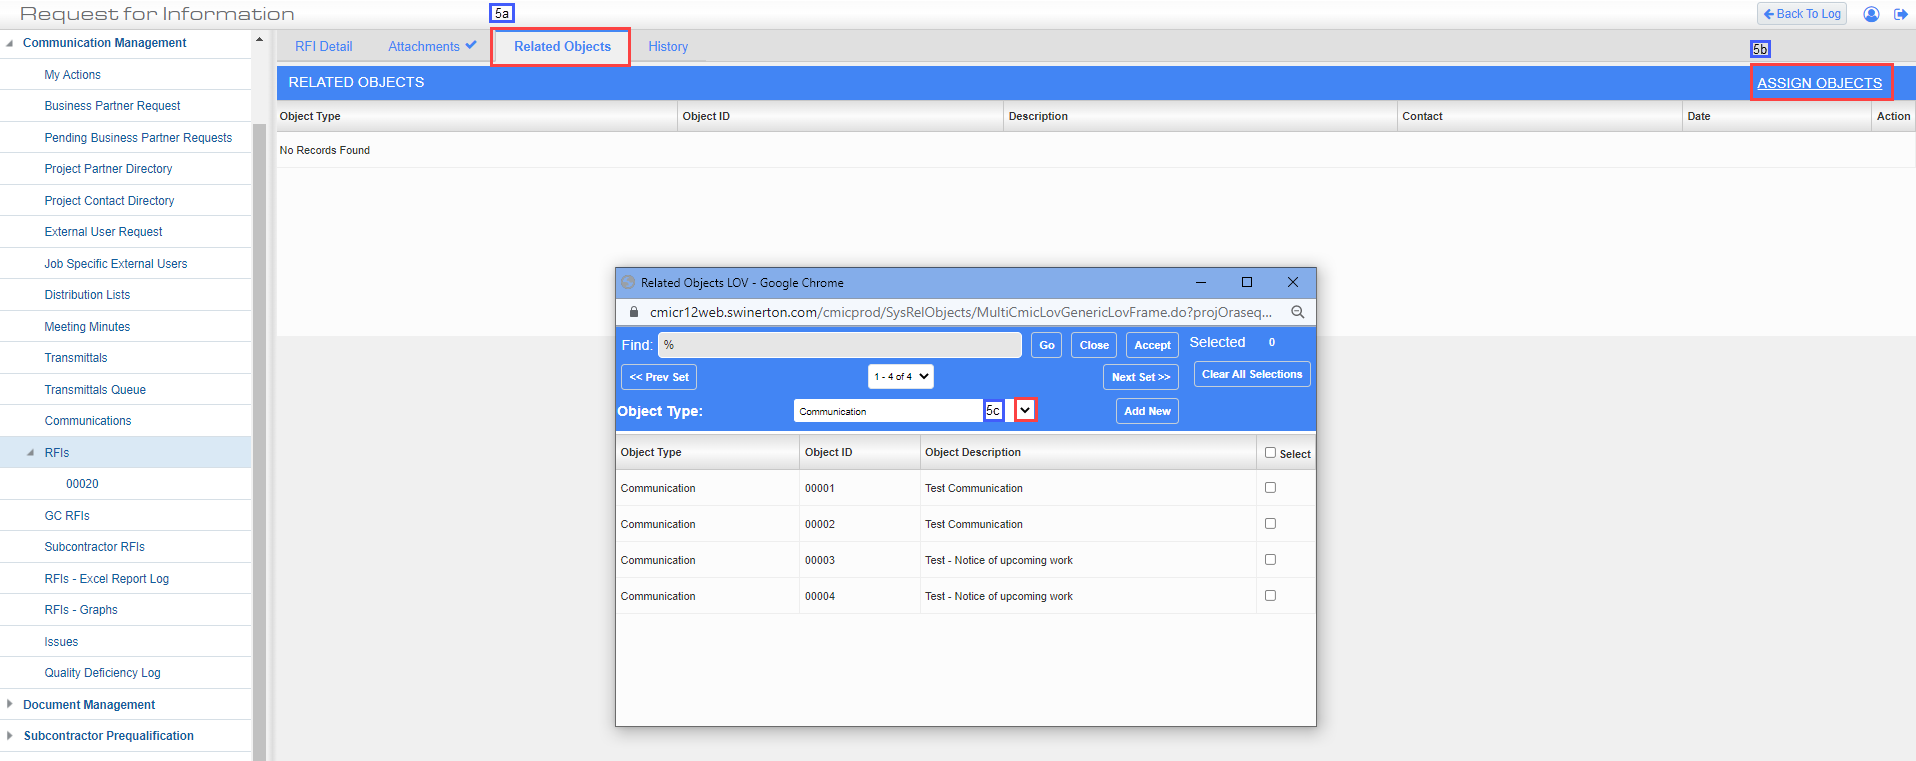
a. Click the Related Objects
b. Click Assign Objects
c. Click on Down Arrow, select the required process, check the appropriate check box(es) and click on Accept
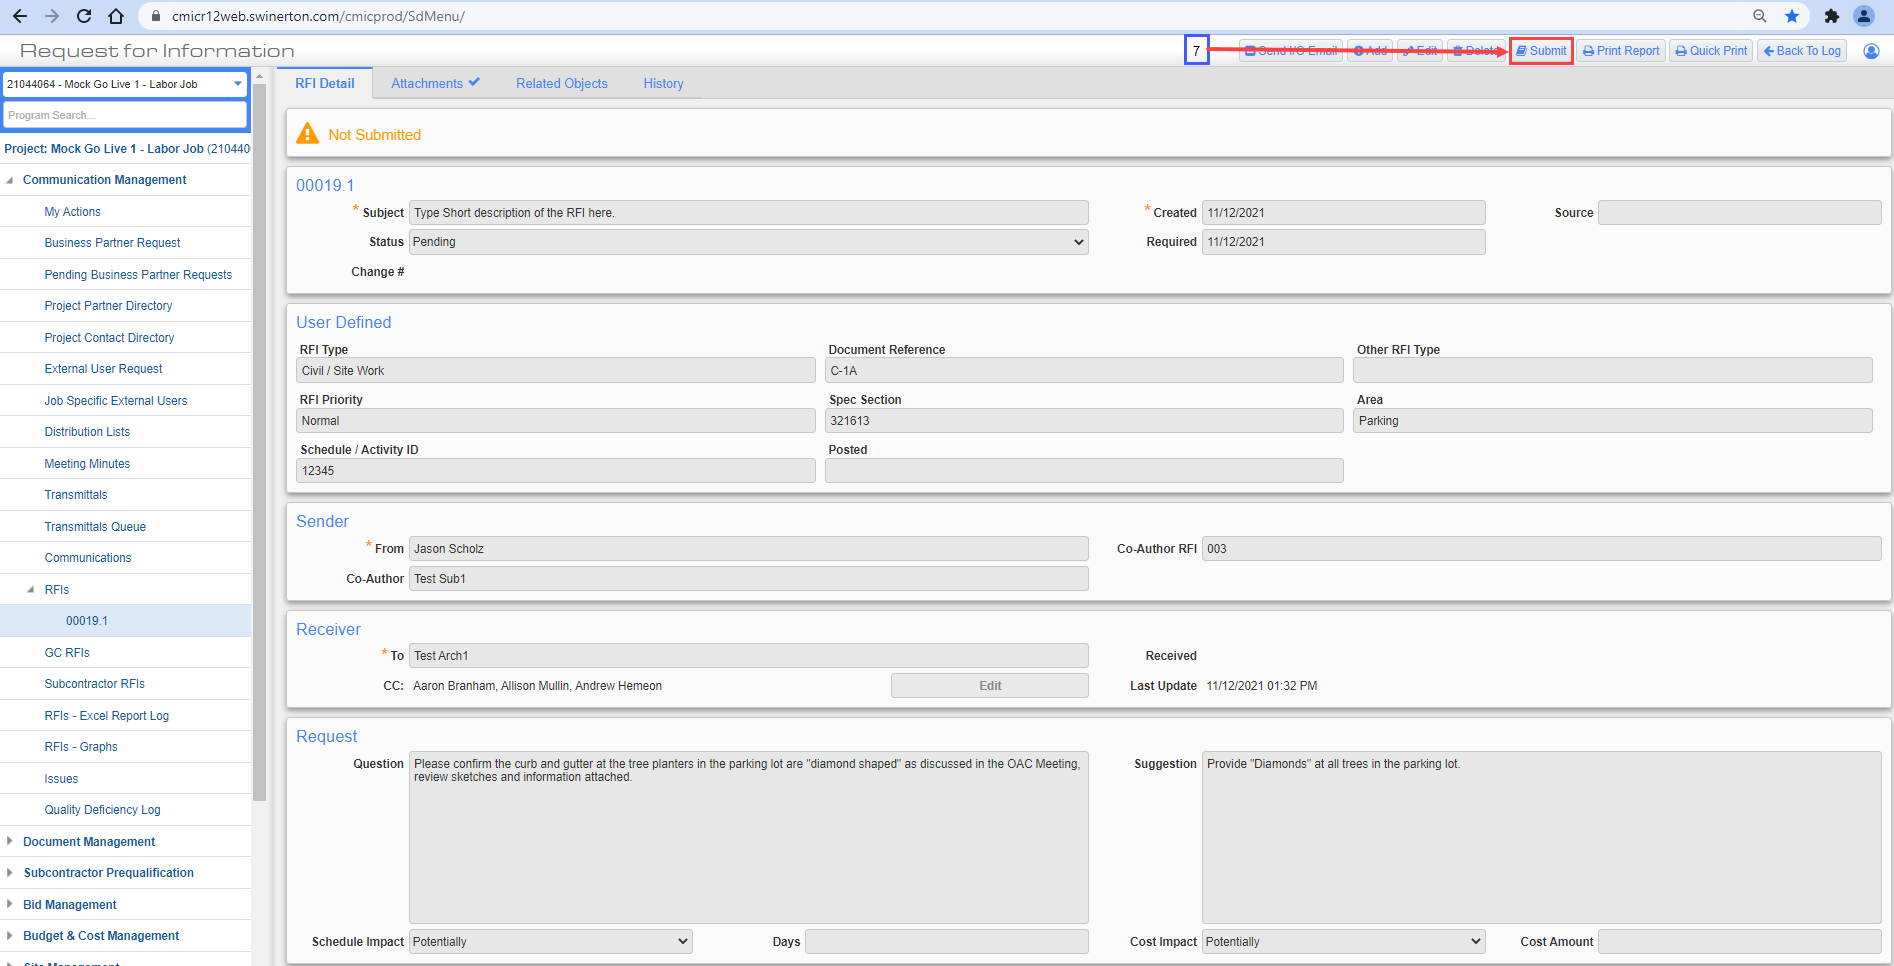
STEP 6: Click the RFI Detail tab.

STEP 7: Click the Submit button located in the upper right hand corner of the screen.
STEP 8: You may either:
a. Send using I/O Email. See RFI-Using I/O Email How To Instructions.
b. Or, Click on the Print Report button located in the upper right hand side of the screen
1. In the Print Report window accept default and click the Print button.
2. In the Report Config(uration) window accept default and click the Run Report button to process report.
3. MS Word displays the RFI form, click the Print button in word to print the RFI.