Job in Progress (JIP) Workflow for PM
Job in Progress (JIP) Workflow for PM
All new opportunities will be created in Cosential via a Cosential User liaison.
This liaison will create the opportunity and let you know the BidJob # to look up in the Job Start Log in order to complete the Job Start Form in Boomi.
You can follow the steps below or Watch this Video to review the Job Start Process and completing the form in Boomi.
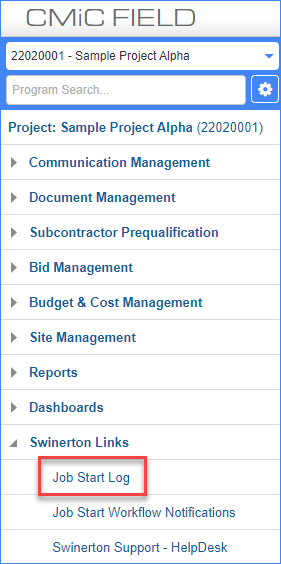
STEP 1: Click on the Job Start Log from the CMiC treeview (from any current project that defaults in)
Note: This will take you to a separate application called the Boomi Flow (Program) to complete the Job Start Form. The Boomi Form pulls all relevant data from the Cosential Opportunity Record (Shaded Fields)
STEP 2: Search for the BidJob # that you were given by your Cosential User liaison
Note: The BidJob# will have a “P” at the end for Pursuit.
STEP 3: Click on the eye to complete the Job Start Form

Note: If you hover over the "i" in the small blue circle, it will explain what what each field is looking for.

Note: Take notice of the Flow Line at the top of the screen. This will allow you to understand where you are in the process. Make sure you click Save before you move to the next station

General Contract Information Station
Note: The Controlling Job Field is a required field that automatically defaults to ALL. It should remain as ALL, UNLESS you are certain that your project will be a sub job to a controlling job (for example, SMC frequently assigns Controlling Jobs). Confirm before selecting a Controlling Job #.
Note: If the Project Role selected for your project is Sub to Self (Self-Perform), then completion of the GC Job# (Self-Perform Only) Field is required. You must select a GC Job #. See below (notice the fields appear in a slightly different order when Project Role is Sub to Self (Self-Perform). REMINDER: Do not enter the GC Job # into the Controlling Job Field UNLESS you are certain that the GC Job is also supposed to be controlling your project. SMC is typically the only entity that inputs anything other than the default ALL into this field. This is because they have Controlling Jobs that are used to track budget and costs of the controlled jobs.

Note: The Client Field is also a little different
STEP 1: Click the filter icon to the right of Client Field

STEP 2: Enter the Owner/Client Name
STEP 3: Click Filter (or press Enter on your keyboard)

STEP 4: Click the Arrow to insert the Client into the Job Start Form
NOTE: Ensure that you are selecting the correct client with this field. Confirm with your Cosential Liaison, as well as with your Prime Agreement. If there seem to be multiple options to select from in this field for a single client and you aren't certain which to choose, best practice would be to also double check with AP@swinerton.com to confirm you are selecting the correct entity (in case one BP code is not to be used).

STEP 5: Fill in the balance of the fields as necessary
Note: You will notice that on many of the fields if you answer Yes, that new fields will appear
STEP 6: Click Save
STEP 7: Click Project Team & Address Station
Project Team & Address Station
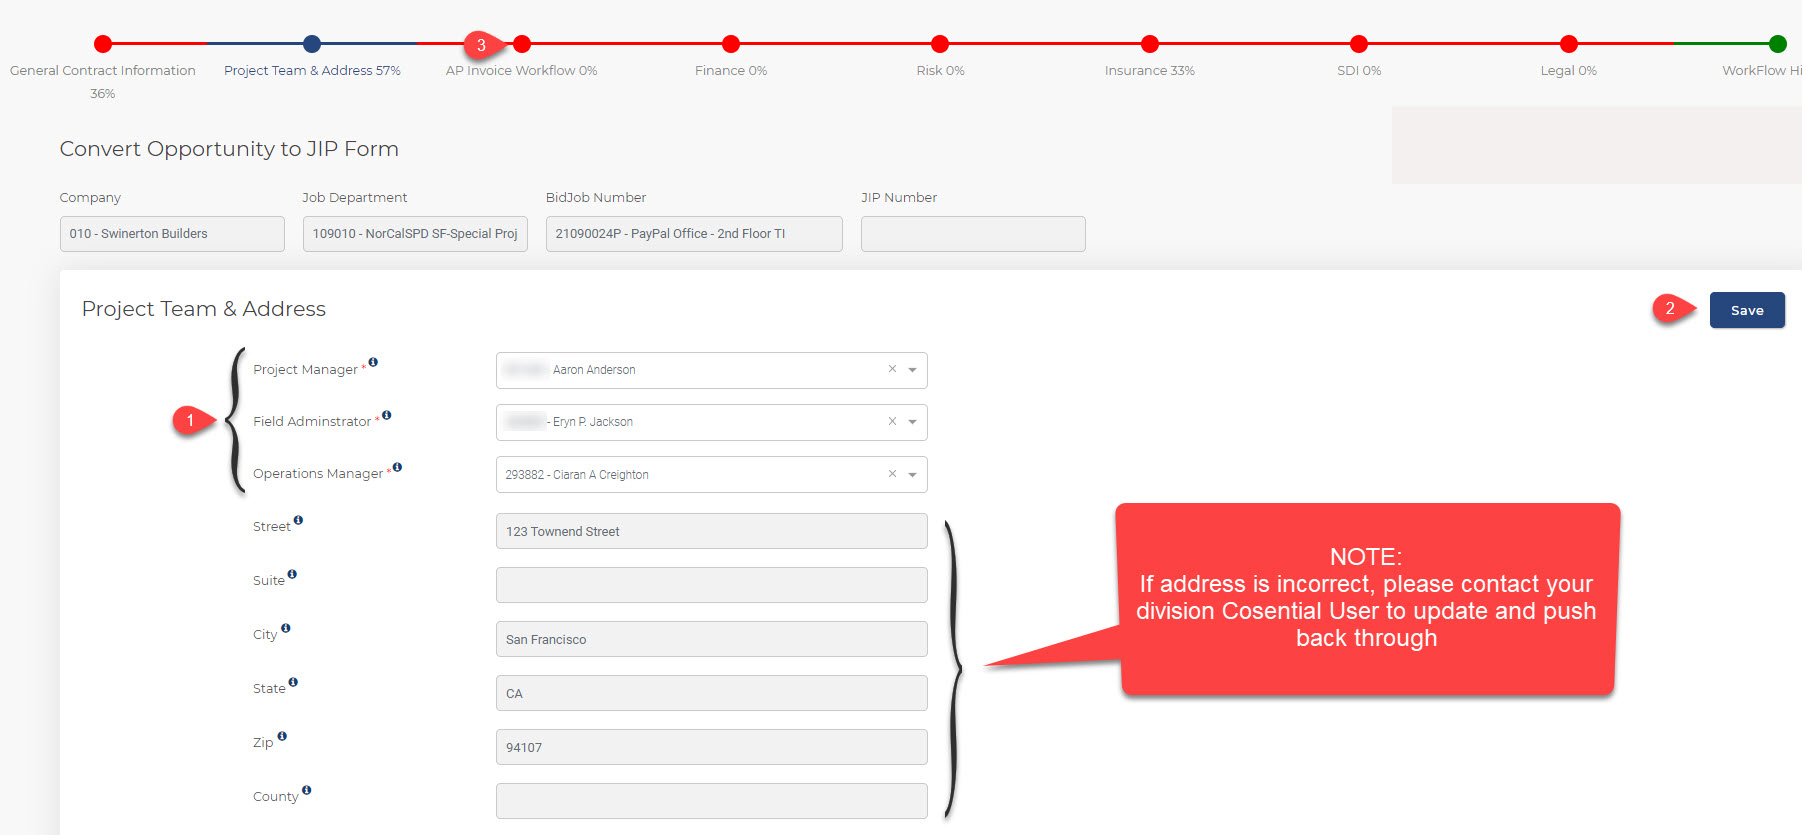
STEP 1: Choose the Project Manager / Field Admin / Operations Manager
NOTE: If the address is not correct, you will need to reach out to your Cosential Liaison to update and push through again since this information comes from Cosential.
STEP 2: Click Save
STEP 3: Click AP Invoice Workflow Station
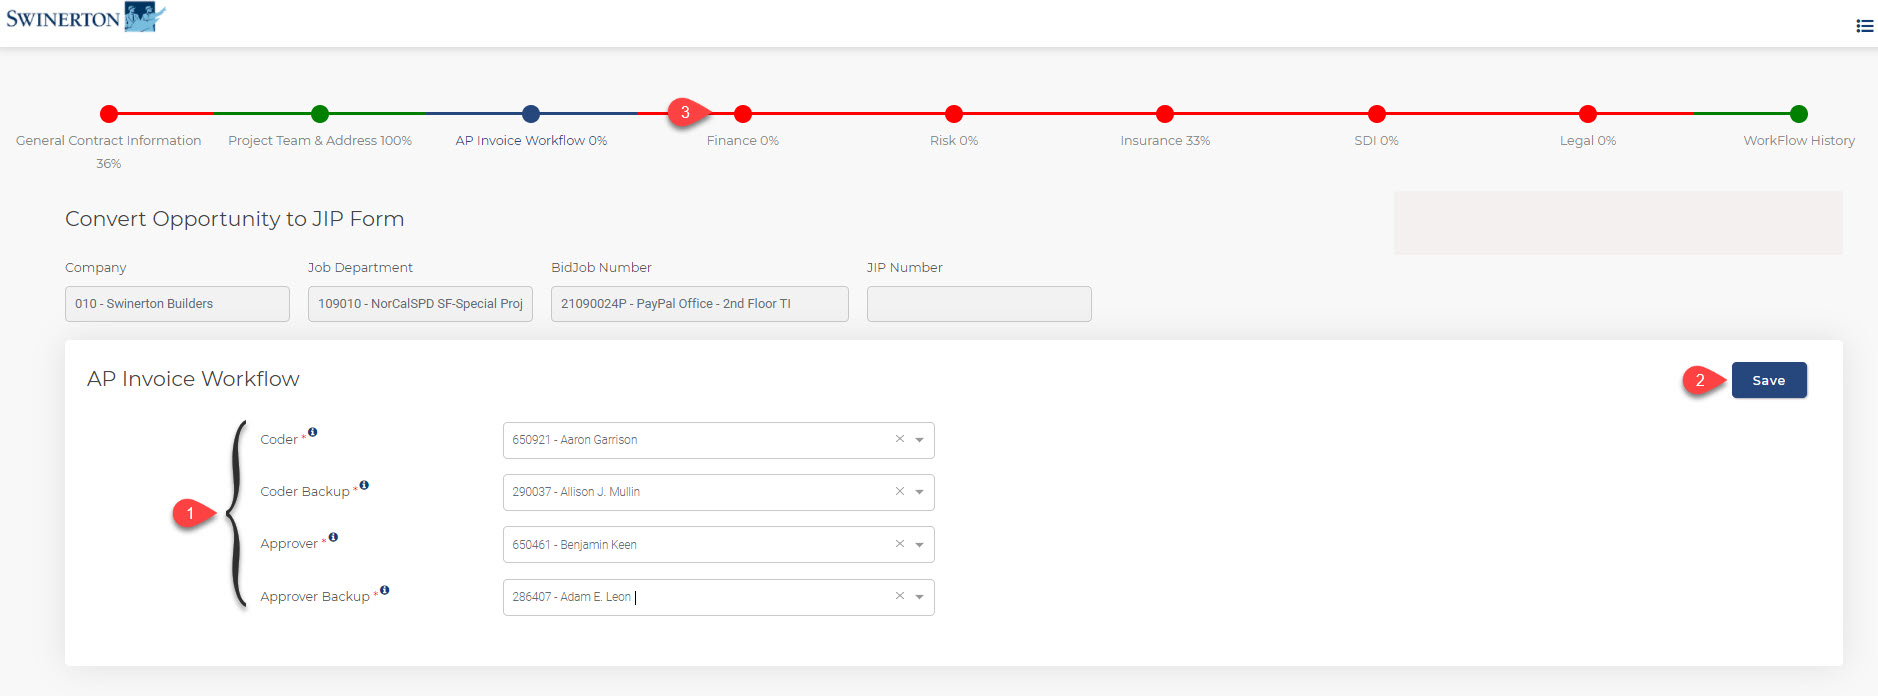
AP Invoice Workflow Station
STEP 1: Choose the Project Invoice Coder / Coder Backup / Approver / Approver Backup
STEP 2: Click Save
STEP 3: Click Finance Station
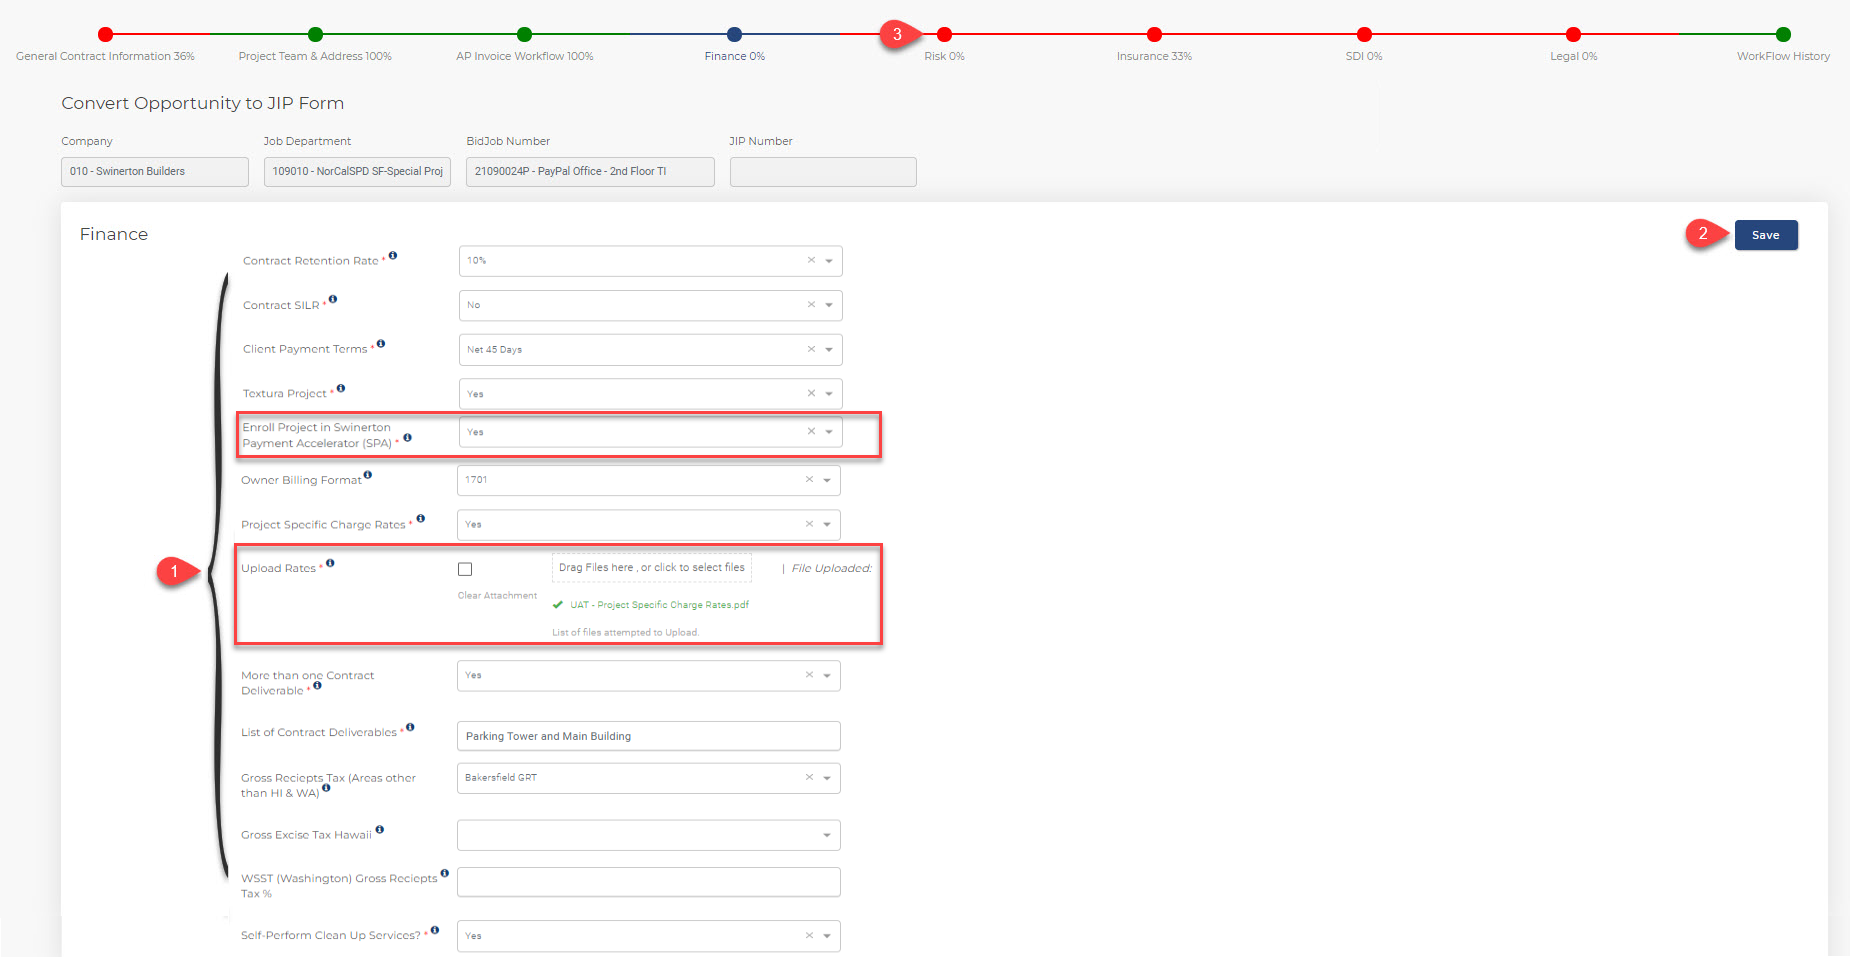
Finance Station
STEP 1: Fill in the Fields with correct information
Note: If you select "Other" for Client Payment Terms, another mandatory field will appear allowing you to include an explanation. Please make sure your entries into these fields are accurate.
Note: If you select "Yes" for Textura Project, another required field will appear asking if you want to Enroll Project in Swinerton Payment Accelerator.
Note: If you mark "Yes" for Project Specific Charge Rates, the section will expand requiring that you to upload your specific rates.
Note: Boomi only accepts attachments in PDF format. Images (e.g., .jpg, .png) are not an acceptable format.
STEP 2: Click Save
STEP 3: Click Risk Station
Risk Station
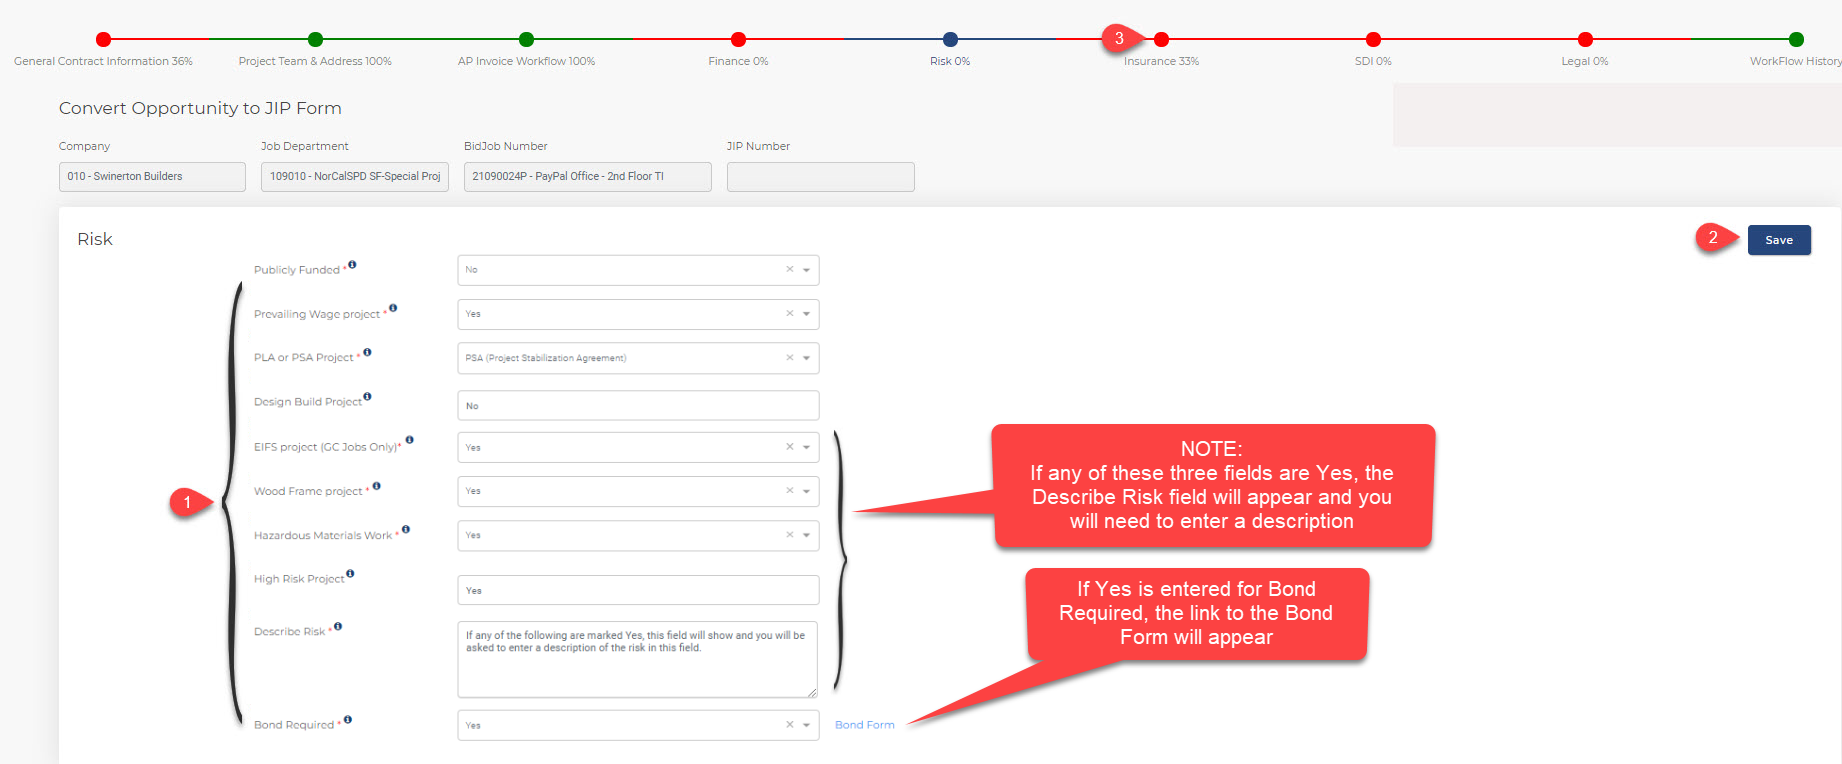
STEP 1: Fill in the Fields with correct information
Note: If you mark "Yes" for any of the following: EIFS Exterior project (GC Jobs ONLY) / Wood Frame project / Hazardous Materials Work, or the Delivery Method from Cosential is Design-Build, Progressive Design-Build or Integrated Project Delivery then field named "High Risk Project" will change to Yes and the Describe Risk field will appear and you will need to enter a description of the risk
Note: If you mark "Yes" for Bond Required, notice the link to the Bond Form will appear. Click HERE for the P&P Bond Request How To's
STEP 2: Click Save
STEP 3: Click Insurance Station
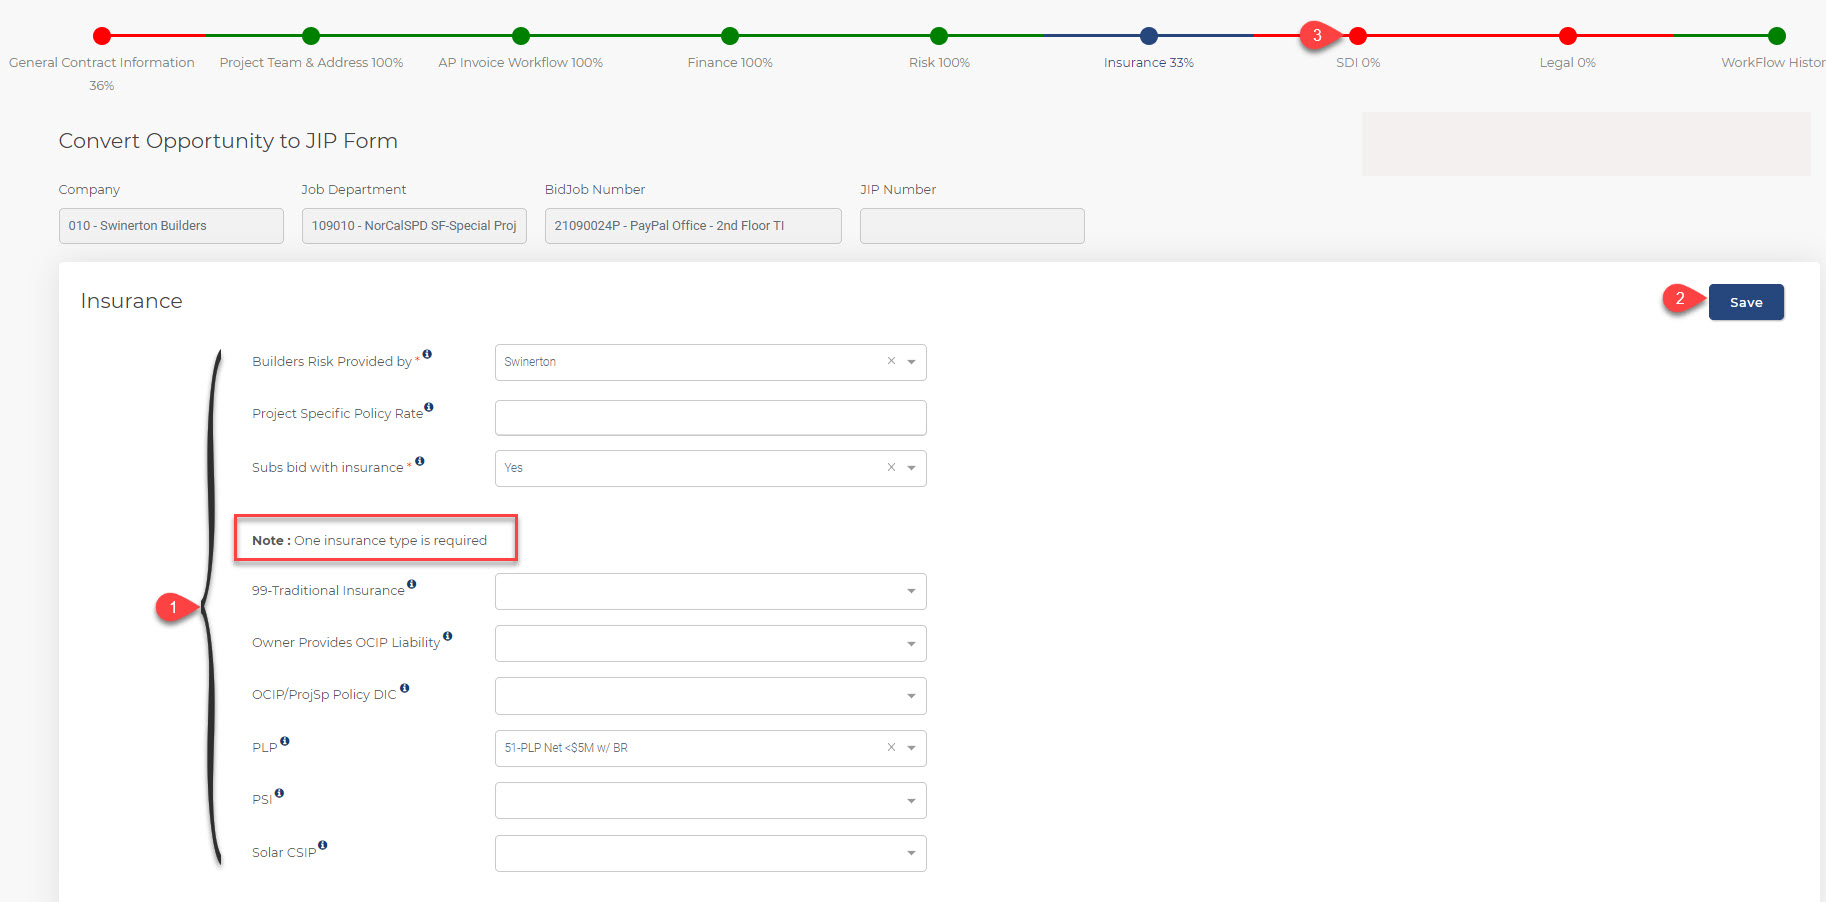
Insurance Station
Click HERE for detailed Information on this station
STEP 1: Fill in the Fields with correct information
STEP 2: Click Save
STEP 3: Click SDI Station
SDI Station
Click HERE for detailed Information on this station.
STEP 1: Fill in the Fields with correct information
Note: If you are needing to request a Waiver for SDI and field is Yes, please choose a reason. If "Other" is the reason chosen from the dropdown, then another free form field will appear for more information.
Note: Click HERE for more information on the SDI Workflow
STEP 2: Click Save
STEP 3: Click Legal Station

Legal Station
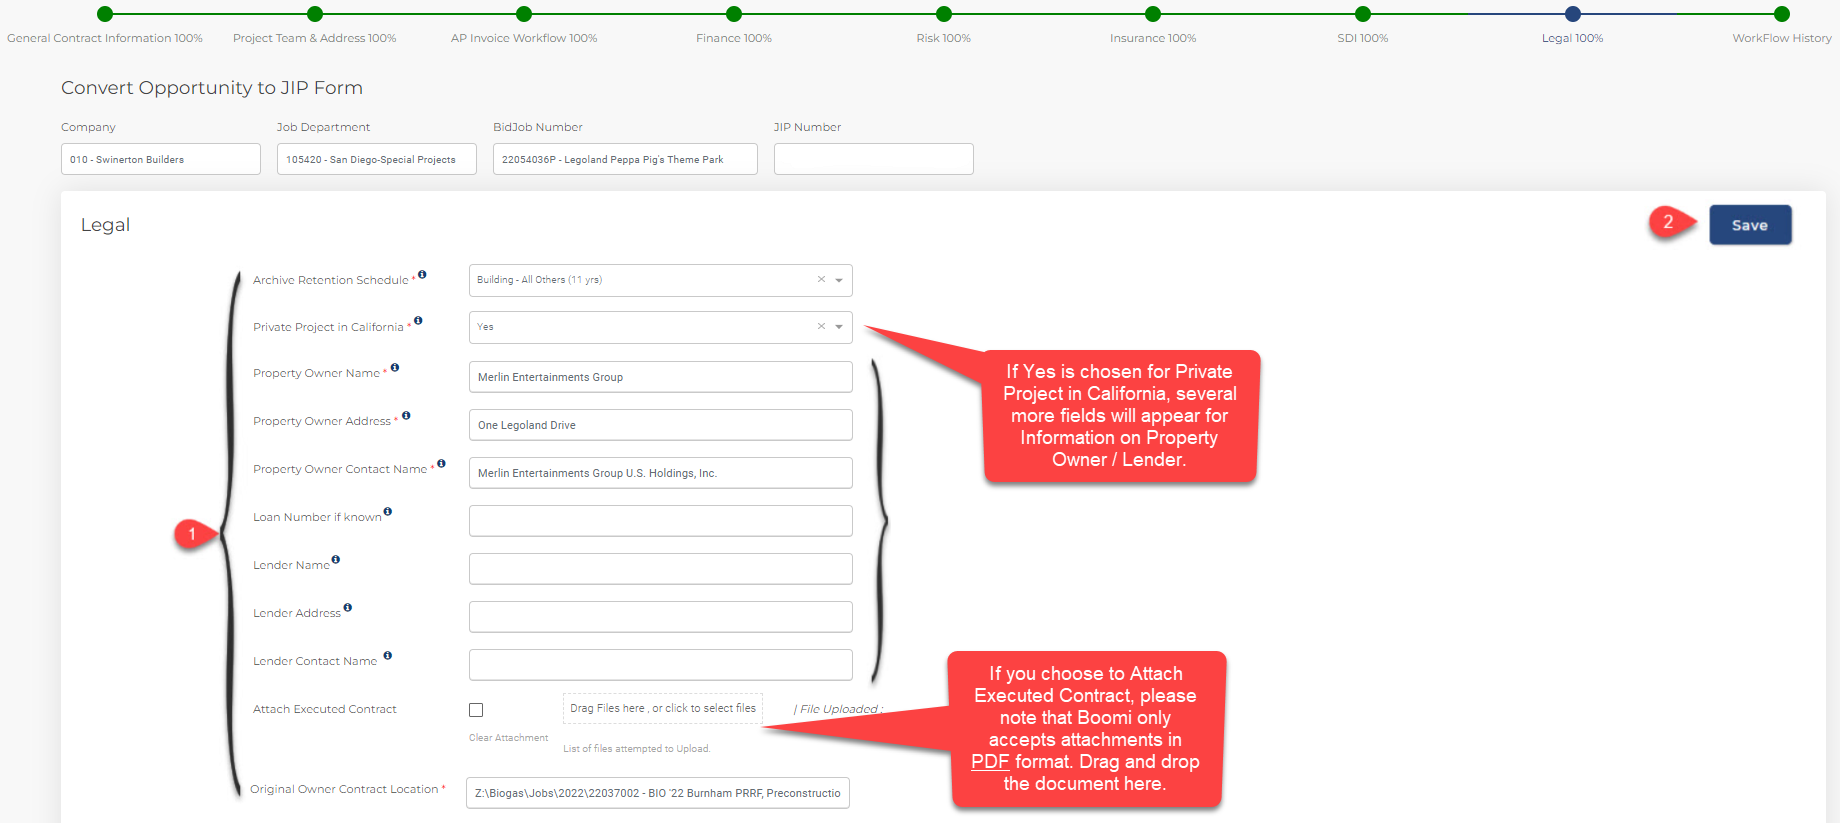
STEP 1: Fill in the Fields with correct information.
Note: If Yes is chosen for Private Project in California, several more fields will appear for Information on Property Owner / Lender.
Note: If you choose to Attach Executed Contract, please note that Boomi only accepts attachments in PDF format. Images (e.g., .jpg, .png) are not an acceptable format.
STEP 2: Click Save
STEP 3: Reach out to your Unanet User and inform them that the JIP Form is complete.
NEXT STEPS: