Autodesk Field Management - Checklists - How to Add or Remove Signatures from Overall Checklist
STEP 1: Open Autodesk BIM 360 website and sign in
STEP 2: Select the module selector and click Field Management

STEP 3: Select Checklists in the upper left
STEP 4: Select Templates
STEP 5: Find the checklist you need to add or remove the required signature to and select the three dots to the far right.
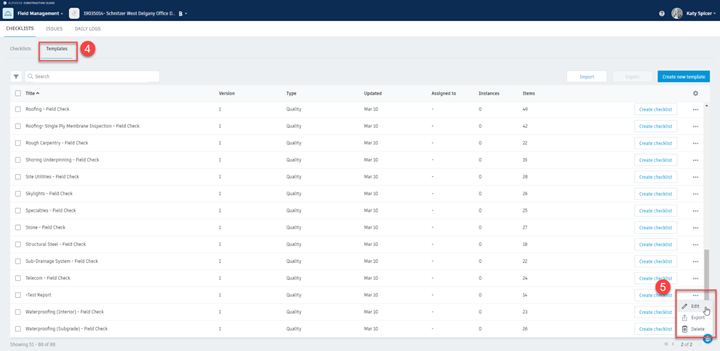
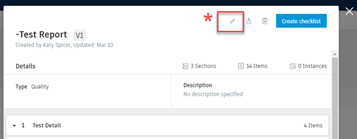
*You can also select the checklist then click the pencil in the upper right to edit the checklist
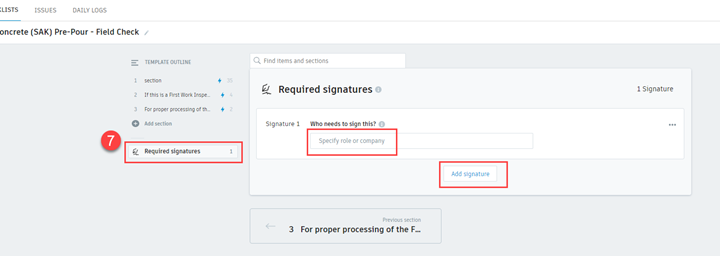
STEP 6: On the right hand side, you can add or remove required signatures, you can toggle the switch on or off and add additional signatures.

STEP 7: Select Required signatures on the left and fill out who needs to sign the checklist. You can add additional checklists by choosing Add Signature
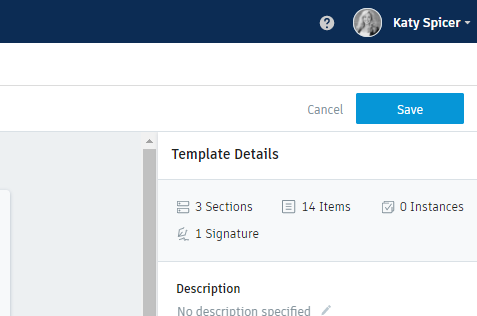
STEP 8: Once you make your adjustments for each signature required, select Save in the upper right.
Checklists that require signatures:
Quality
- First Work Inspections - _FWI –
- Inspection Request Record
- Material Verification Inspection - _MV –
- Mock-Up (Scope(s) being inspected)
- Test Report
- Concrete (SAK) Pre-Pour Field Check
- Concrete Pre-Pour Field Check
- In Wall [General] Field Check
Safety
- Restrooms Checklist
- Safety Contacts and Observations
- Safety Meeting & Training Roster
- Orientation Checklist
- Sub Minimum Performance Standard Checklist
- Weekly Safety Documentation