How To: Generate Documents Using Standard Templates in Publisher
General Notes
- In the Publisher module, all standard templates are housed in the Template Administration (upper left hand corner) section.
- The content you select must be in the project or personnel record to populate your template. If the content is not filled out in the personnel or project record, your document will show the variable (e.g., %PublishProjectName%) that represents that missing data field in the record.
- If any changes have been made to the data in the personnel/project record, you will need to regenerate the document to reflect your changes.
- All of your created documents are saved in Unanet. Once the document is saved, you can re-generate it directly in Publisher and have the option to apply a different template to it. Unanet will populate the document with the most recent data.
Naming Convention
- Project Sheets: Project Name_Primary Market_Product Type (Example: RosemeadHighSchool_Education_K12_Gym)
- Resumes: Division_First and Last Name_Title_Market, if applicable (Example: Atlanta_Bob Brown_PM)
- Project List: Primary Market_Product Type_Parameters (5Years_over50M, etc.)
- Publisher will show the date of your document and who generated it.
Additional Notes and Instructions to Consider
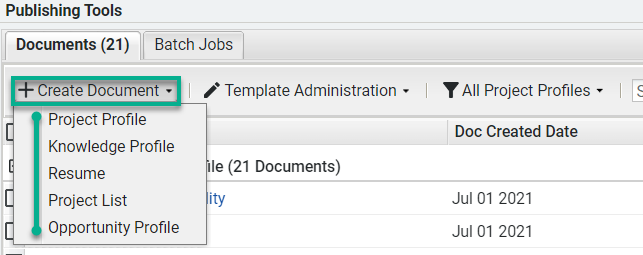
Step 1: In Unanet, go to Publisher 4.0 > Create Document and select the document (Project Profile, Resume, etc) that you’d like to create.

Step 2: Name your document (see recommendations above), search for and select your project, and click save. Do not use commas and/or periods.

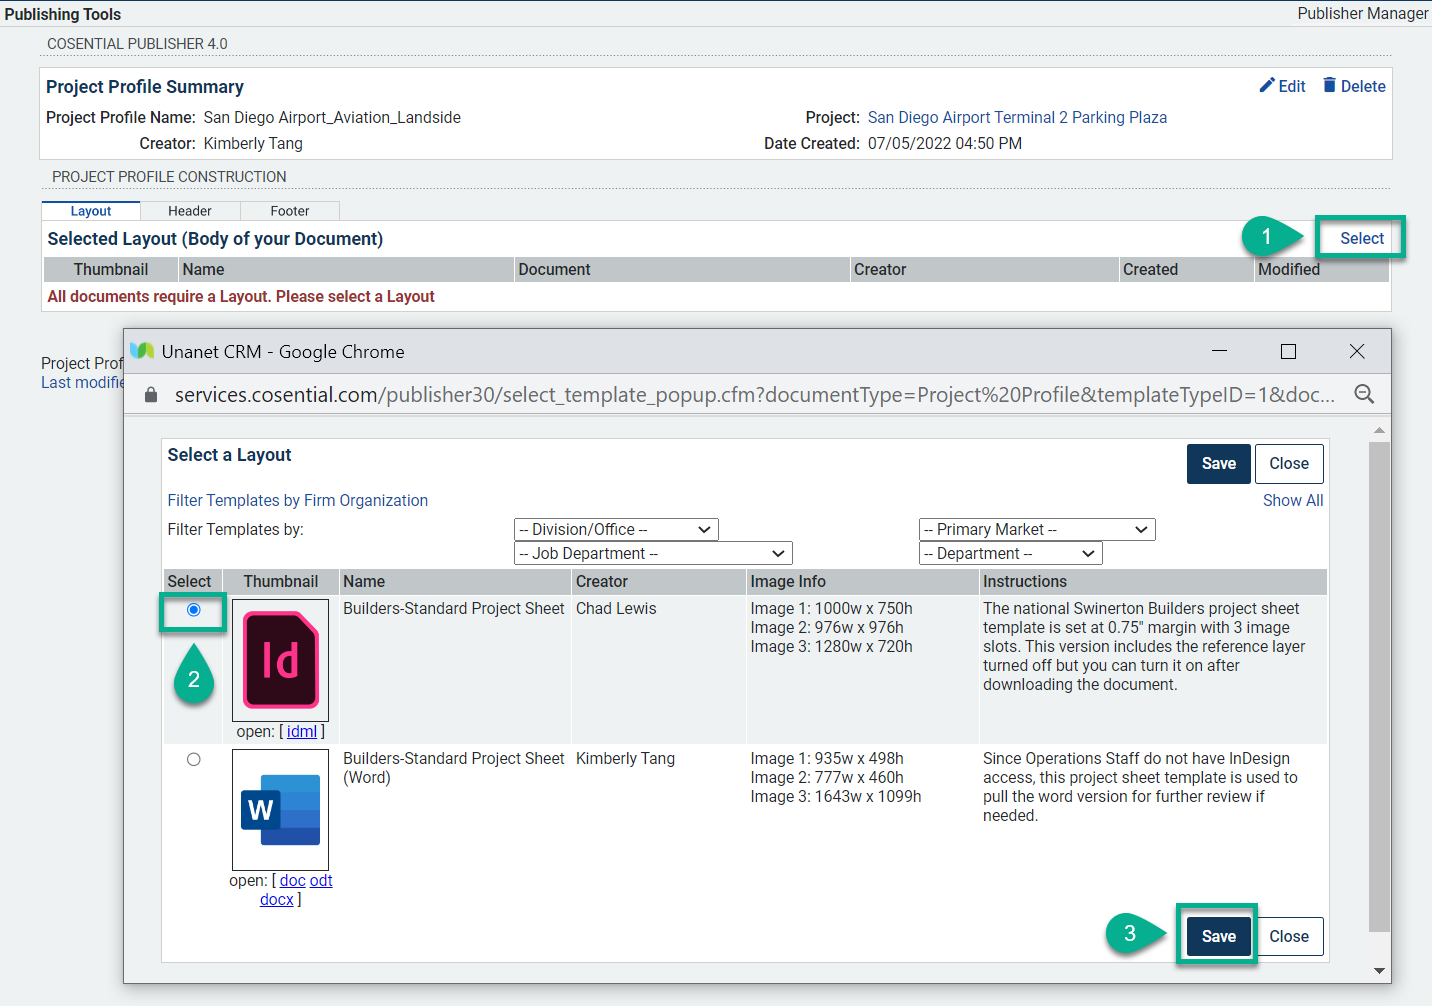
Step 3: Next, select the template for your document. We have uploaded standard templates for Project Sheet, Resume and Project List. If you’d like to create a new template, please work with your regional Unanet administrator to create and upload a new template. Since this could be lengthy process, a workaround is to utilize the standard templates and reformat the document once it is generated and downloaded from Unanet.
Step 4: Once you’ve selected your template, you will arrive at the Project Profile/Resume Construction page where you will complete the data associated w/your template. Select your template layout at Layout tab>Select.

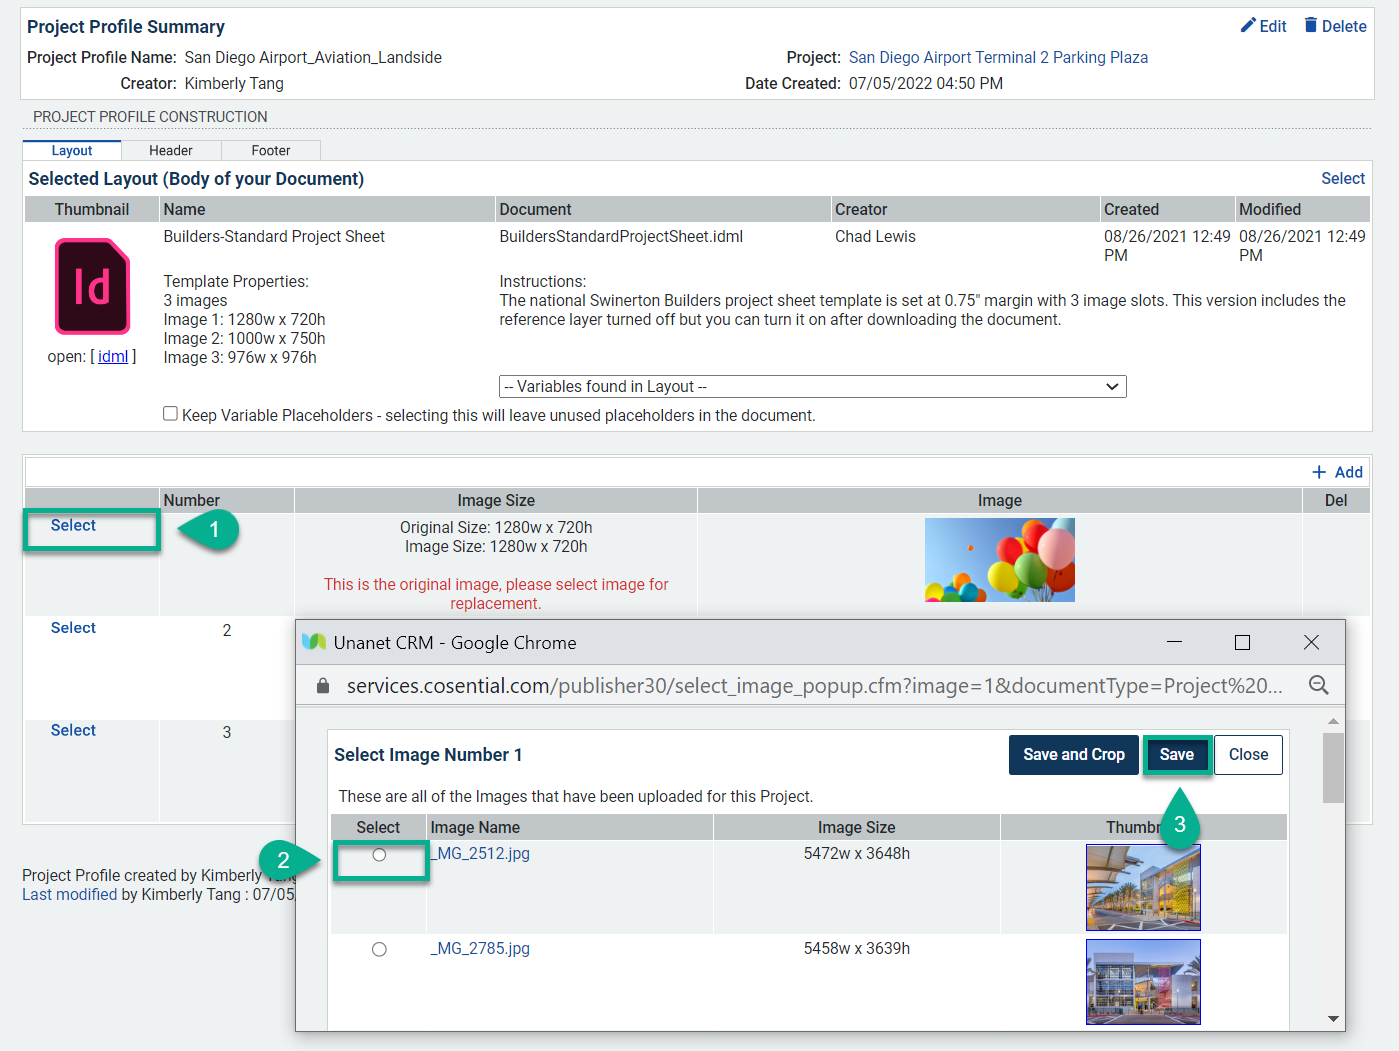
Step 5: Once your template layout has been selected, you will be prompted to select the content that will populate your template.
- For Project Profiles, you will be prompted to select the images to populate your project sheet.
- For Resumes, you will be prompted to select project experience, education, state specific registration (such as licenses), other registrations (memberships/affiliations such as DBIA, LEED), and a resume introduction from your chosen personnel record.
- For Project Lists, you can select the projects you want to populate your list by using Project search to select an existing report, generate your own report in the Reports Module, or manually select your projects.

Image Notes
- When selecting your images, we suggest selecting “Save” which will allow you the most flexibility to crop, position and resize once the ID file is generated. The “Save and Crop” feature will allow cropping based on the dimensions of your placeholder image. You can disregard the note “Your image size is not ideal.” You will still be able to format the image positioning/scale/etc. in InDesign once your document has been generated.
- Project Profile - Ensure you select 3 images for your project sheet.
- Resume Headshot - You can select the Personnel photo if no photo has been designated as the “Primary Photo” in the personnel record. If only one photo is in the Personnel record, Publisher will automatically insert the sole photo in the record.
- Images for Project Lists - In Project records, you can identify the default project image for lists by adding “Thumbnail” in the photo’s keyword field. To select the image for your project list, set the paramaters at Project List Image Options, Image Select Method to “By Keyword” and set Image Keyword to “Thumbnail.”
Step 6: Once you’ve selected the content, press "Generate Document". Sometimes, you may need to press on the "Generate Document" button twice if the system does not trigger the first go around. Once your document has been generated, download by selecting idml or word if a Microsoft Word template was used instead. Save the document to your chosen destination.
