Cisco AnyConnect - VPN client installation procedure
If you do not have the Cisco AnyConnect Secure Mobility Client installed on your machine then these steps can be followed to install it. Otherwise, please follow these instructions to access the software installed on your computer.
These steps require elevated privileges, so if you do not have administrative access on your computer then please contact an IT admin for assistance.
Connecting to Swinerton
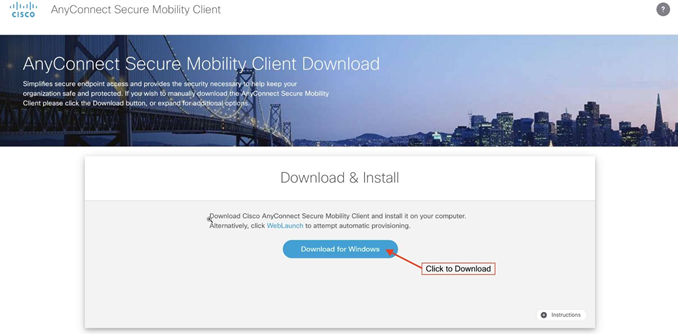
SSL VPN / AnyConnect Portal
1. Navigate to https://webvpn.swinerton.com (https://192.225.59.5)
2. Click Download to save the installation package
Installing the Cisco AnyConnect client
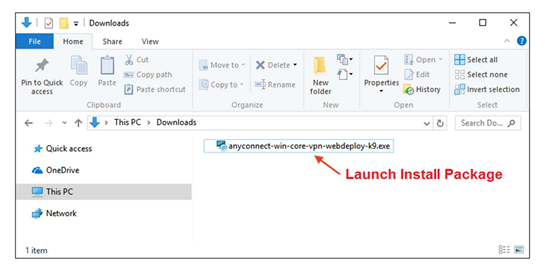
3. Locate
and open the downloaded install package
4. Click Next on the “Welcome to the AnyConnect Secure Mobility
Client Wizard” screen

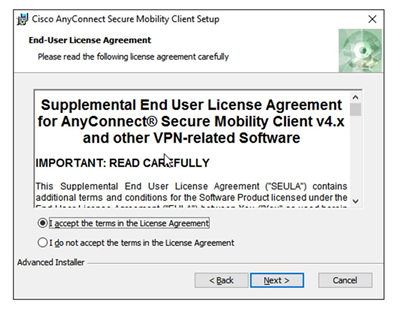
5. Agree
to the Software License Agreement and click Next
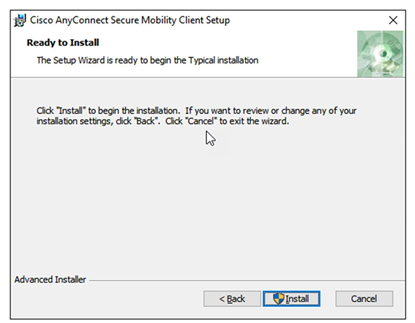
6. Click Install to begin installation
7. You
must have elevated privileges to install Cisco AnyConnect Secure Mobility
Client. When prompted, choose Yes to proceed with installation

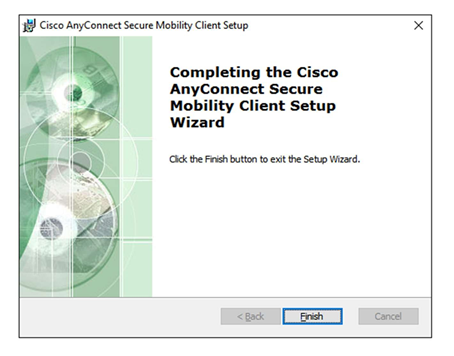
8. You have successfully installed the Cisco AnyConnect Secure Mobility Client and can begin using it. Click Finish to exit the Setup Wizard.
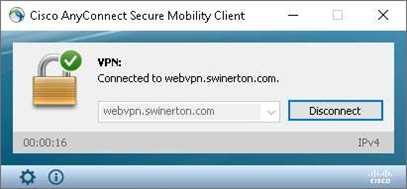
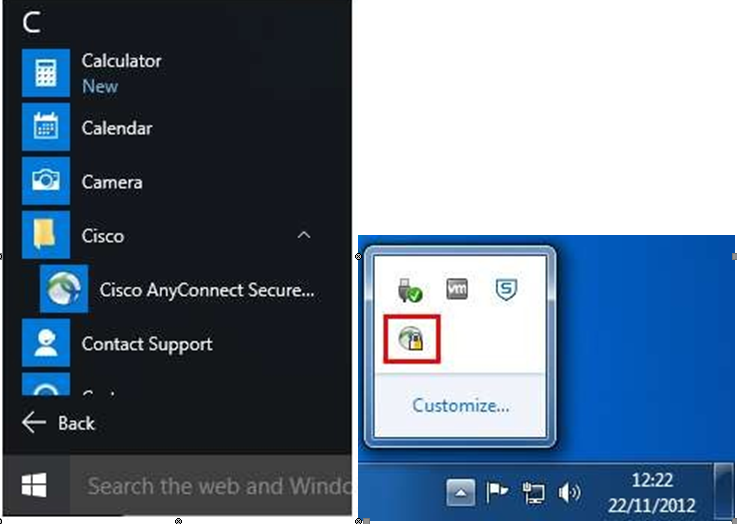
Connecting to the Cisco AnyConnect VPN
9. Launch
the Cisco AnyConnect Secure Mobility Client from the Start Menu or Systray Taskbar
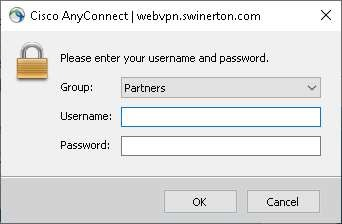
10. Type ‘webvpn.swinerton.com’ or ‘192.225.59.5’ and click Connect

11. Enter ‘Username’ and ‘Password’ and click OK.
12. Upon
successful authentication, you will see connected status