Image Web Part (Upload Image, Get Image URL, and Edit Web Part)
Image Web Part (Upload
Image, Get Image URL, Edit Web Part)
STEP 1: Size and cut your images according
to the image specs in the SwinNet Style Guide. Check the image dimensions for the
content page template you want to use.
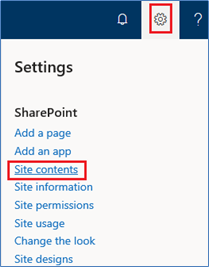
STEP 2: Click on Gear icon (Settings) and click on Site Contents.
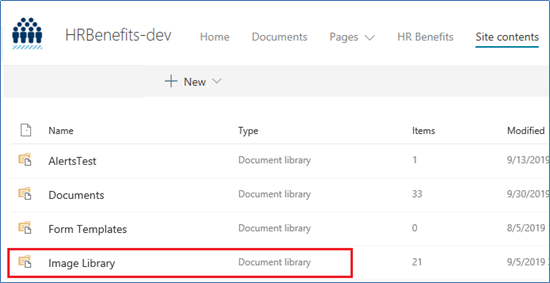
STEP 3: Click on Image Library.
STEP
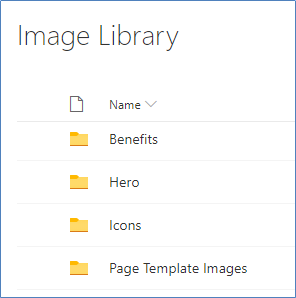
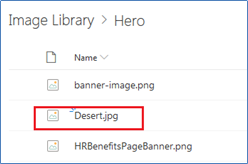
4: In the Image Library, create a new folder for each one of your content pages. You can also have sub-folders to keep organized.
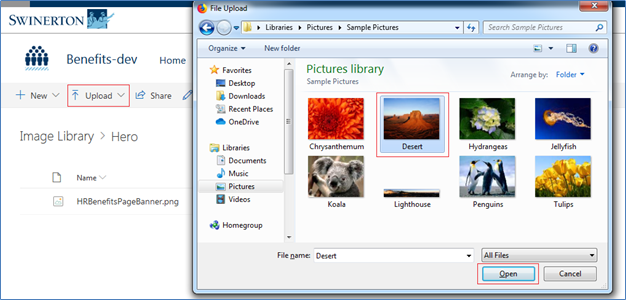
STEP 5: Open the appropriate folder and click Upload in the toolbar. Then select image and click the Open button.
STEP 6: Image was uploaded successfully.
PART 2:
Get Image Web Address (URL)
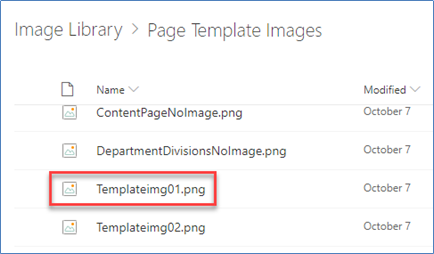
STEP 1: Open the image by clicking on it in the Image Library.
DO
NOT use Copy Link.
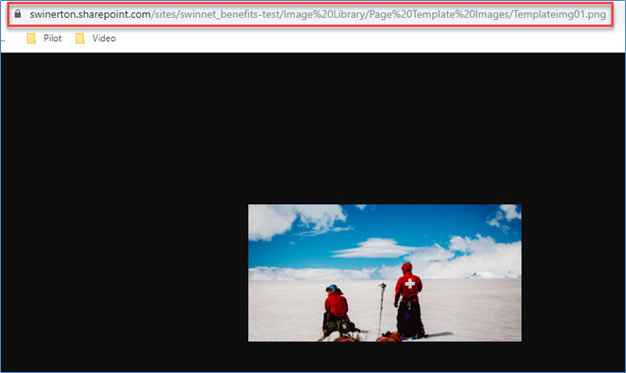
STEP 2: The long URL will appear in the browser window. Click on View Original for the shorter URL.

STEP 3: Copy the short URL. You may use it in an Image web part (see Part 3, Step 4, Link Alternative).
PART 3: Edit Image
STEP 1: Click Edit on right hand
side.

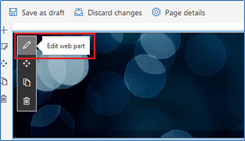
STEP 2: Click on Image and then click on Edit
Web Part (pencil icon) on left hand side of image.
STEP 3: Click on Change Image button on right pane.
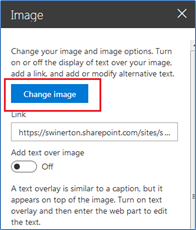
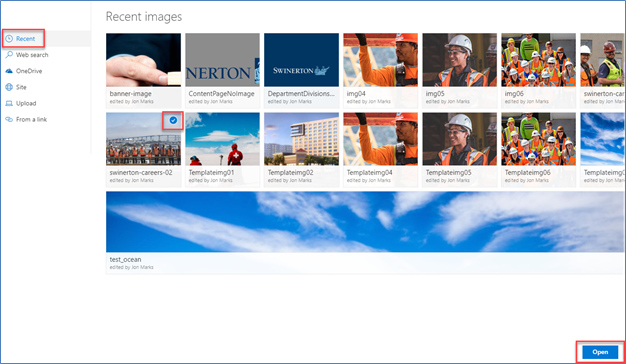
STEP 4: You are dropped into the Recent Images view where you can select an image that was recently uploaded. Check
the image in the upper right corner to select and then click the Open button.
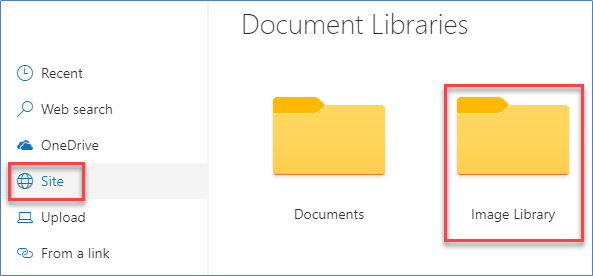
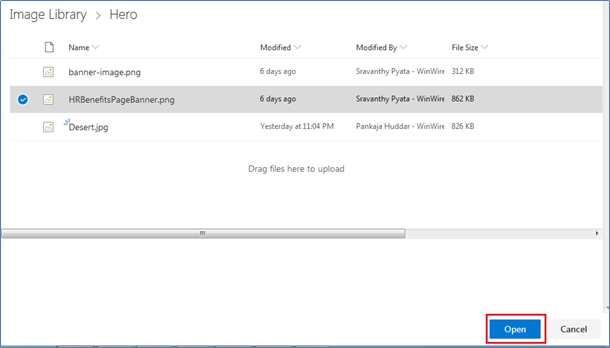
STEP 4 (SITE ALTERNATIVE): If you do not see your image, you can go to the Site view and navigate to your image through the Image Library folders. Select Image and click the Open button.
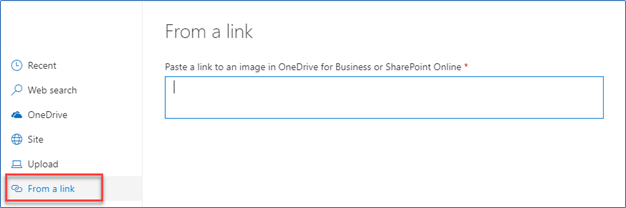
STEP 4 (LINK ALTERNATIVE): You can also select an image by pasting in the image web address (URL). Enter the URL and click the Open button.
STEP 5: Image web part is updated with the selected image.
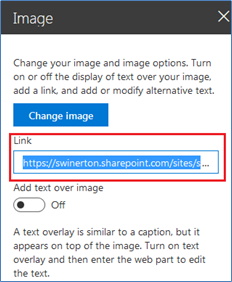
STEP 6: To link an image, enter valid URL in Link field in the right pane.
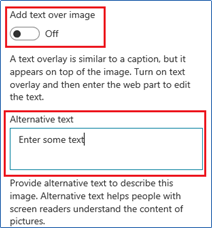
STEP 7: Leave the toggle on Off for Add Text Over Image.
DO NOT put text over an image when using an Image web part.
STEP 8: Enter a short text
description in Alternative Text.
Alternative text displays when the image
does not load and is used for screen readers.
STEP 9: Close the image panel. Click on the Submit for Approval button.

STEP 10: Once approved, you will see the updated image. It will link to the web
address (URL) you entered.