Quick Links (Add, Edit, Delete, and Add Note)
Quick Links (Add, Edit, and Delete)
PART 1:
Add Quick Link
STEP 1: Click Edit on right side above hero image.

STEP 2: Scroll to Quick
Links web part on bottom left side.
Click + Add Links.
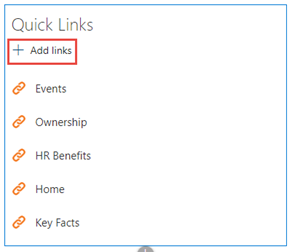
STEP
3: Click From a Link and paste valid URL within the box.
You may see a yellow error message. Please ignore this message. Open a ticket with Swinerton Support if you cannot complete this task.
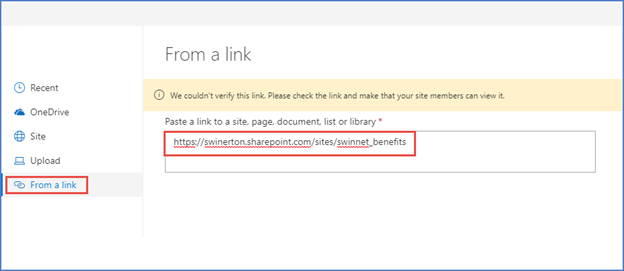
STEP 4: Click Open in the bottom right corner of the page.

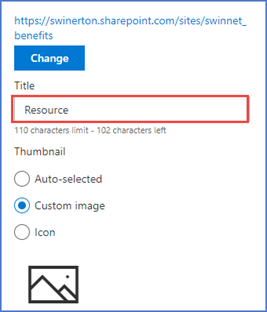
STEP 5: A panel will open on the right side of the page.
Enter Title for your link. This is the Title that displays under Quick Links.
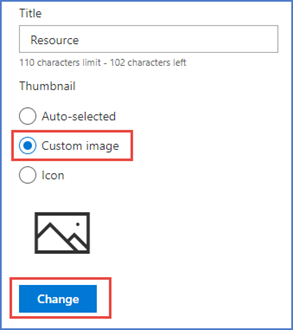
STEP 6: Select Custom
Image radio button.
Click Change.
STEP 7: A pop-up window will open. Select Site, then click on Image Library folder.
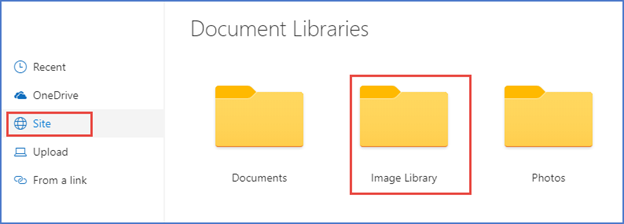
STEP 8: Click on Icons folder.
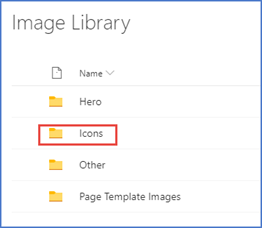
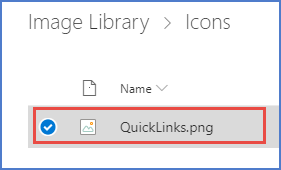
STEP 9: Select the Icon Image (QuickLinks.png).
Click Open in bottom right corner.

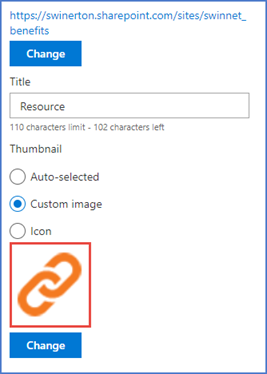
STEP 10: The
orange custom link icon now displays.
STEP
11: Click Save As Draft. Note that the new Quick Link now displays.
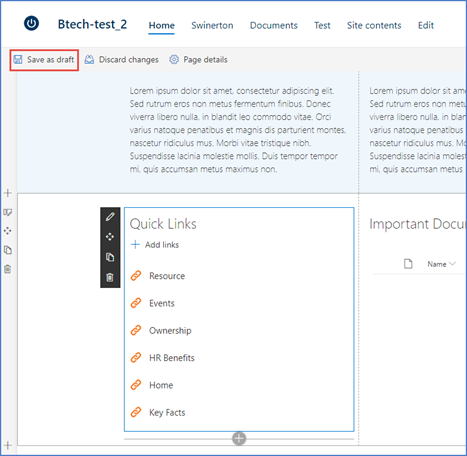
STEP 12: Once all edits have been made, click Submit for Approval button.

PART 2: Edit Quick Link
STEP 1: Click Edit on right side above hero image.

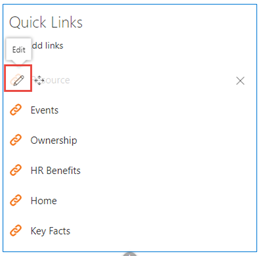
STEP 2: Hover over the link you want to update. Click Edit pencil icon.
STEP
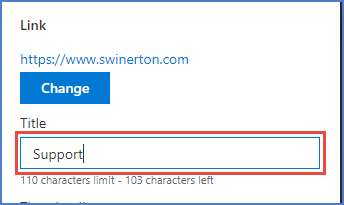
3: A panel will open on the right side of the page.
Edit Title field as desired.
STEP 4: If you also wish to change the link itself, click Change button to update the URL.
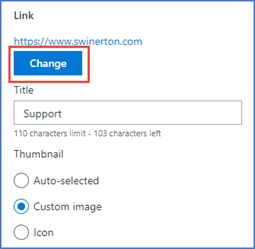
STEP 5: Click From
a Link and enter new URL.
You may see a
yellow error message. Please ignore this message. Open a ticket with Swinerton Support if you cannot complete this task.

STEP
6: Click Open in the bottom right corner of the page.

STEP
7: Click Save As Draft. Note that the renamed link is displayed.
You can also reorder the Quick Links if desired. Simply hover over the Quick Link title within the Quick Links web part box, and drag up or down to reorder.
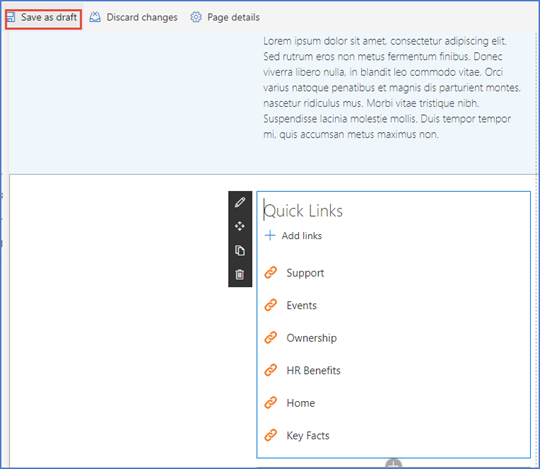
STEP 8: Once all edits have been completed, click Submit for Approval button.

PART 3: Delete Quick Link
STEP 1: Click Edit icon on right side above hero image.

STEP 2: Hover over link you want to delete and click Remove.
A Delete Confirmation box pops up. Click Yes.
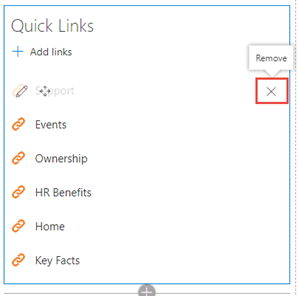
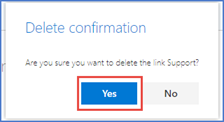
STEP 3: Click Save As Draft. Note that the removed link no longer displays under Quick Links.
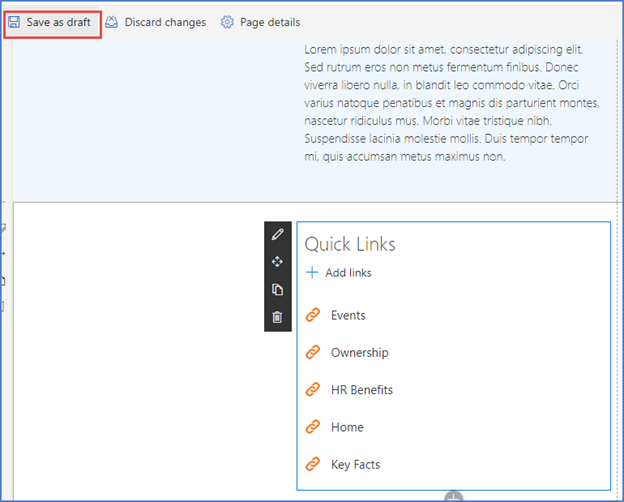
STEP 4: Once all edits have been completed, click Submit for Approval button.

PART 4: Add Note to Quick Link
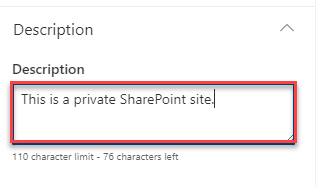
Sometimes you will want to add a note to a Quick Link to indicate that the site has limited access (e.g. a private SharePoint site). This is how you do it.
STEP 1: Click Edit icon on right side above hero image.

STEP 2: Click on the Quick Link web part and the pencil icon.
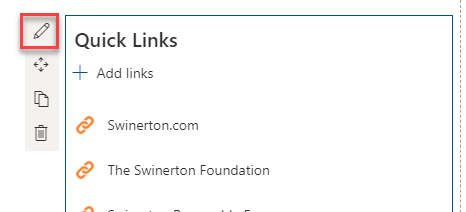
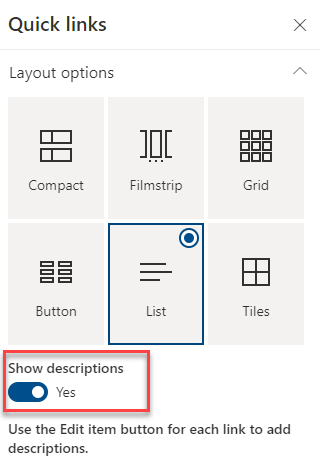
STEP 3: In the right panel, click the Show Descriptions toggle to Yes.
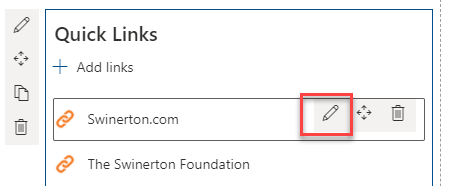
STEP 4: Close the right panel and then click on the link where you want to add the note. Click on the pencil icon next to the link to open the right panel.
STEP 5: Enter your note in the Description field in the right panel.
STEP 6: You will see the note under your link in the Quick Links area.
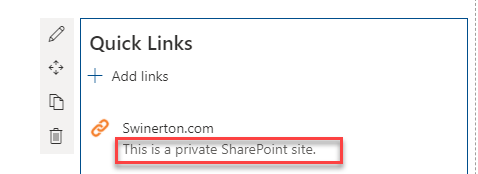
STEP 7: Click Save As Draft. Once all edits have been completed, click Submit for Approval button to publish your change.
