3rd Part Rental - Creating PO and Completing Contract (Part 2)
Creating the Purchase Order and Completing the Contract
Note:Now that you have the prices, you can complete the contract
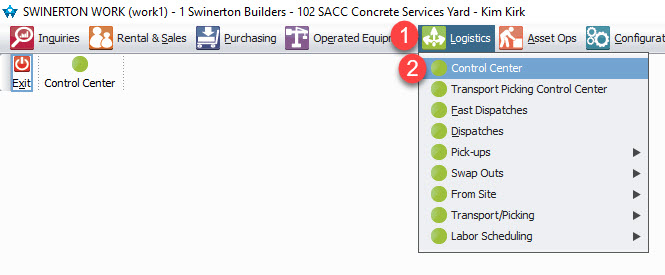
STEP 1: Click on Logistics
STEP 2: Click on Control Center
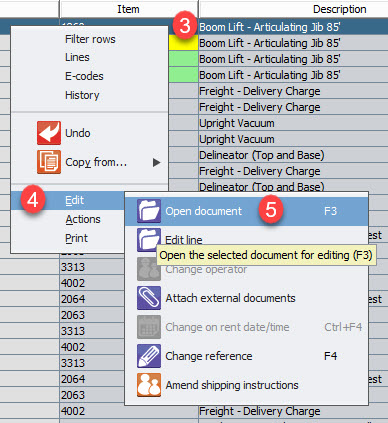
STEP 3: Select line - Right click
STEP 4: Hover over Edit
STEP 5: Click Open Document
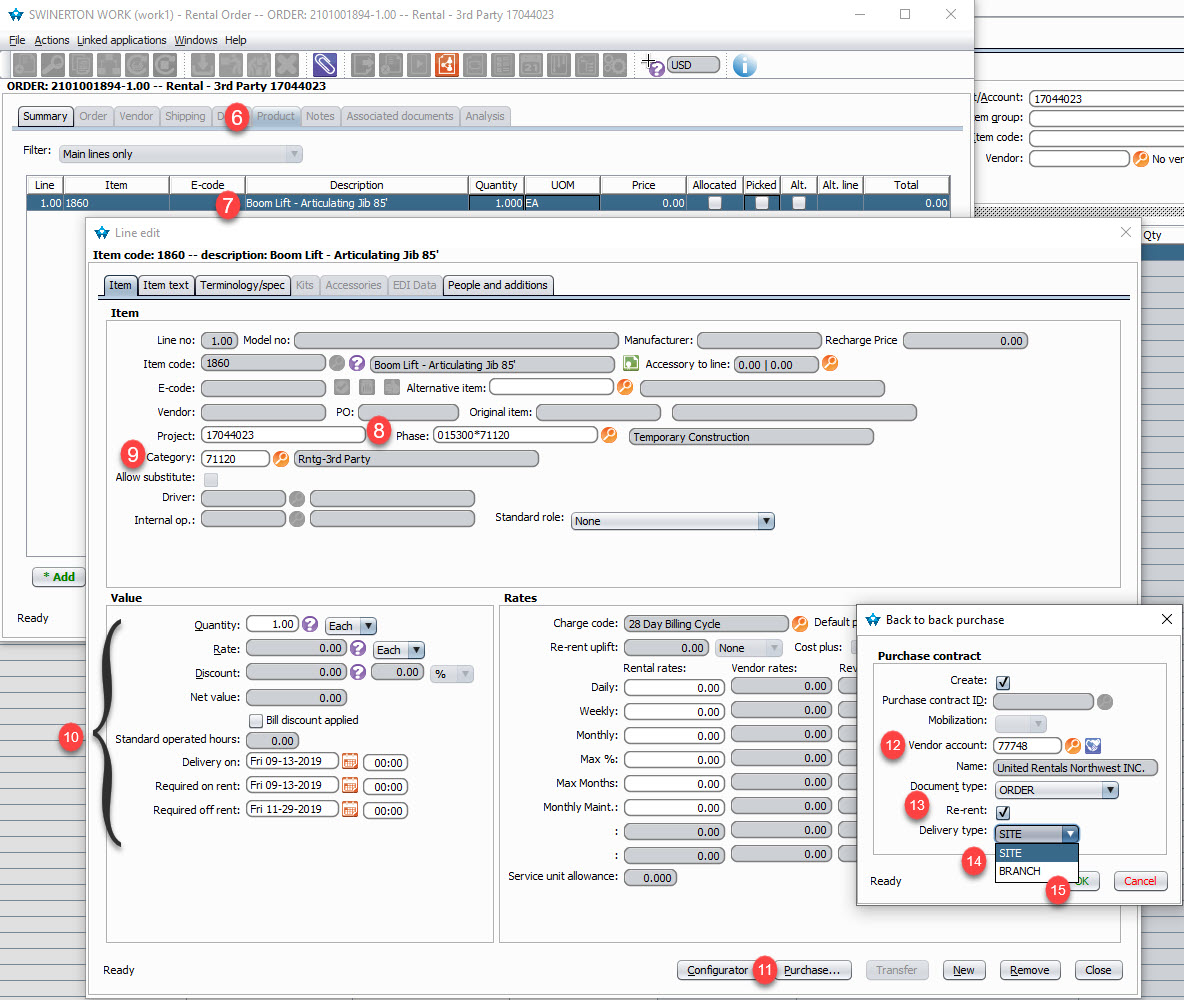
STEP 6: Click on the Product Tab
STEP 7: Double click the item
STEP 8: Double check Phase Code
STEP 9: Double check Category
STEP 10: Double check Quantity and Dates
STEP 11: Click Purchase
STEP 12: Choose your vendor (Double check the address/customer number is correct)
STEP 13: Click Re-rent box
STEP 14: Choose where the item will be delivered (Project SITE or BRANCH)
STEP 15: Click Ok
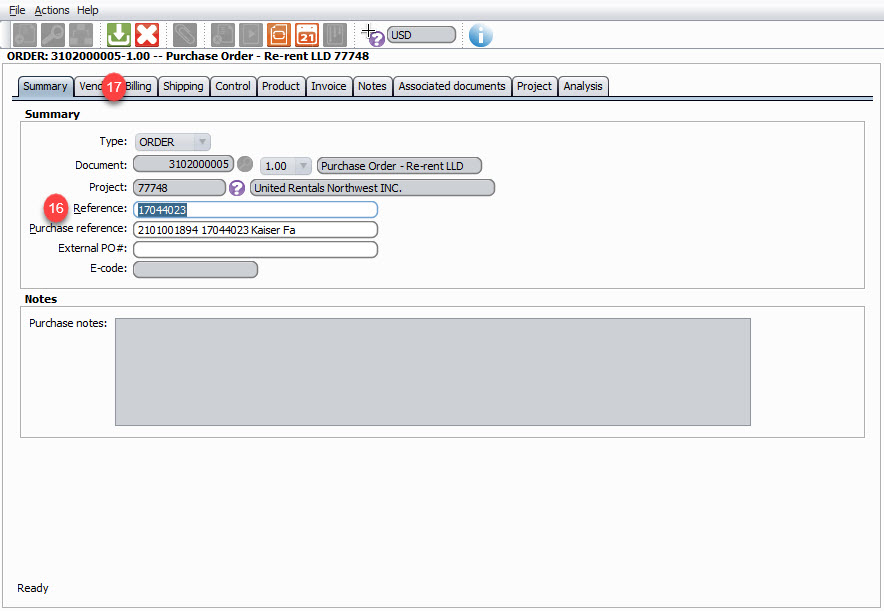
STEP 16: Enter the Job # in the reference field
STEP 17: Click the Billing Tab (Double check correct address)
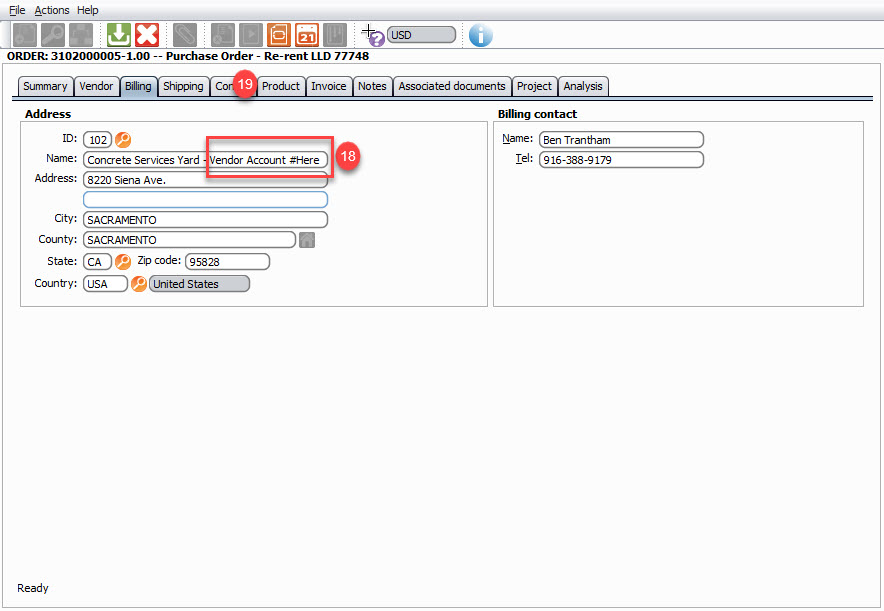
STEP 18: Enter your Vendor Account #
Note: Each warehouse will have their own account #
STEP 19: Click Product Tab

STEP 20: Double Click on item
STEP 21: Choose your uplift process
Note: Re-rent uplift can be done by % or amount.
STEP 22: Enter the rental rates the vendor will be charging you
STEP 23: Click Close
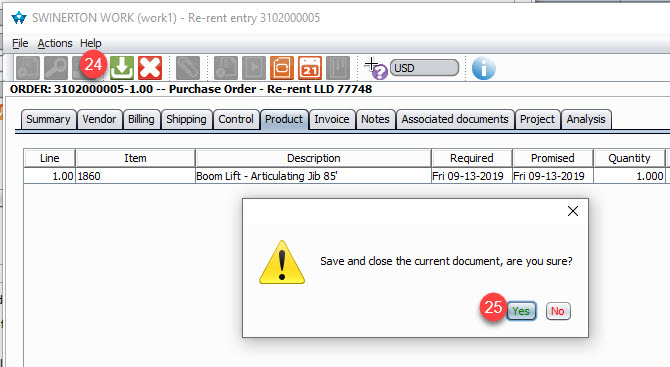
STEP 24: Click Save
STEP 25: Click Yes
STEP 26: Click Ok
STEP 27: Output Options - Click Close (This is just for the Purchase so no need to print. You have already given the vendor the PO# = Job # and you already have your rates)
STEP 28: Click Close (Bottom right hand corner)
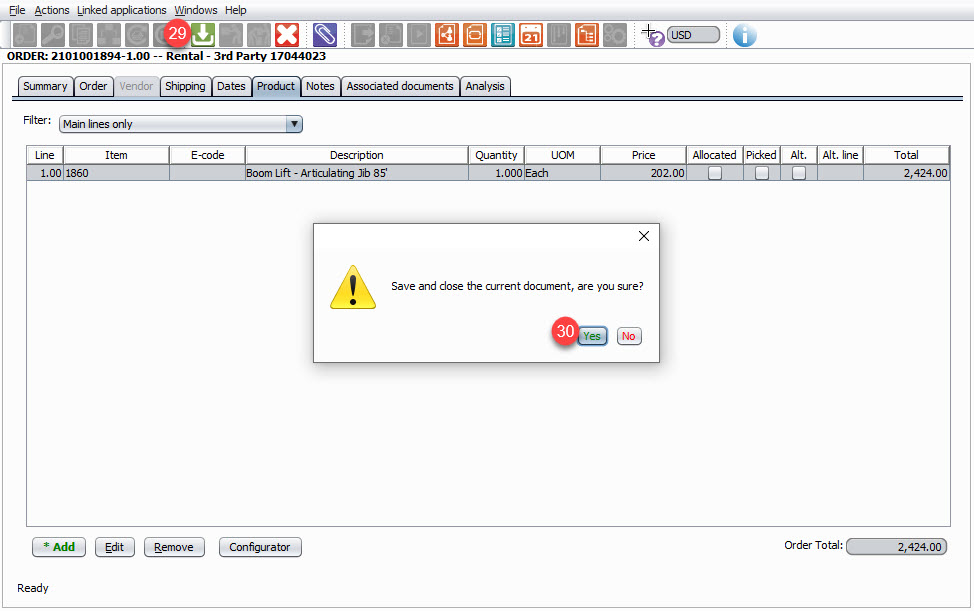
STEP 29: Click Save
STEP 30: Click Yes
STEP 31: Output Options (Email the order to the project team)
Note: You can now see that the status has changed to Order and it is awaiting the project team to confirm delivery