Enter Time by "Time Block" - (Hourly)
Enter Time by "Time Block" - (Hourly)
Note: To enter your work hours, it can be accessed by using the worklet or using the search field by typing "enter my time"
Company Holidays will populate automatically. Sick/Vacation has to be completed via Time Off worklet and then will auto populate in Time
From the Workday Home page click on "View All Apps" or the Menu in the upper left hand corner and locate the Time app

STEP 1: Click Time

STEP 2: Click Select Week
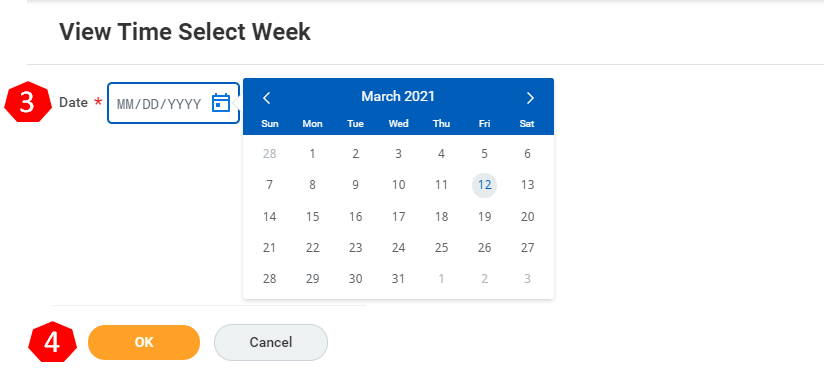
STEP 3: Click on the first start day of the pay period
STEP 4: Click Ok
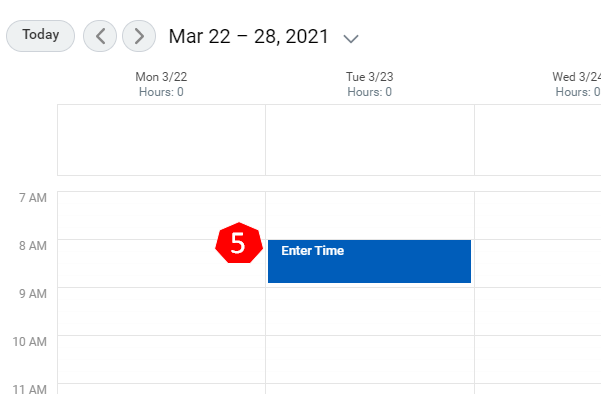
STEP 5: Double click on the date/time you want to enter time for
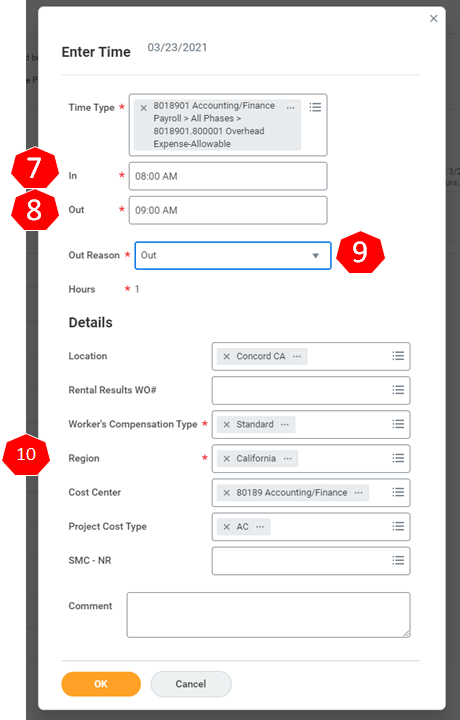
STEP 6: Click into the Time Type field to select your Job and Phase - There are two options here:
1. Most Recently Used - if you have already charged time to a project/phase, you can select it here.
2. Project Plan Tasks - Select your Job and Phase from the list provided
STEP 7: Enter your start time
STEP 8: Enter the time you stopped working on that project/phase code
Note: If you are working on multiple projects in the morning then the Out Reason will remain as "Out" until you go to lunch, then the Out Reason will be "Meals"
STEP 9: Enter your Out Reason
Note: If you are just stopping work on that project, then your Out Reason is "Out". If you are stopping for lunch, your Out Reason is "Meals"
STEP 9: Verify additional details of your time coding. Here you will see information that is defaulted based on your job location (for payroll tax purposes), your department org chart and your position.
Note: The region and Location need to match where you are physically working. These details default in based on the job/department location you are charging to. If you are physically working somewhere else, you need to change the region and the location to where you are working. Reference THIS solution for updating location worked.
The details are defaulting in so if something is not right, please submit a Swinerton Support Ticket
Rental Result Warehouse employees - If you are working on repairing equipment, you will Choose the Workshop Order (WSO)# here
STEP 10: Click Ok
Note:Complete this process until all hours/projects are in for that day/week
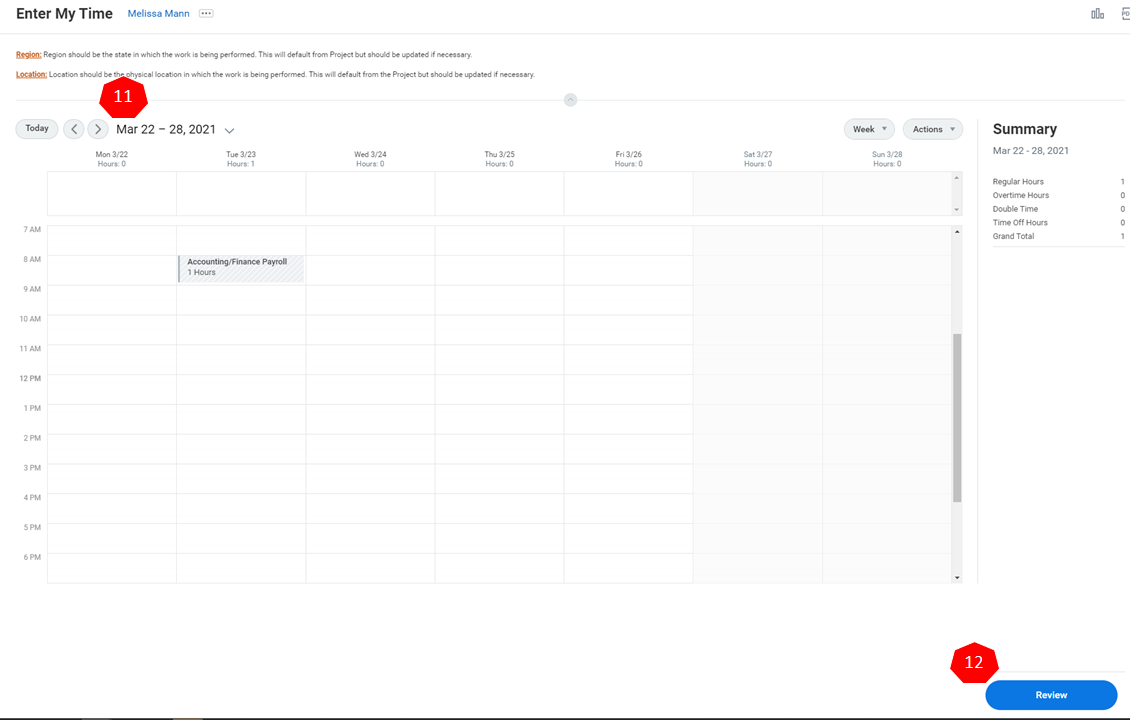
STEP 11: Click the forward arrow to take you to the next time block
Note: Complete the above process until all hours/projects are in for that pay period
STEP 12: Click Review
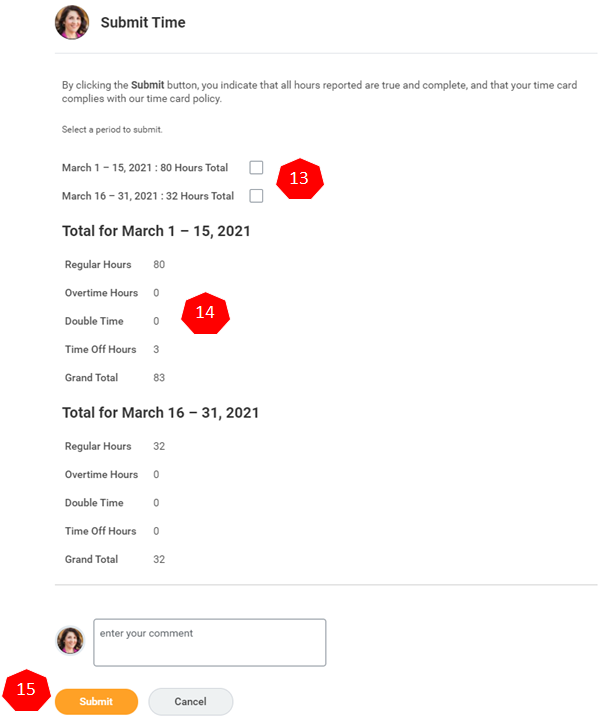
STEP 13: Click time period you wish to submit (you will only need to select if you enter time for more than one pay period)
STEP 14: Review your time
STEP 15: Click Submit
Note: Once you click Submit, your approver will receive a notification to approve your time card