Transfer Rental Contract (All Lines) (Video & How To Guide)
Transfer Rental Contract - All Lines
Note: You would use this method if you want to transfer ALL ITEMS from one contract/job to another
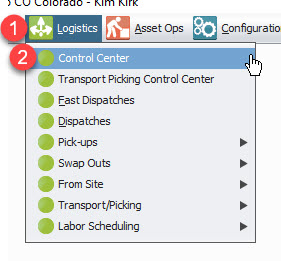
STEP 1: Click Logistics
STEP 2: Click Control Center
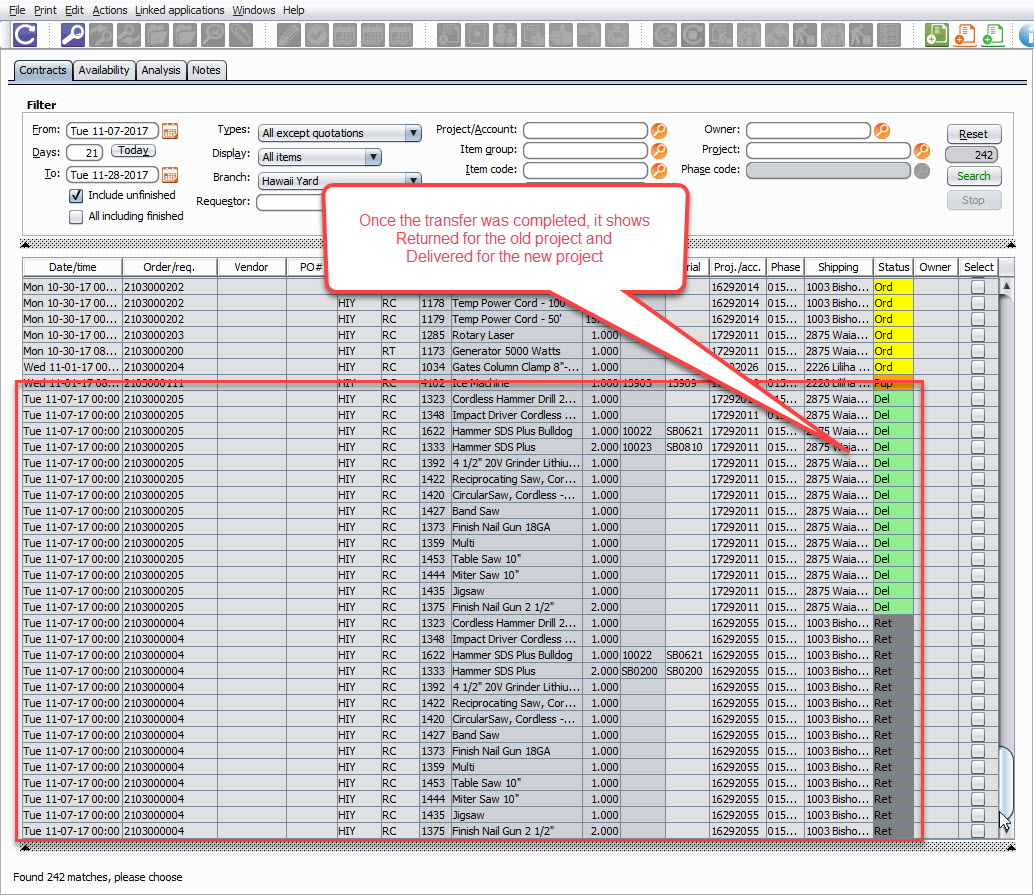
Note: You can only transfer if the Status of the current contract is "Del" and highlighted in green
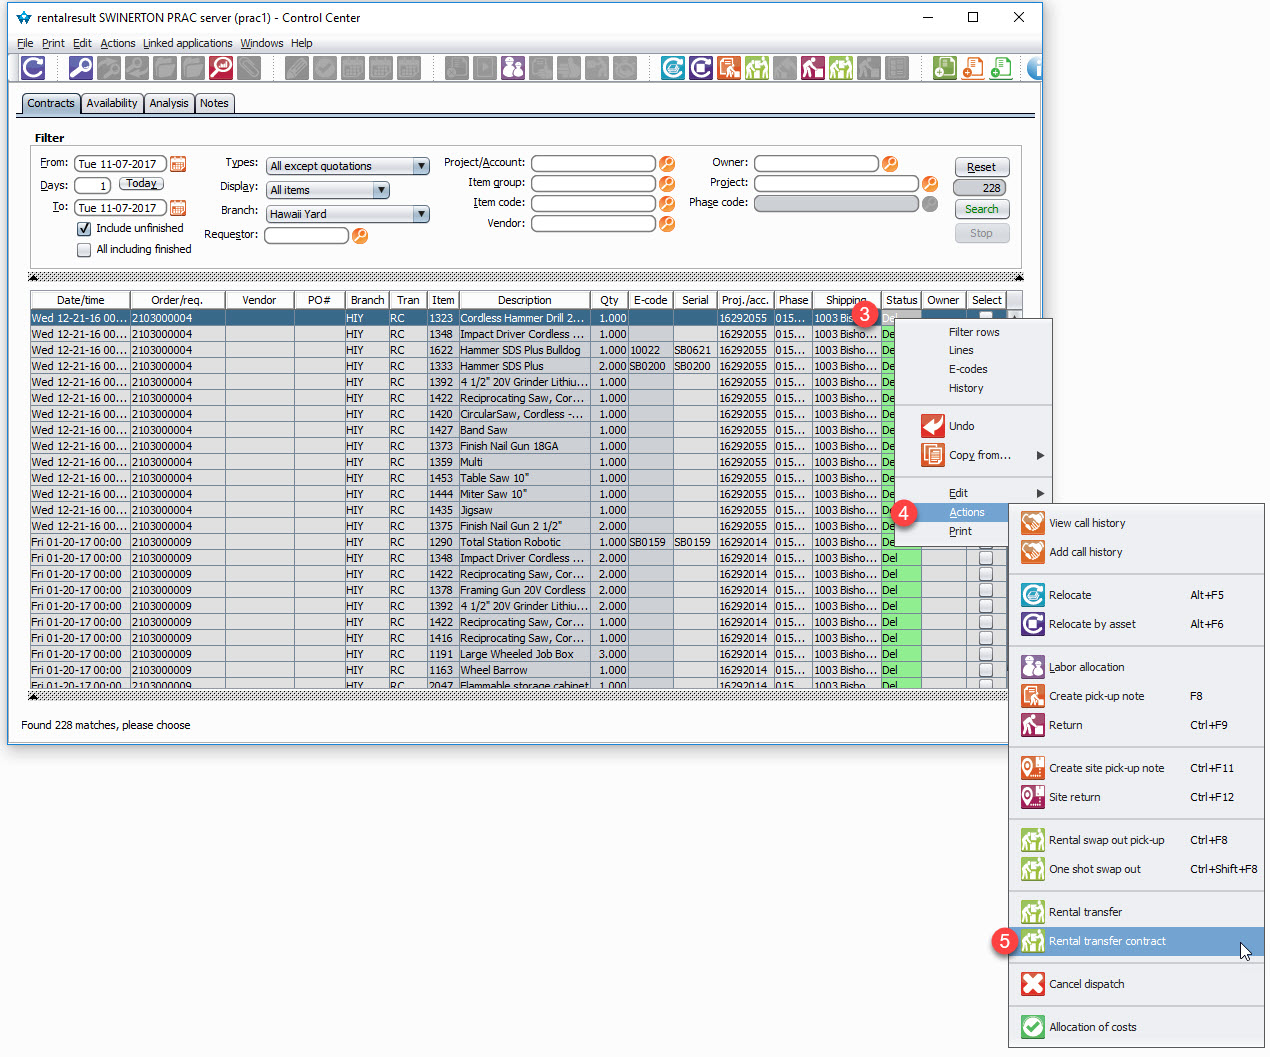
STEP 3: Right Click on one of the rows
STEP 4: Click Actions
STEP 5: Click Rental transfer contract
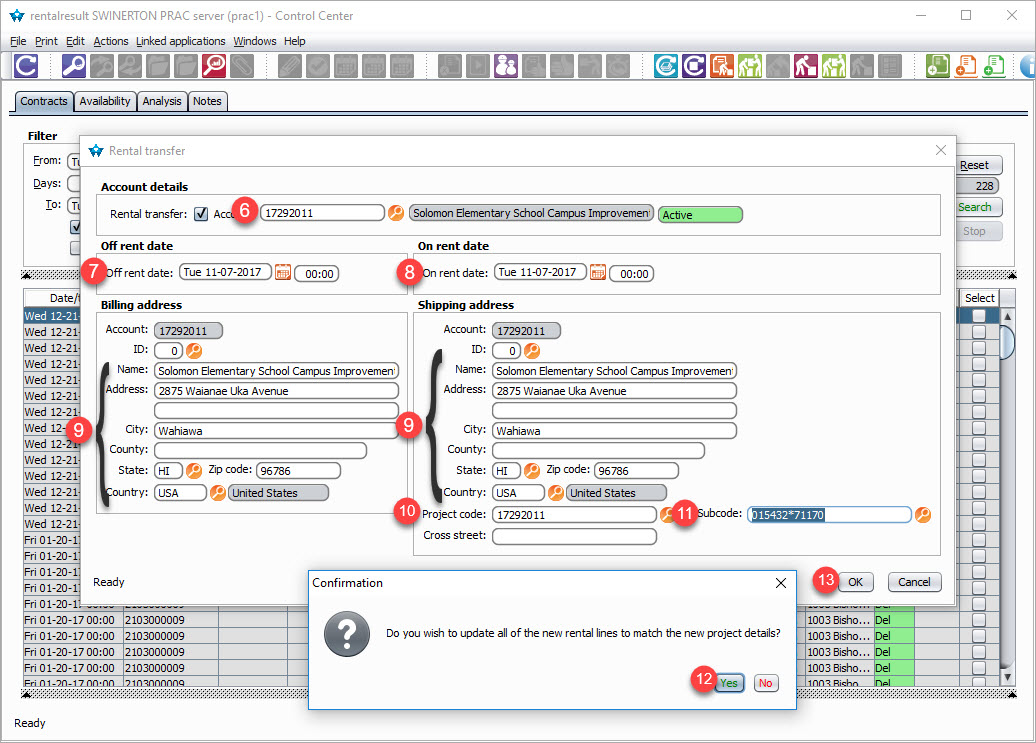
STEP 6: Enter the new project #
Note: This field will default to the current project so just override it with the new project #
STEP 7: Double check Off Rent date
STEP 8: Double check new On rent Date
STEP 9: Double check the address of the NEW project
STEP 10: Enter the new project #
STEP 11: Choose the Phase code/category
STEP 12: Click Yes
STEP 13: Click Ok
Note: It will take just a moment,but it will open up your new contract
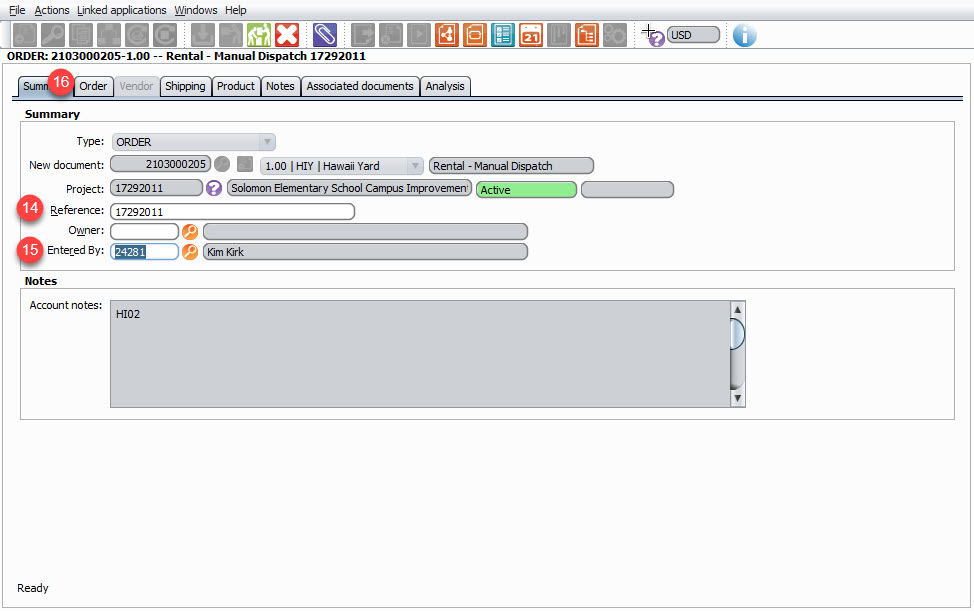
STEP 14: Enter the new project in the Reference field
STEP 15: Enter your employee # as the "Entered By:"
STEP 16: Click Order Tab
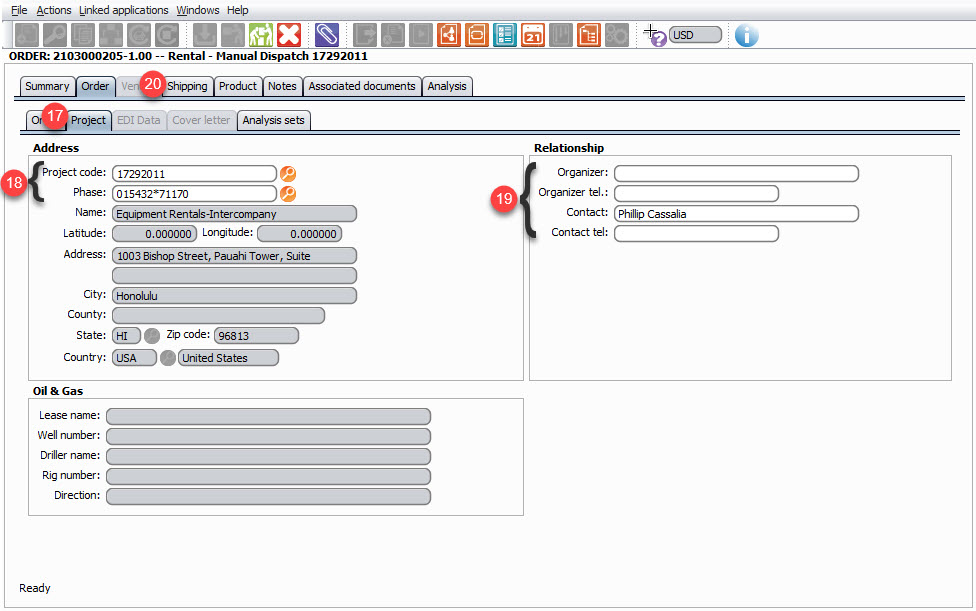
STEP 17: Click Project Tab
STEP 18: Double check the job # and new phase code
STEP 19: Double check the information in the Relationship box
STEP 20: Click Shipping Tab
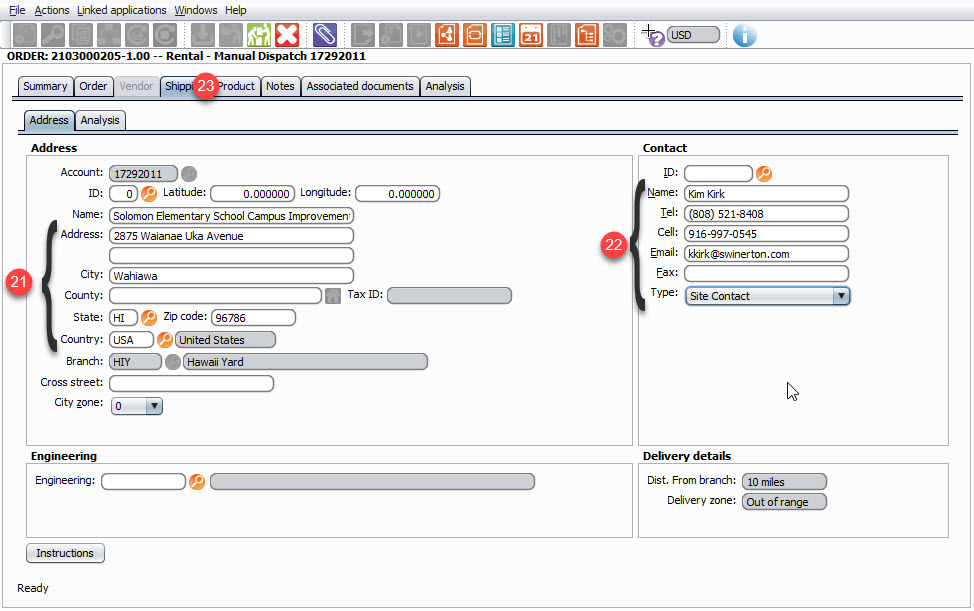
STEP 21: Double check the shipping address
STEP 22: Enter the Contact information
STEP 23: Click Product tab
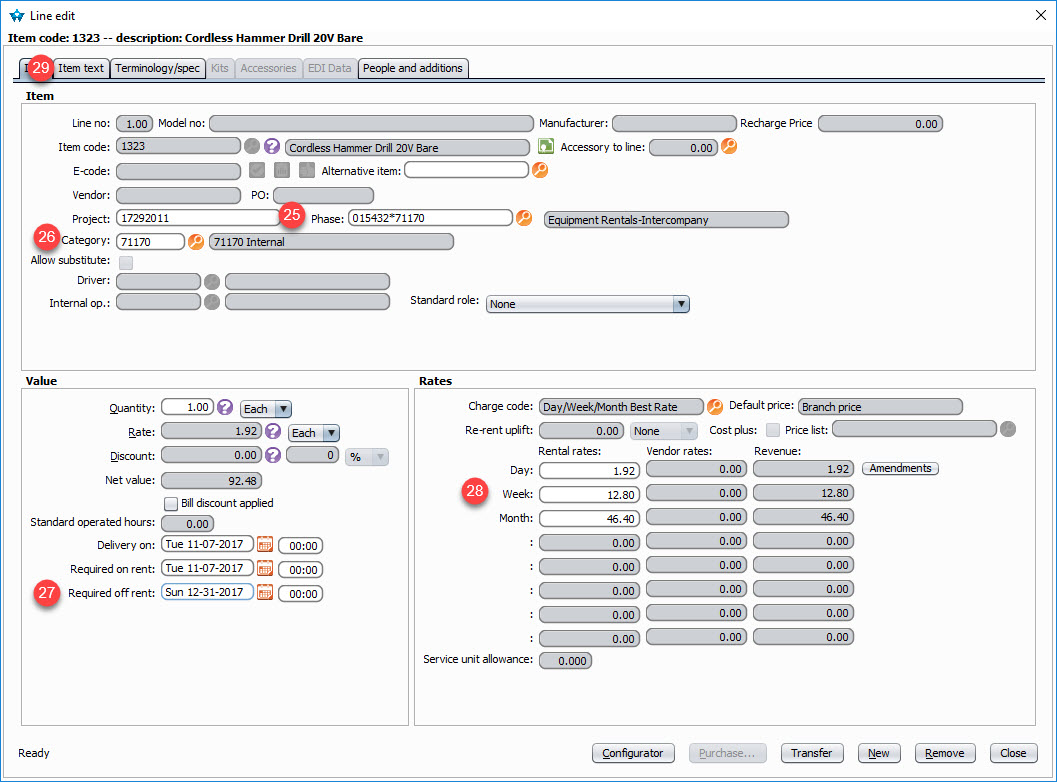
STEP 24: Double click first line
STEP 25: Verify/Change the Phase/Categroy
STEP 26: Enter the category
STEP 27: Choose the New Required Off Rent date
STEP 28: Double check your rates
STEP 29: Click Item Text Tab
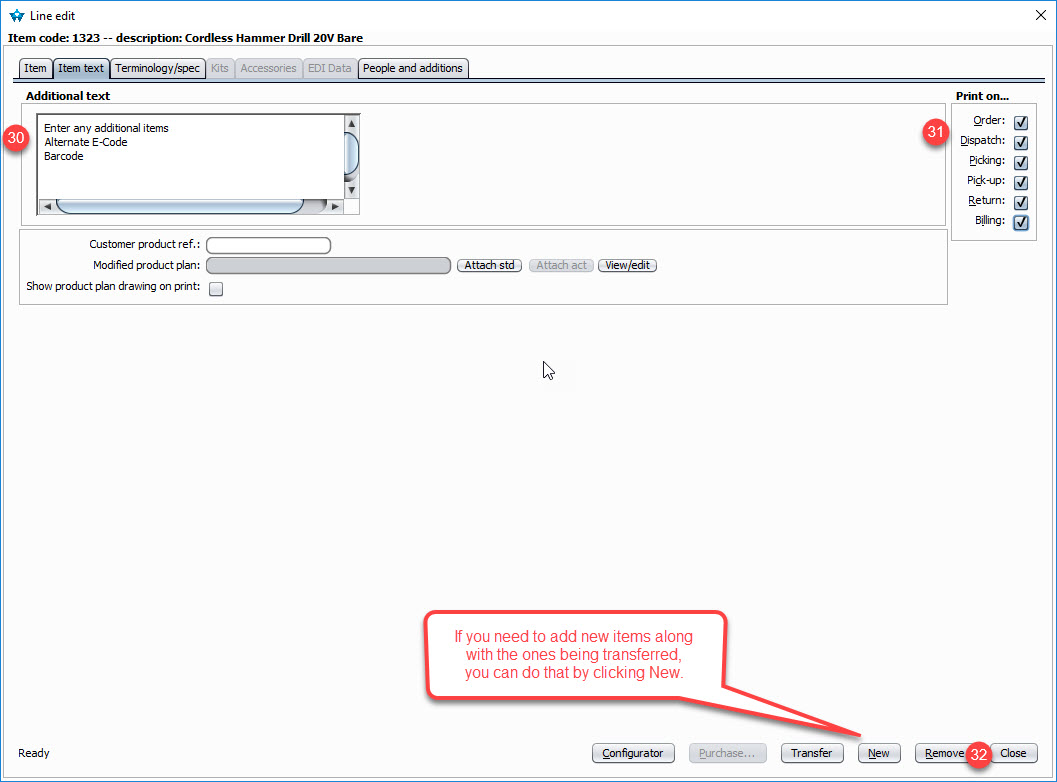
STEP 30: Enter any Addiitional Text
STEP 31: Choose what will be printed
STEP 32: Click Close
Note: If you need to add items to this contract that were not part of the initial transfer, you can click the New Button
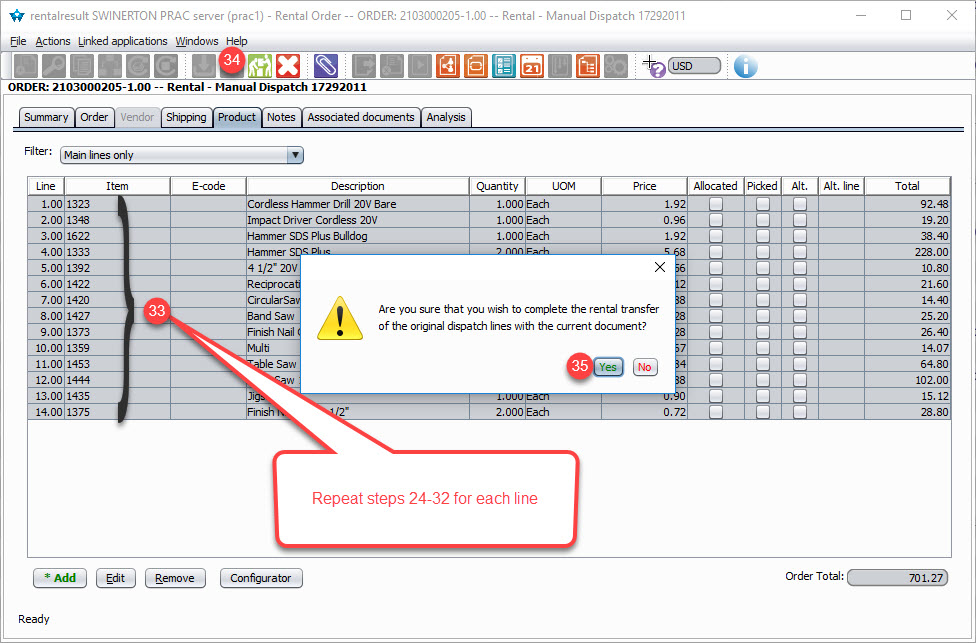
STEP 33: Repeat Steps 24-32 for each line on that contract
STEP 34: Click Complete the Rental Transfer Process button
STEP 35: Click Yes
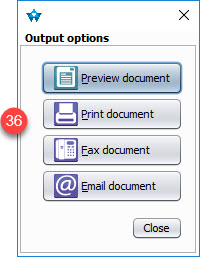
STEP 36: Choose your print option to alert the new project