Transport Picking Control Center - Used with the Logistic Transaction Rental Order
Transport Picking Control Center
NOTE: As a yard manager or yard admin, you would utilize this screen to further process any logistic rental contract (Logistics Order). You would use the first tab to locate your contract and pick the assets/ rental equipment. Then you would use the second tab to put your rental equipment on a vehicle (i.e. delivery truck) to be delivered to the project site and confirm that delivery.
NOTE: If it turns out that the project wants to come pick up the items, after completing the Rental - Logistics contract, you can go straight to Dispatch and "pick" from there.

STEP 1: Click Logistics
STEP 2: Click Transport Picking Control Center
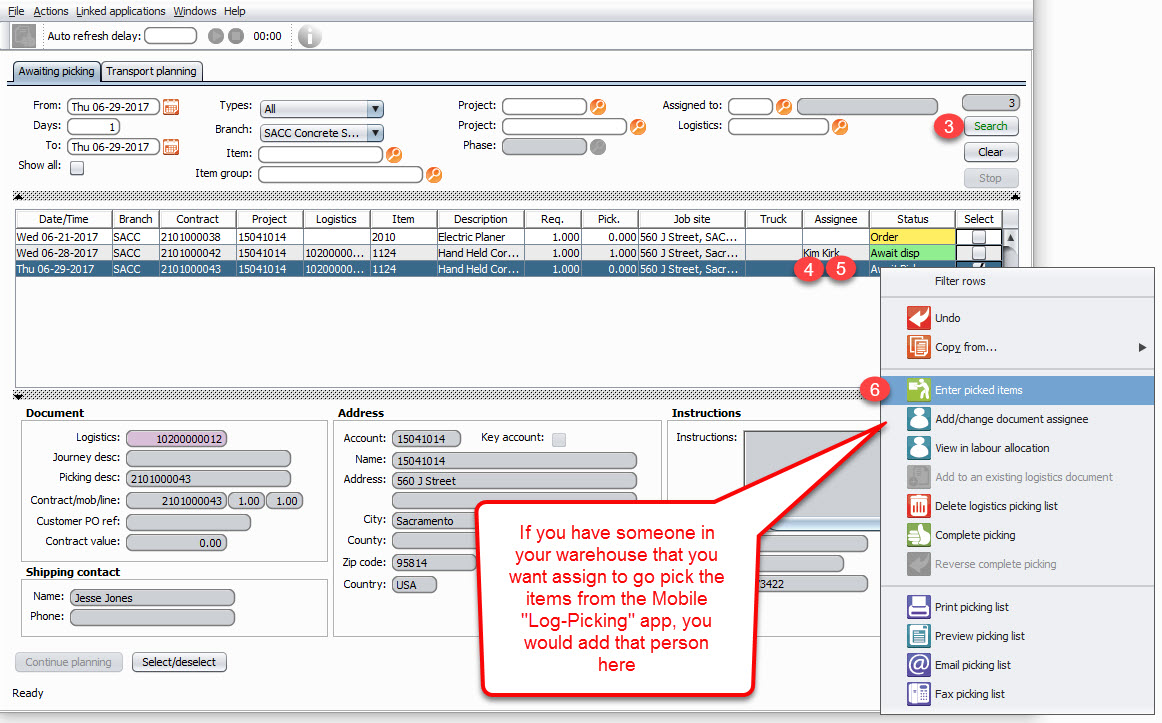
STEP 3: Click Search
STEP 4: Select the line for the document you would like to use
STEP 5: Right Mouse Click
STEP 6: Choose Enter Picked Items
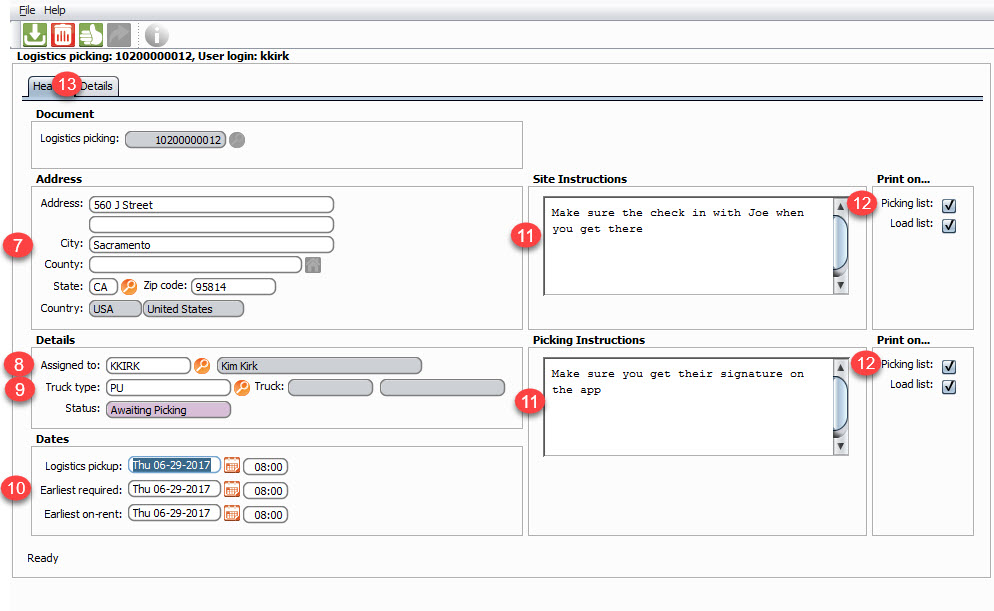
STEP 7: Validate the project address
STEP 8: Enter the picker of this item into the Assigned to: field
NOTE: The assignee will determine which users and/or devices can access the document via the mobile Java application, but this will not affect who can access the document through the Core Transport Picking Control Center.
STEP 9: Choose your Truck Type
NOTE: The “Truck” information to the right of the “Truck type” field will only display once the logistics document has been added onto a truck on the “Transport planning” tab
STEP 10: Validate the dates and make changes as need be
STEP 11: Add any additional instructions
STEP 12: Choose the documents you want the instructions to print on
STEP 13: Click Details Tab
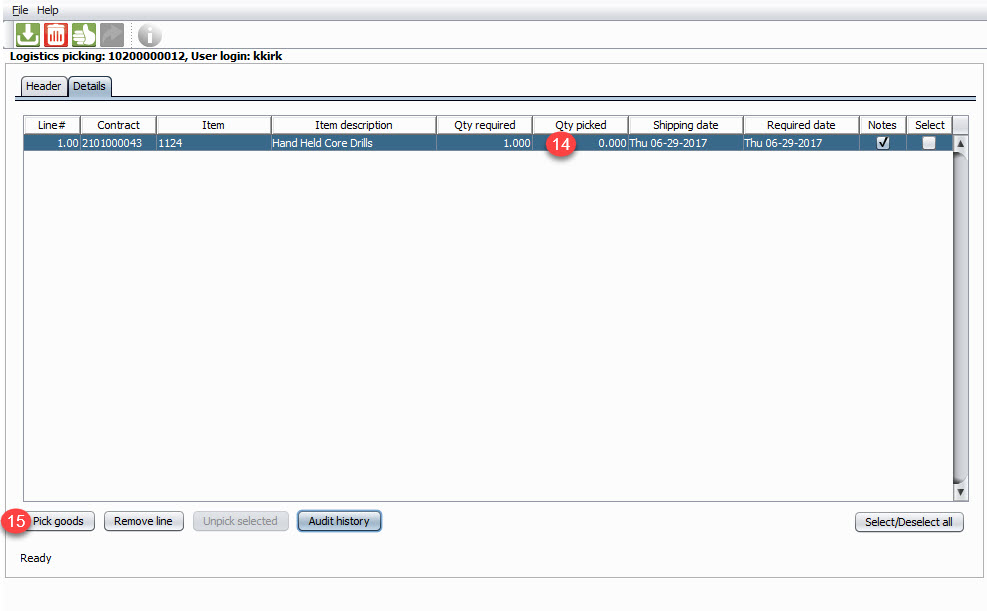
STEP 14: Highlight the line you want to pick for
STEP 15: Click Pick Goods
NOTE: The “Notes” box will be checked to indicate that notes were added to the original order line with the “Picking” box checked. These notes will be output whenever the logistics document is printer
NOTE: The “Select/Deselect all” button can be used to select multiple lines in order to unpick in bulk when used in conjunction with the “Unpick selected” button
NOTE: The “Unpick selected” button will only activate when at least one “Select” box is checked for at least one line
NOTE: Clicking on the “Audit history” button will launch a form displaying the history of changes to all the lines on the logistics
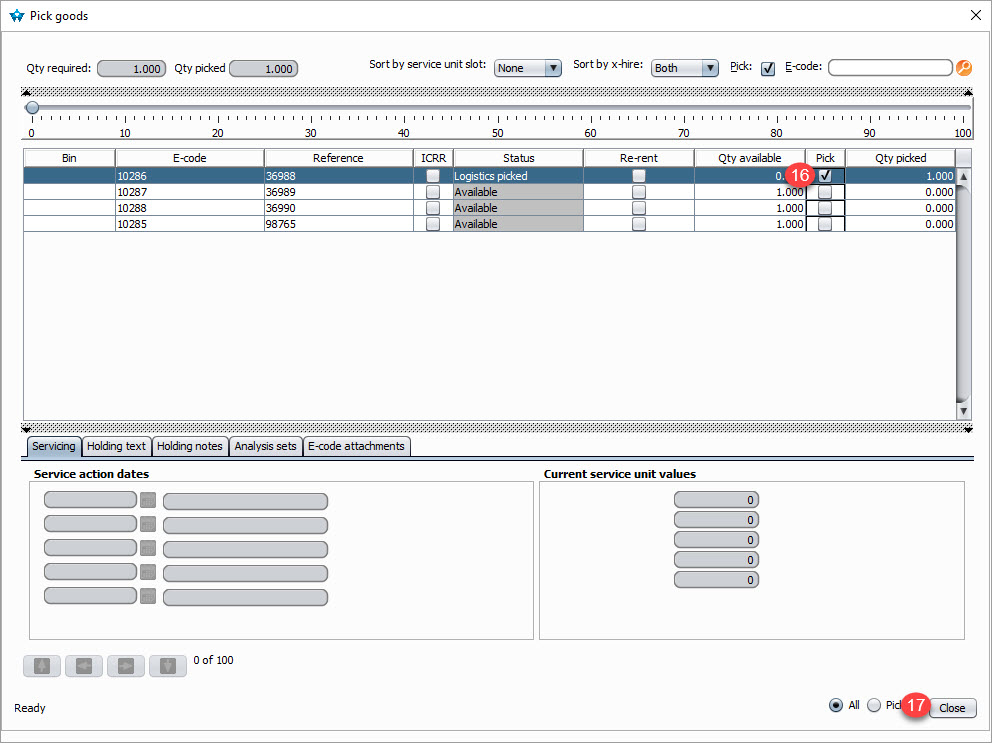
STEP 16: Click the Pick box of the item you want
STEP 17: Click Close
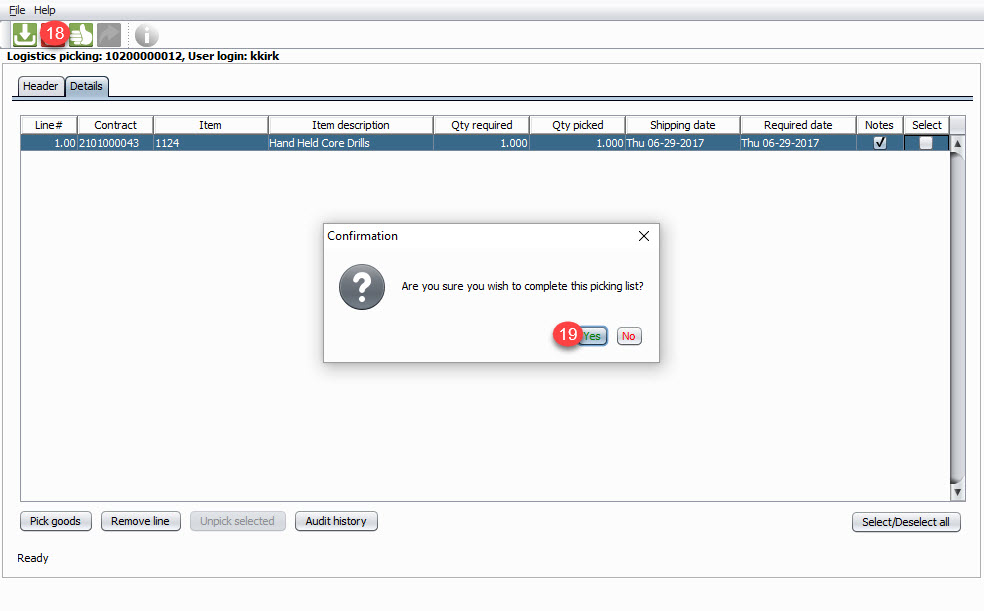
STEP 18: Click Complete Picking
STEP 19: Click Yes
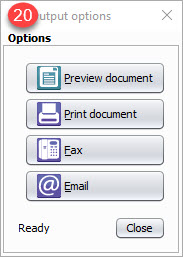
STEP 20: Choose your option and complete
NOTE: It would make sense, process wise, to print the document and take it with you to the ware house to make sure you are putting the right item/e-code #'s on the truck
STEP 21: Close
NOTE: Your Tranport Picking Control Center will now show this item as a status of Await dispatch
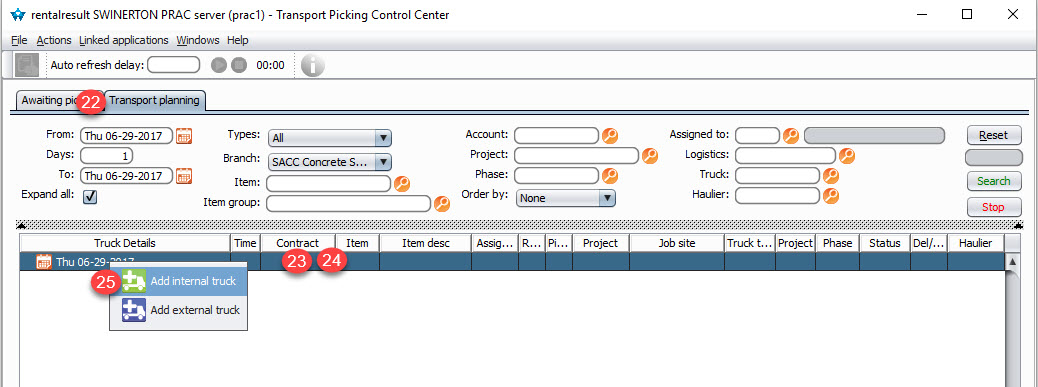
STEP 22: Click Transport planning tab
STEP 23: Highlight the line you are working on
STEP 24: Right Click
STEP 25: Choose Internal Truck
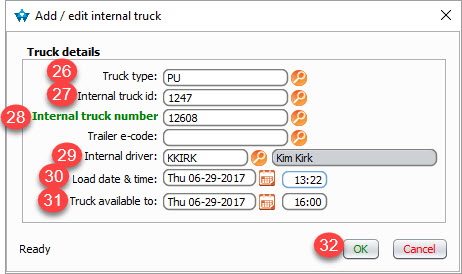
STEP 26: Choose the truck type
STEP 27: Choose truck id
STEP 28: Choose truck number
STEP 29: Choose the driver
STEP 30: Choose your load date & time
STEP 31: Choose your truck available to
STEP 32: Click OK
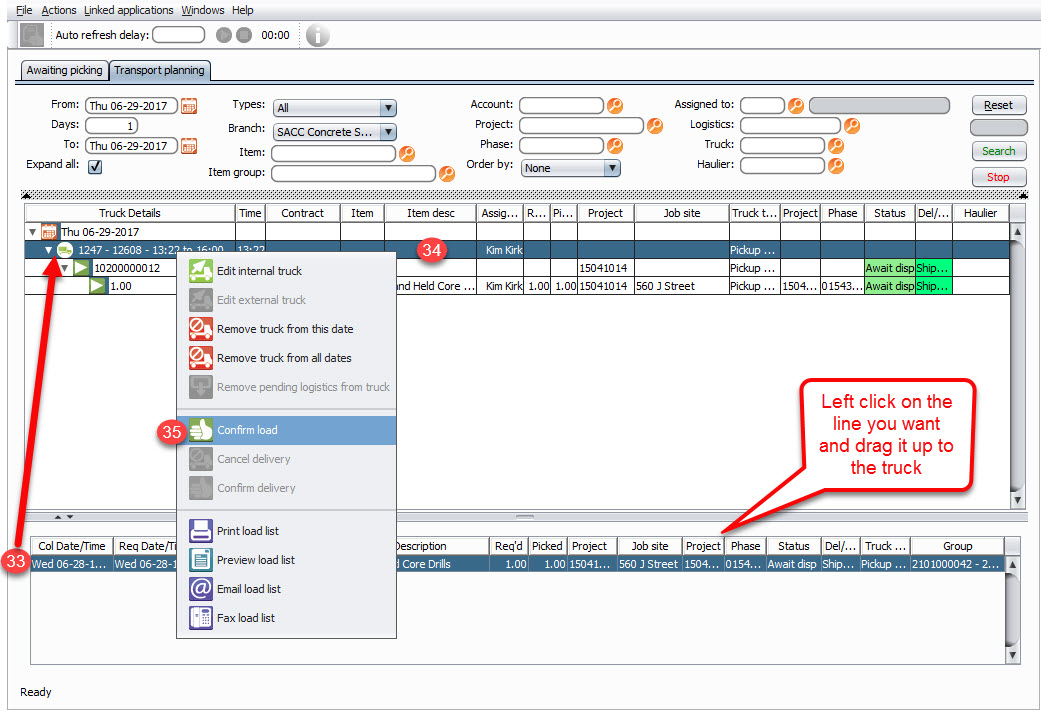
STEP 33: Left click on the order and DRAG up to the truck
STEP 34: Right Click the Truck
STEP 35: Click Confirm Load
NOTE: Your Tranport Picking Control Center will now show this item as a status of In Transit and is now available on the Signature app for the driver.
NOTE: See "Signature App" Guide to complete getting the signature when delivered
NOTE: Once Signsture is optained and load is confirmed via the app, your order will show in the Control Center as a status of Delivered