Workshop Order (Part 2) Actual Costs to Finish
Workshop Order (Part 2) Actual Costs to Finish
NOTE: This document assumes you have an existing Workshop Order with Budgeted Costs in Completed Status and Actual Costs have been integrated to the workshop order from CMiC. (If you have not yet entered your workshop order and completed the service/repair please use the Workshop Order Part 1 Budgeted Costs to Service Completion document.)
Whether your Workshop Order is Billable to a Project or is Non Billable costs to be absorbed by Yard OH the Actual Costs come into the Workshop Order via CMiC.
This is done one of 3 ways:
-
CMiC Timecard: When a timecard is entered into CMiC time/costs spent on a workshop order can be applied to that workshop order by using the Equipment WO field and selecting the workshop order number. Once Timecards are posted in CMiC these transactions will then integrate over to the Rental Results Workshop Order as an actual cost line(s).
-
CMiC Accounts Payable/Imaging: When an invoice comes into imaging and is directed to the “coder” AP costs associated with a workshop order can be coded to that workshop order by using the Equipment WO field and selecting the workshop order number. Whoever is coding invoices will need to know the workshop order number to apply the AP actual Cost against. Once AP invoice is posted in CMiC these transactions will then integrate over to the Rental Results Workshop Order as an actual cost line(s).
-
CMiC Job Cost: When a workshop order cost has come in using either of the above two (2) methods and was inadvertently not applied or coded to the workshop order. Your financial manager can do a JC Journal entry to move the cost out of the phase/category and move it back into the phase/category/Equipment WO. Once the Journal entry has posted, this transaction will then integrate over to the Rental Results Workshop Order as an actual cost line(s).
This document walks you through allocation of Actual Costs after integration to Finishing (and closing) the Workshop Order in Rental Results.
Workshop Order Actual Costs to Finish
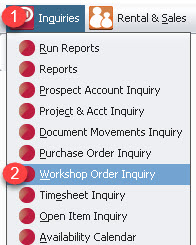
STEP 1: Click Inquires
STEP 2: Click Click Workshop Order Inquiry
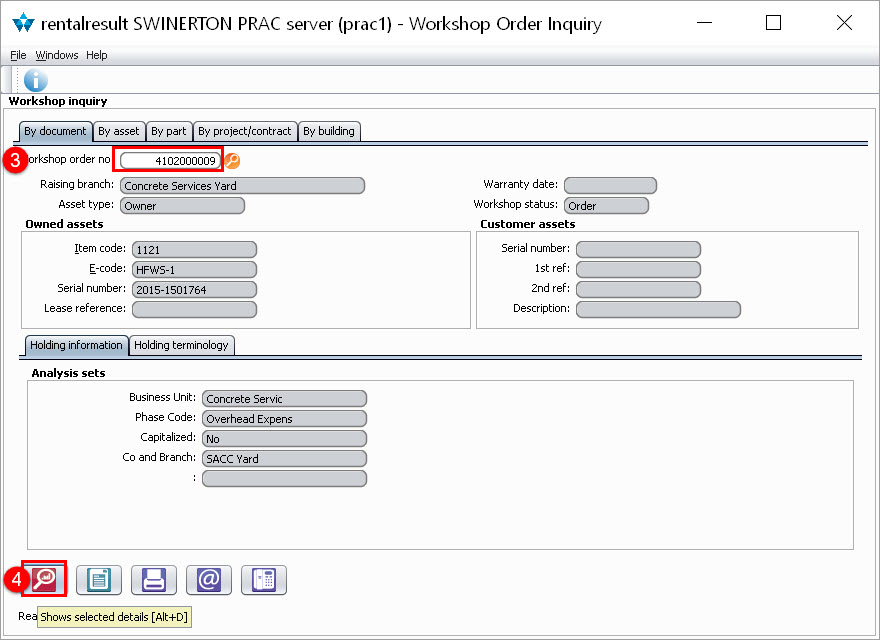
STEP 3: Enter the workshop order number you are inquiring on
STEP 4: Click the red magnifying glass in the lower left of the window to display selected workshop order details. The document movements inquiry displays
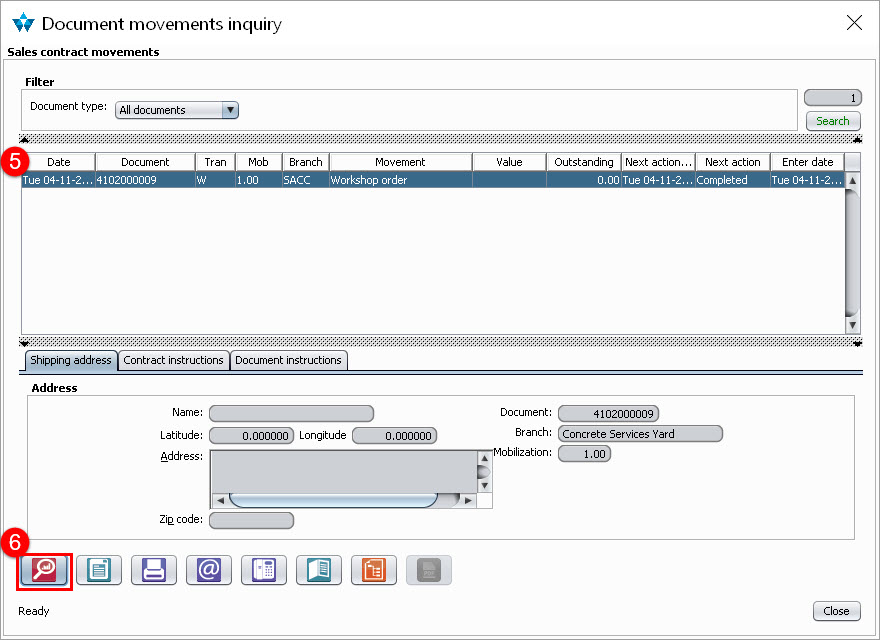
STEP 5: If not already highlighted, highlight the document row for the workshop order you are inquiring on
STEP 6: Click the red magnifying glass in the lower left of the window to display selected workshop order details
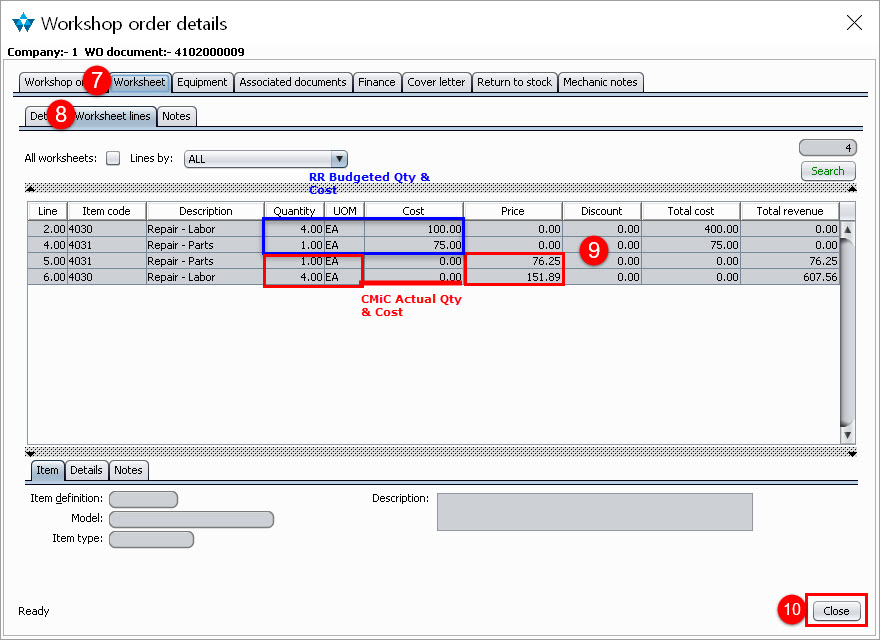
STEP 7: Click Worksheet tab
STEP 8: Click Worksheet Lines tab
NOTE: The Worksheet lines grid will display both the Budgeted Qty and Cost (outlined in Blue) entered on the Workshop Order as well as any CMiC Actual Qty and Cost (outlined in Red) that was coded to the Workshop Order. If you are billing a Project, the billing uses only the Actual Qty and Costs
STEP 9: Validate ALL CMiC Actual Costs have integrated to the Workshop Order. If all actual costs are displayed, continue through the end of this document. If not, follow the instruction below to close out of Workshop order inquiry and do not continue until such time as you can validate that all actual costs have hit the workshop order. All CMiC Actual Costs must have integrated into Rental Results prior to Finishing (closing) the Workshop Order
STEP 10: Click Close
STEP 11: Click Close
STEP 12: Click X in upper right hand corner
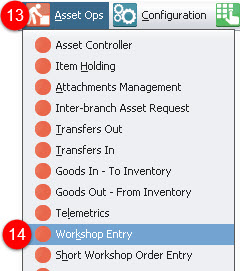
STEP 13: Click Asset Ops
STEP 14: Click Workshop Order
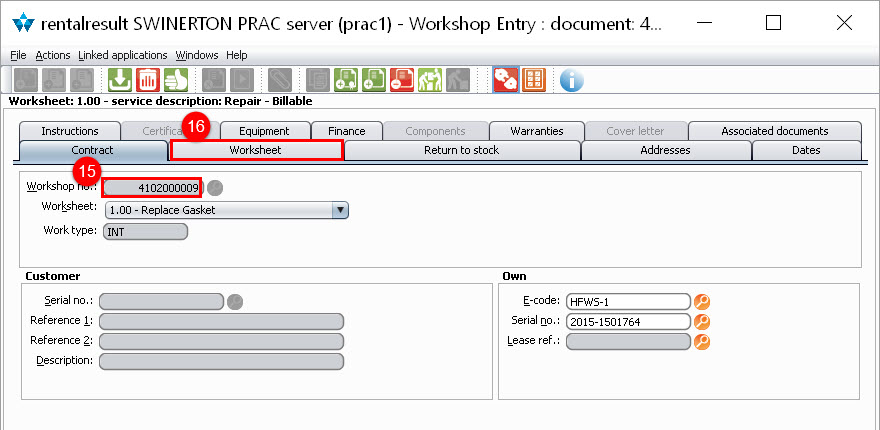
STEP 15: Enter Your Workshop Order #
STEP 16: Click the Worksheet tab
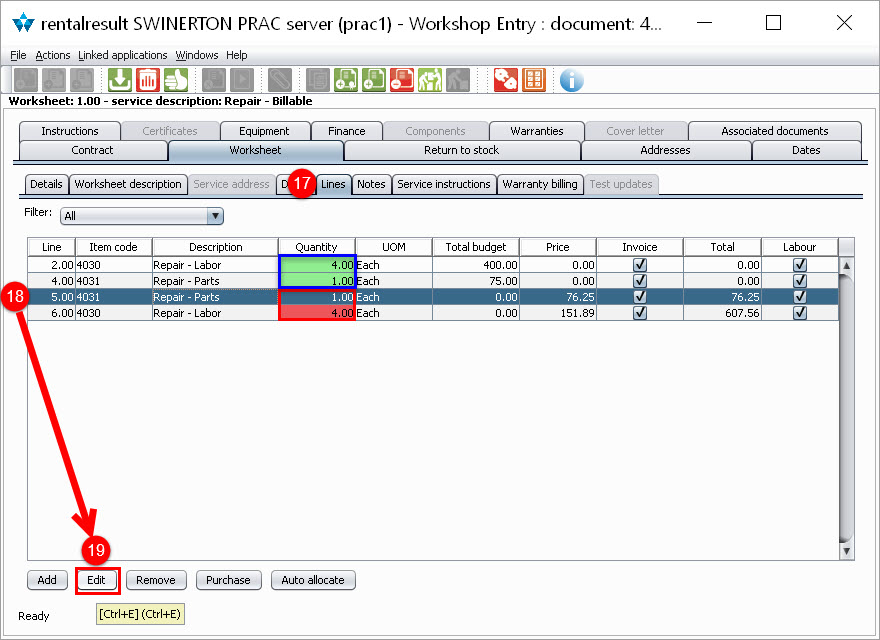
STEP 17: Click the Lines tab
NOTE: In the Quantity column you will see the Budgeted Items are displayed in Green meaning the Budgeted Quantities have been allocated and the Actual Cost is displayed in Red meaning the Actual Cost has not been allocated
STEP 18: Choose the first Actual Cost Row with quantity displayed in Red
STEP 19: Click Edit
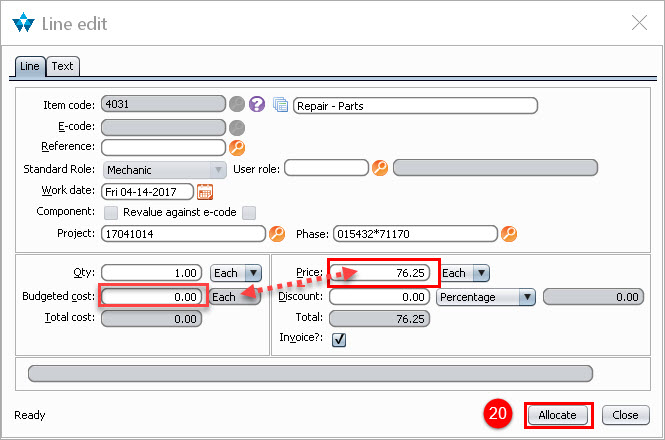
NOTE: Notice Budgeted Cost is 0.00 and Price is populated with Actual Cost
STEP 20: Click Allocate
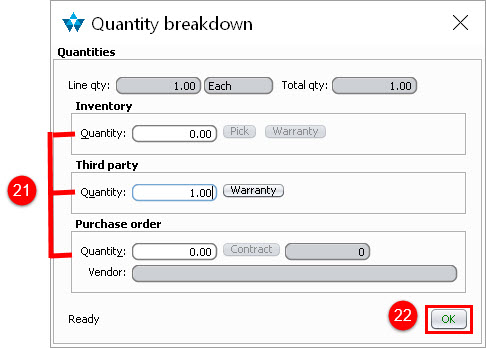
STEP 21: Choose how the service will be completed
NOTE:There are three(3) options to allocate the actual quantity. Enter the actual quantity in the appropriate field as defined below:Inventory: Used for Internal Labor (qty of hours) and/or Parts (1 lumpsum)
Third party: Used for third party Labor and/or Parts (1 lumpsum)
Purchase order: Used for any third party with whom there is a Purchase Order generated within Rental Results. Creating Purchase Orders in Rental Results is optional so if not using the PO module, use Third Party option.
STEP 22: Click OK
STEP 23: Click Close
STEP 24: Repeat Steps until all line are showing green, meaning they have been allocated (e.g., Labor, Parts etc)
NOTE: The Auto Allocate function should only be used if the line you want to allocate should go to Inventory (Internal). It does not auto allocate to third party or purchase order. It is recommended that you manually allocate each line.
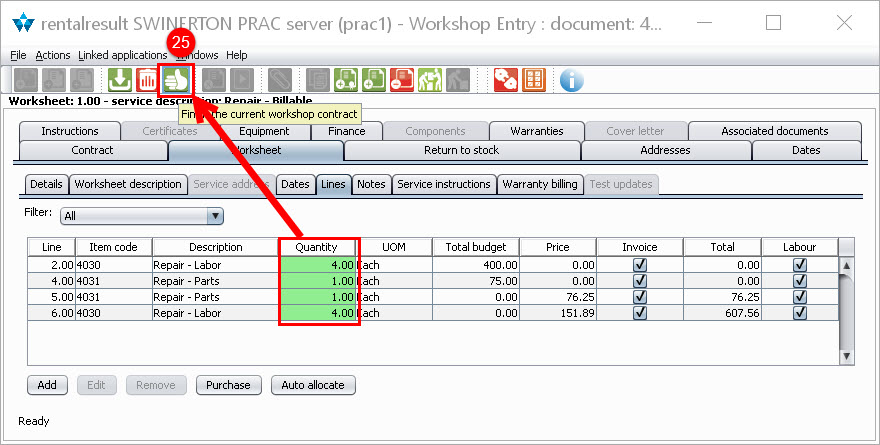
STEP 25: Once all Quantities are allocated (Green), Click the Finish (hand) icon to Finish the current workshop Contract.
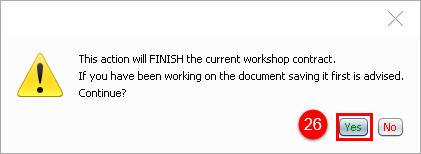
STEP 26: Click Yes
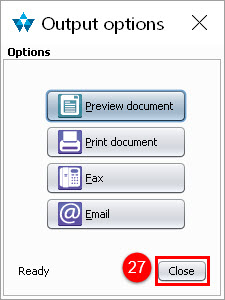
STEP 27: Choose your output option
STEP 28: Click X in upper right hand corder to Close