Creating a Contract - No Req. - Transaction: "Rental - Hawaii", Type: "Order"
Rental Contract Creation - No Portal Requisition – Transaction: "Rental - Hawaii" - Type: "Order"
NOTE: This special transaction was set up for Hawaii only, as Hawaii has been configured to request approval at every step. Only Hawaii should be using this
transaction type.
NOTE: Please use this type if project has requested rental items to be delivered.
This means that the yard/branch will be arranging delivery to project site.
NOTE: Rental Order is another way of saying Rental Contract. You may see these terms used interchangeably.
Creating a Rental Contract
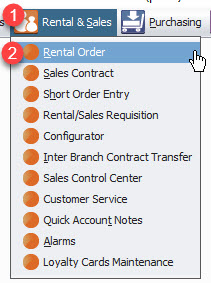
STEP 1: Click Rental & Sales
STEP 2: Choose Rental Order
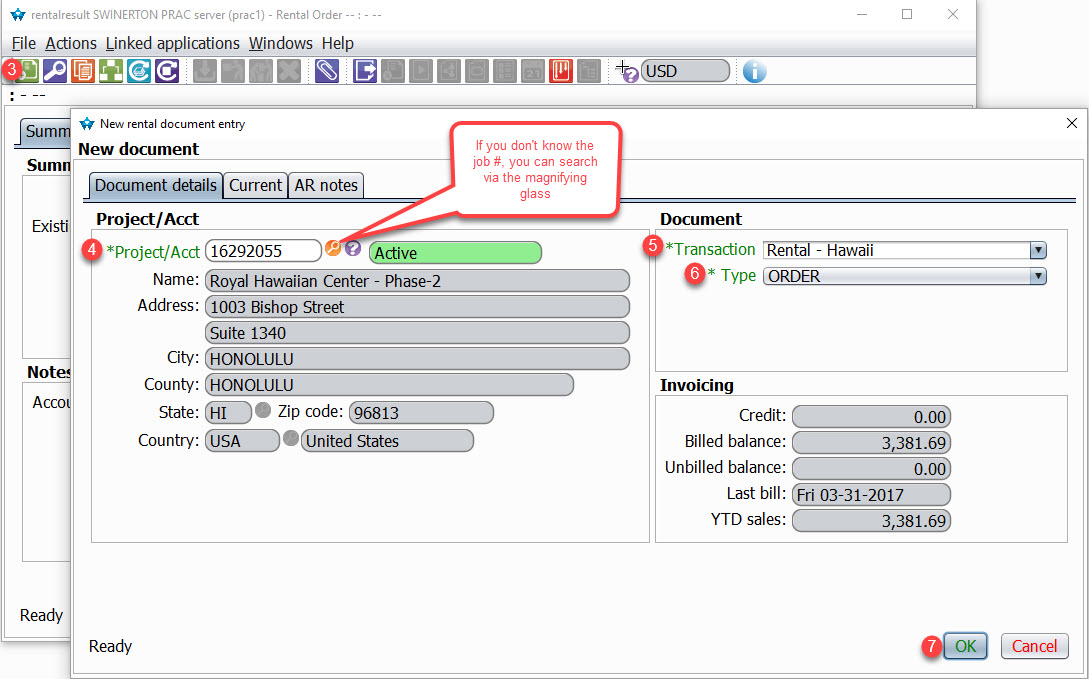
STEP 3: Click New Document
STEP 4: Type in the job #
STEP 5: Choose Transaction: Rental - Hawaii
STEP 6: Leave Default Type of Order
STEP 7: Click OK
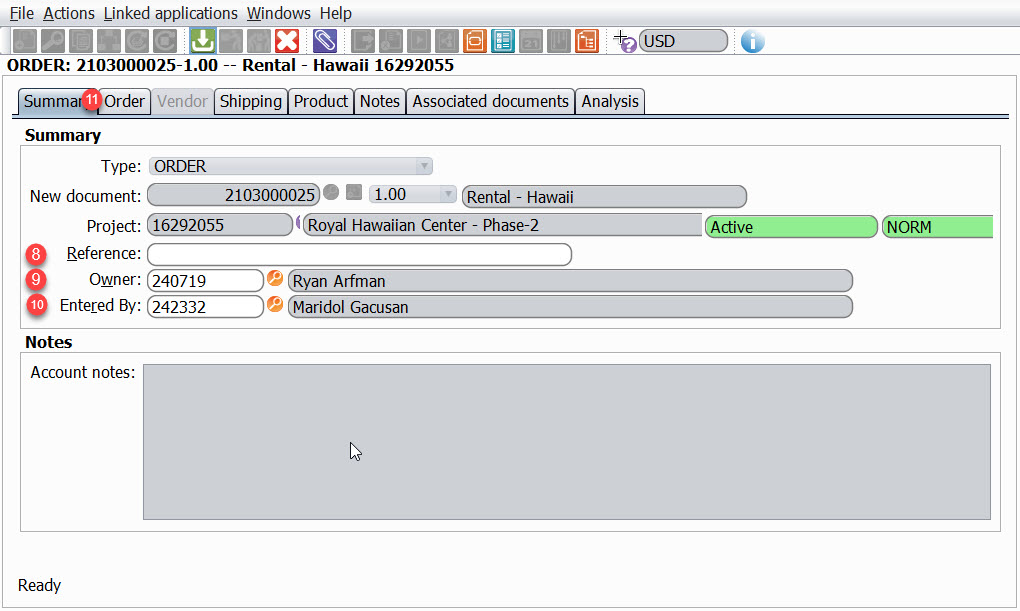
STEP 8: Type in a reference
STEP 9: Choose the person that is picking the item(s) up
STEP 10: Choose the person entering the contract
STEP 11: Click the Order tab
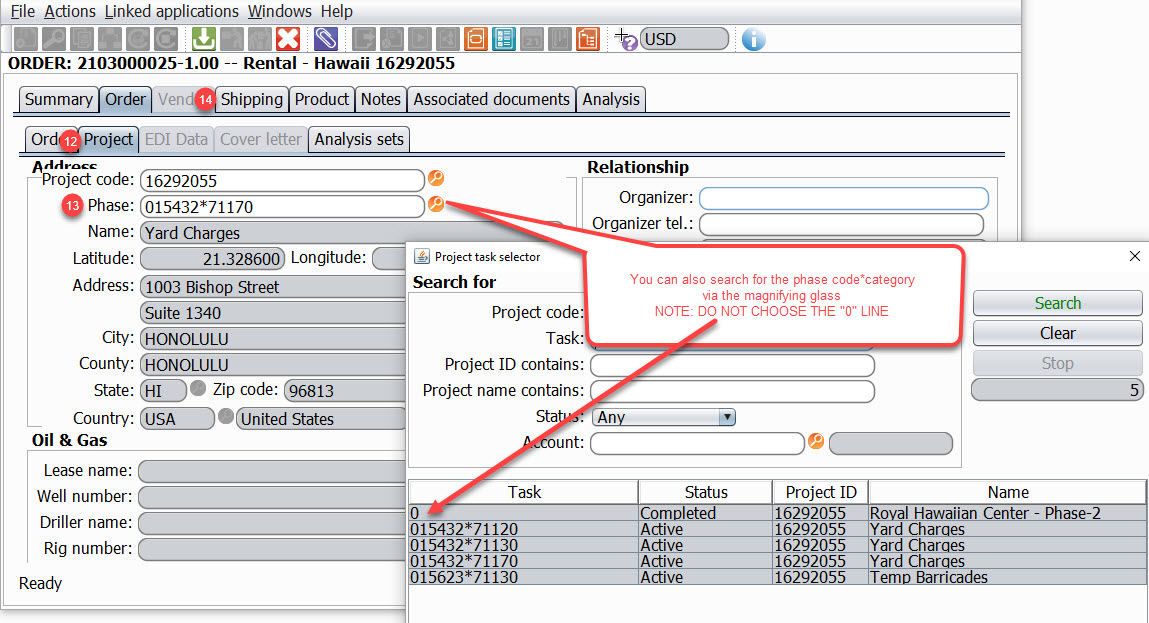
STEP 12: Click on the Project tab
STEP 13: Enter the Phase code/Category
NOTE:You can also search for the phase code/category via the magnifying glass. However, DO NOT choose the "0" line
STEP 14: Click the Shipping Tab
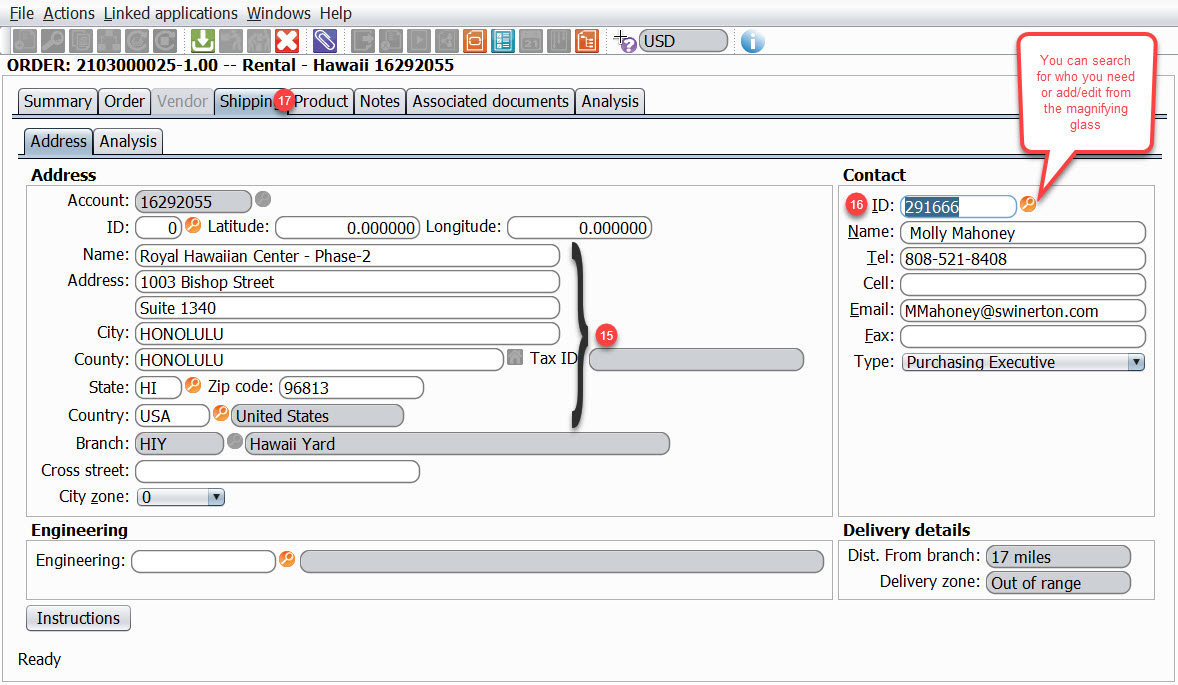
STEP 15: Verify the project address is correct
STEP 16: Choose the person requesting the equipment
STEP 17: Click on the Product tab
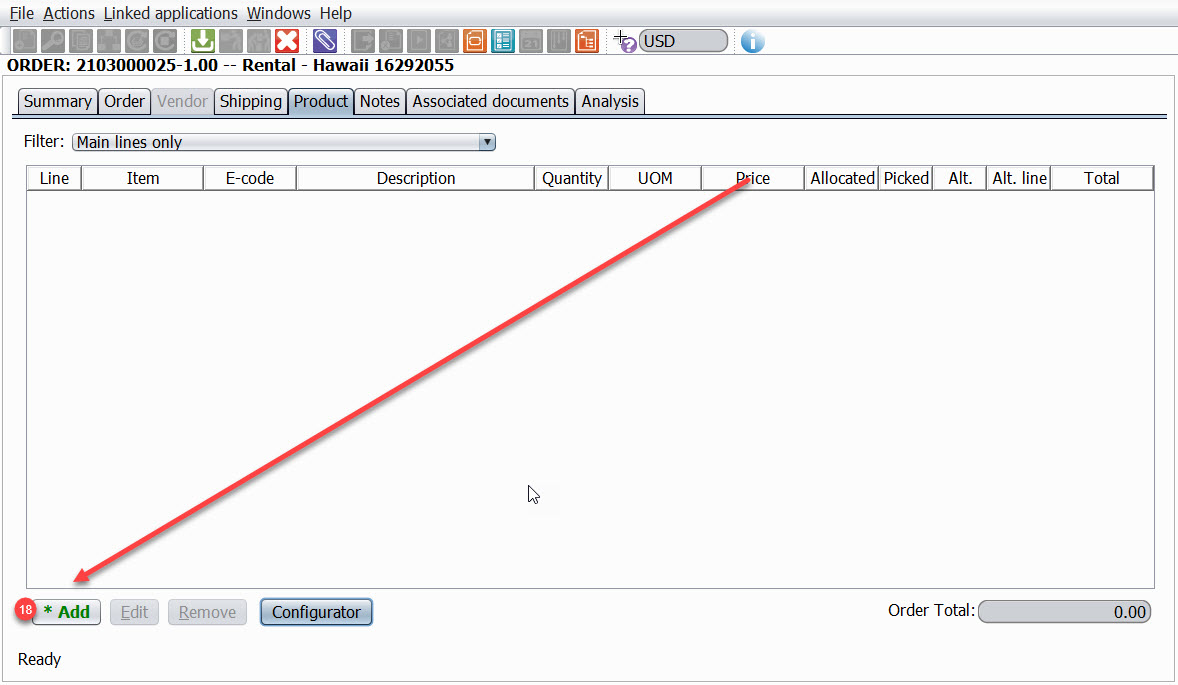
STEP 18: Click Add
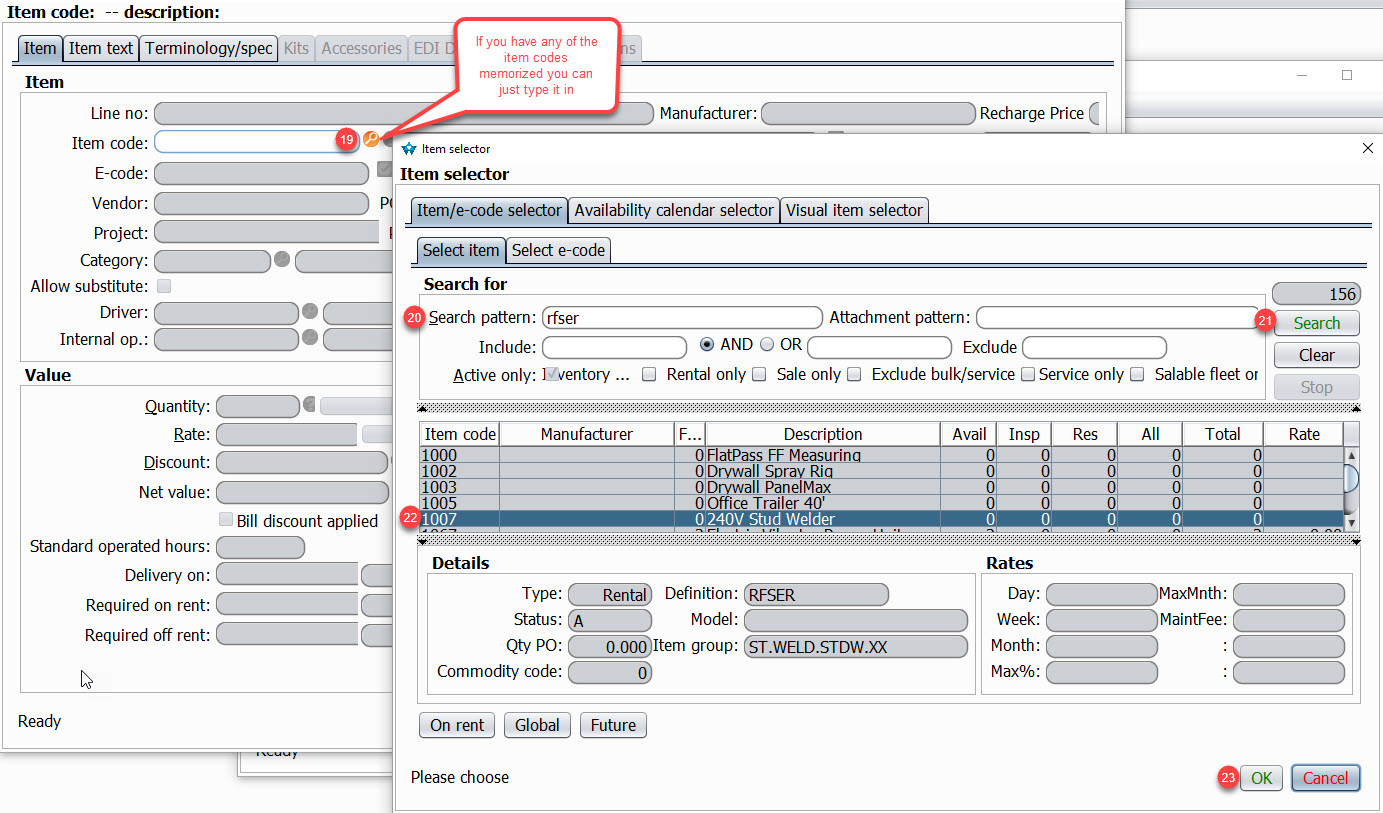
STEP 19: Click the Item Code Magnifying glass
NOTE: For Search Pattern: RFSER = (Kim Kirk to finish)
STEP 20: Enter the search pattern (see above for glossary)
STEP 21: Click Enter or Search
STEP 22: Choose the item
STEP 23: Click OK
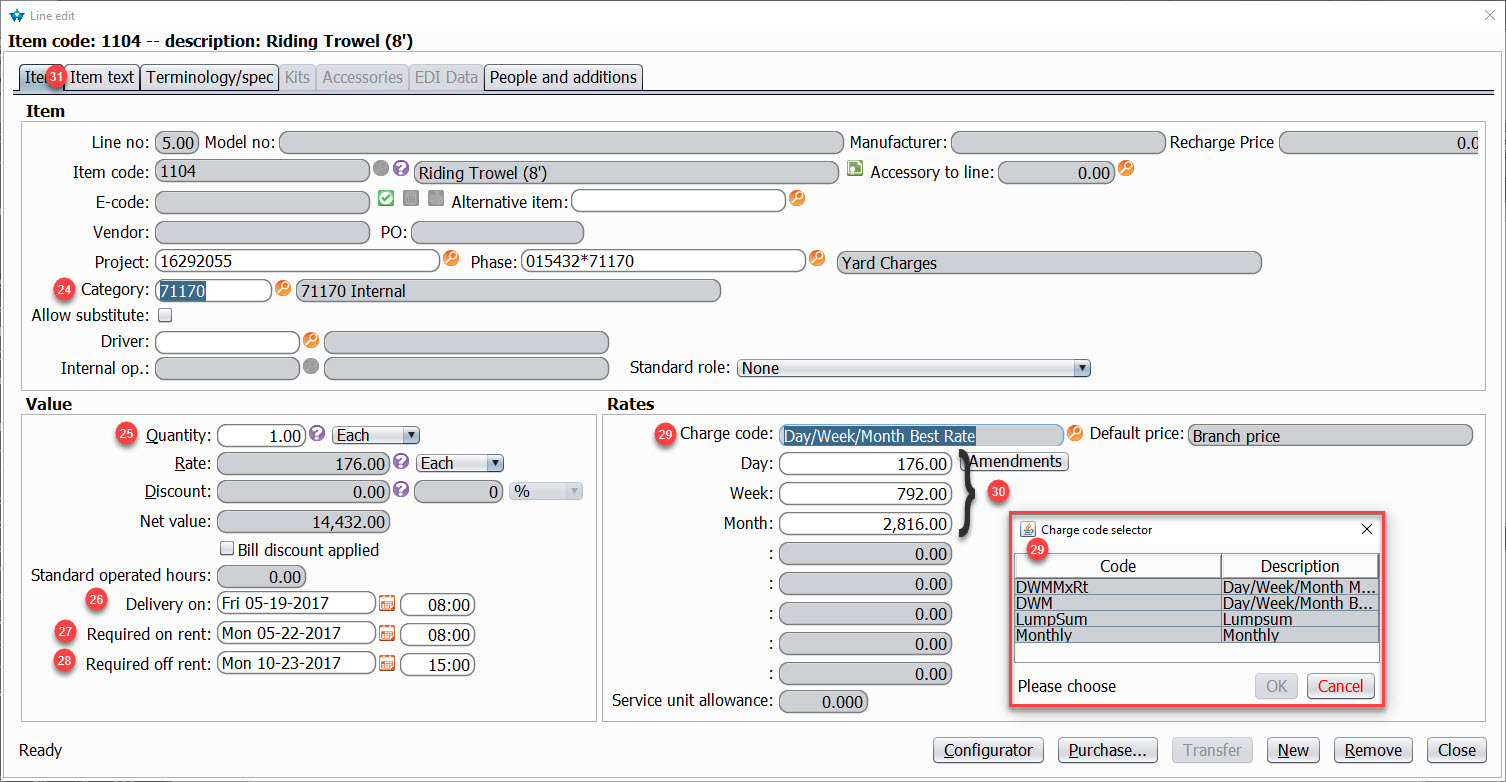
STEP 24: Enter Category
STEP 25: Enter Quantity
STEP 26: Enter the date/time (military time) you need to deliver the item
STEP 27: Enter the Required on rent date/time (military time)
STEP 28: Enter the Required off rent date/time (military time)
STEP 29: Choose which Charge code you want to use
STEP 30: Validate the Rental Rates are correct
NOTE: If the Rental Rates come in as 0.00, see the guide for How To Enter Rental Rates
STEP 31: Click the Item text tab
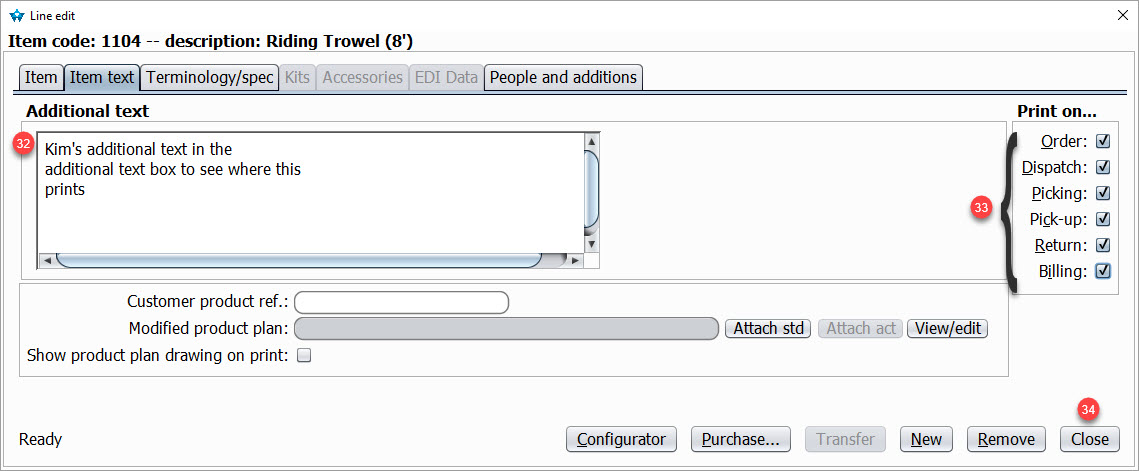
STEP 32: Add any additional comments
STEP 33: Choose all the documents you want these comments to show on
STEP 34: If you are done, Click Close
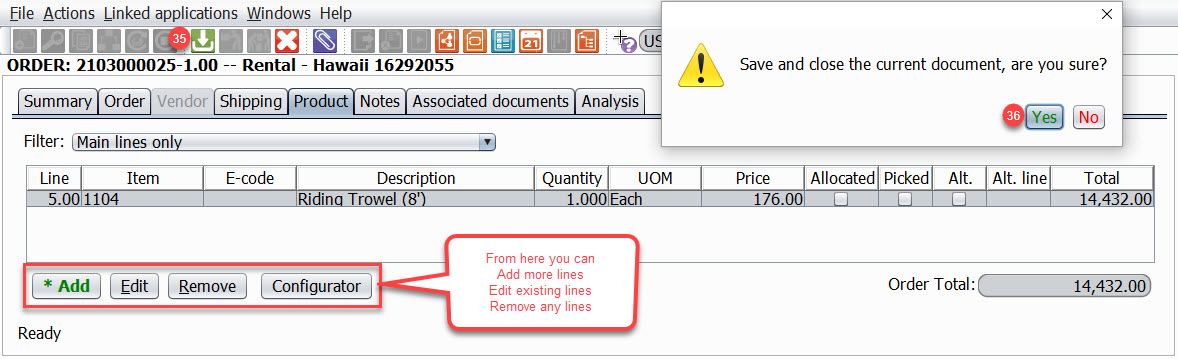
NOTE: Once back on the main window, you can choose to "*Add" more lines, "Edit" existing lines or "Remove" any lines
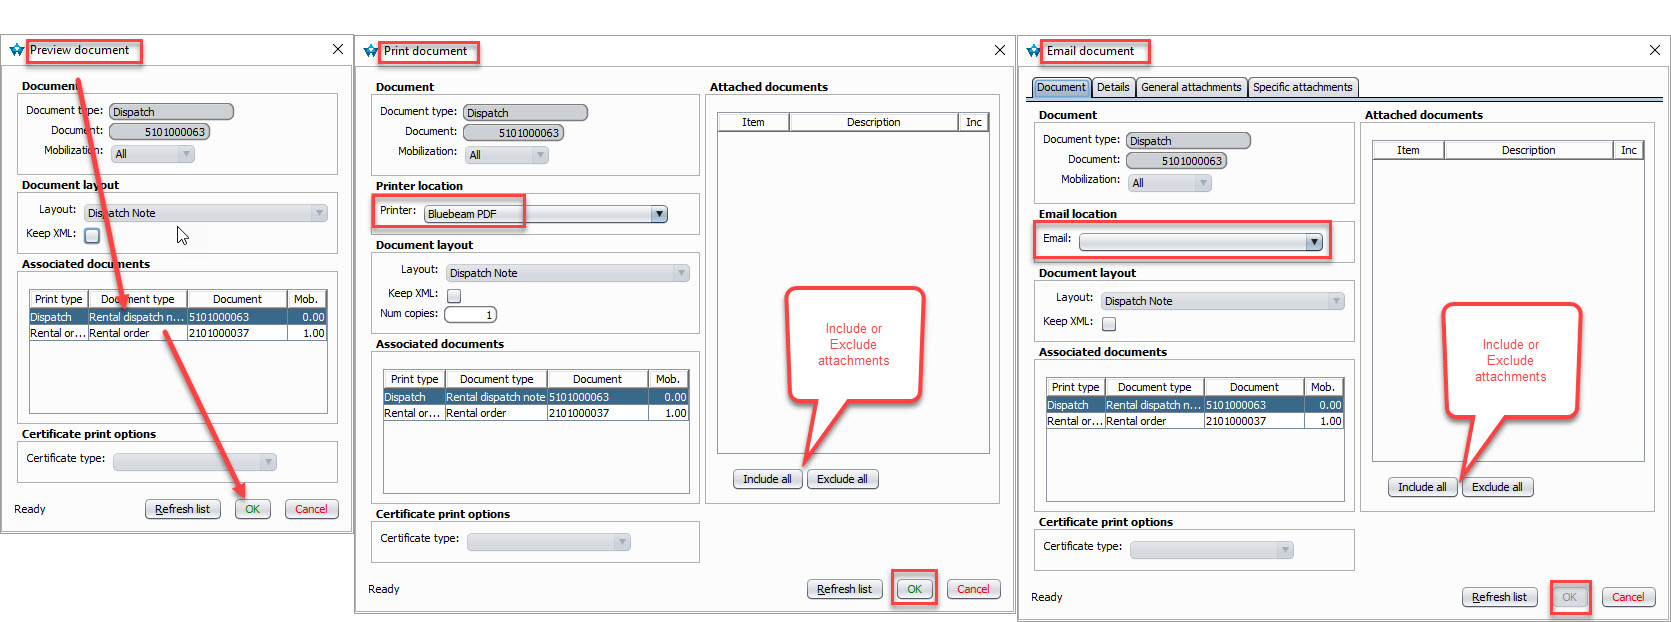
STEP 35: Click the Dispatch icon
STEP 36: Click Yes
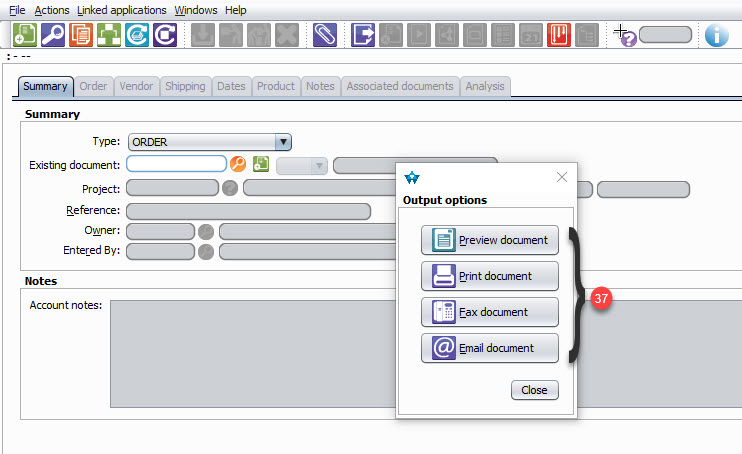
STEP 37: Choose the Output option you want
Output choices