BIM 360 Glue: Setting Up Your Project Origin and Creating Background Models and Files for Use
BIM 360 Glue: Setting Up Your Project Origin and Creating
Background Models and Files for Use
SB VDC
Team
Steps
Involved:
STEP 1: Set up shared coordinates system based
on civil survey file in Revit and move and rotate Revit models to correctly
locate them on site. (See BIM 360 Glue Shared Coordinate Process)
STEP 2: Upload native Revit files with shared
coordinate data to BIM 360 Glue - mark date and corresponding contract drawing
set they reflect to.
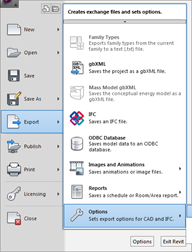
STEP 3: Convert 2D floor and ceiling plans and
3D model view in Revit to AutoCAD dwg files with shared coordinate data.
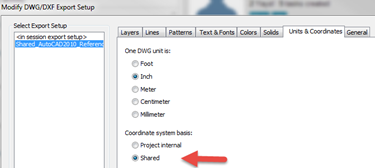
STEP 4: Open the files in AutoCAD to confirm
coordinates system has been shared.
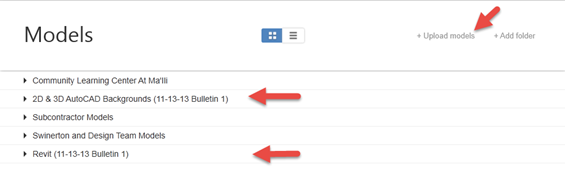
Upload them to BIM 360 Glue under (2D
and 3D AutoCAD Backgrounds) - mark date and corresponding contract drawing set
they reflect to.
STEP 5: Set up trade-specific 3D views in
Revit and separate them by building and levels for coordination in BIM 360 Glue
STEP 6: Glue 3D views using BIM 360 Glue
add-in for Revit under “Swinerton and Design Team Models” folder.
Why this step is
important:
1. Using a common set of coordinate system
will eliminate alignment issues when subcontractors and SB models are merged.
2. Subcontractors with Revit software can
use as a reference in drafting their own models
3. Background files for subcontractors to
draft in shared coordinate system
4. Allow ease of use on BIM 360 Glue iPad
and web version in turning on/off trade views.
Do's:
1. Verify all Revit, 2D and 3D AutoCAD dwg
files contains the share coordinate data correctly by comparing against with
the real world coordinate data from civil survey file and/or survey station.
Don’ts:
1. Don’t distribute Revit and AutoCAD
files to subcontractors without establishing shared coordinate system first.