BIM 360 Field iPad: Adding Issues
BIM 360 Field iPad: Adding Issues
Steps:
STEP 1: There are several different ways to add
issues from several different modules. This guide will cover the most common and recommended way.
STEP 2: Select the correct location of the issue by
using the drop down menu in the top middle portion of the screen
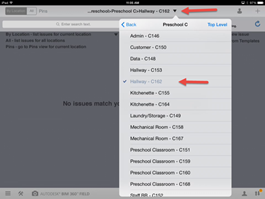
STEP 3: Click on the "pins" setting to open
the plan view of the selected location

STEP 4: Click the thumbtack "pin" in the
lower left hand corner of the screen and touch the screen where the issue is
located
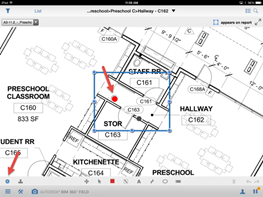
STEP 5: Add
relevant information to the issue including adding pictures, specifications,
due date and assigning to the correct subcontractor
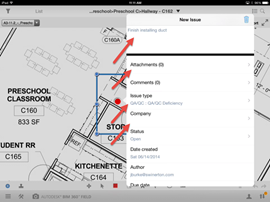
STEP 6: Ensure
you include and double check the location, description, company and issue type
at a minimum
STEP 7: If there
is a common issue, check the issue templates or create your own
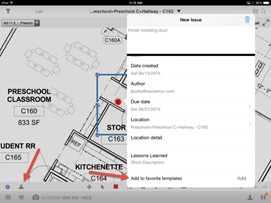
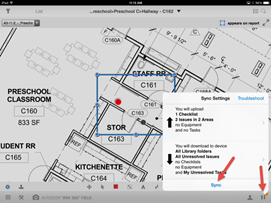
STEP 8: Synchronize to upload the issue to the data base for automatic
notification to the subcontractors
Why this is important:
This is the most basic function of the tool which should be mastered to
utilize the tool efficiently
The ability to document and notify an internal or subcontractor
virtually instantly and automatically with the detailed information provided is
something that would typically take 3 to 4 times longer compared to traditional
methods
Do's:
Issues can also be added from the list view as well as photo view among
several others
Don'ts:
Don't forget to make sure the location, description, company and issue
types are entered correctly. Without
this information correct, the issue may get lost