BIM 360 Field iPad Users Guide Overview
BIM 360 Field iPad Users Guide Overview
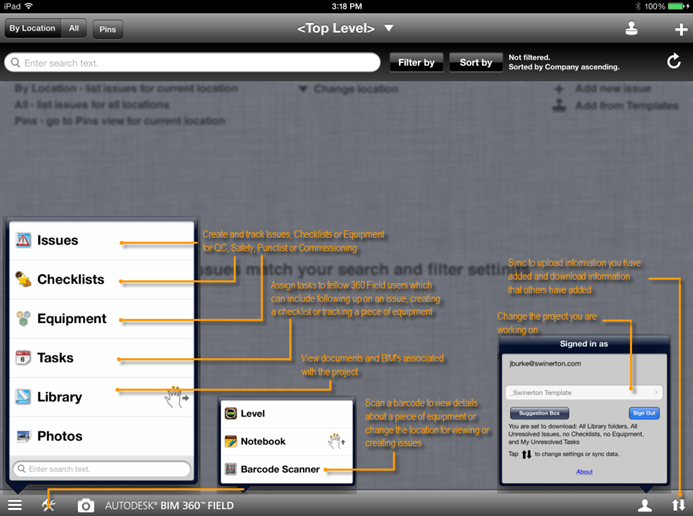
Steps:
STEP 1: Get familiar with the home
view screen menus and shortcuts by using the "Home View Screen Cheat
Sheets” above.
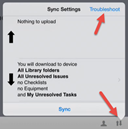
STEP 2: Open the Sync Menu and notice
the troubleshooting option on the top of this menu. This can be used to re-synchronize your
entire project on your iPad if the program stops working properly
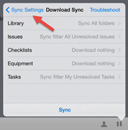
STEP 3: Select the
"uploading" or "downloading" portion of the Sync Menu and
notice that it allows you to adjust the settings and information that will and
can be downloaded or uploaded. This is
also a quick way to jump to a recently used issue, checklist, or piece of
equipment
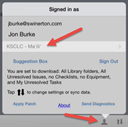
STEP 4: Choosing the profile menu allows you to
switch between projects and sign on and off
STEP 5: Select the tools menu. It
allows you to open a built in level, a bar code or QR code scanner or a note
pad

STEP 6: Selecting the bar code scanner allows you to place bar codes throughout your project in locations or on pieces of equipment. The bar codes will automatically transfer you to the correct location hierarchy in 360 Field or to the corresponding piece of equipment
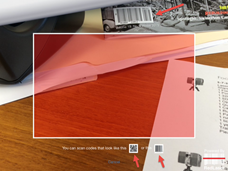
STEP 7: Open the main menu in the
bottom left hand corner and notice the different choices: Issues, Checklists, Equipment, Tasks,
Library, Models (if applicable) & Photos

Why this is important:
Understanding all the functions of the applications and where and how
to use each is important for being efficient when using this tool
Understanding the best ways to complete different record able issues
will allow you to notify your subcontractors and internal team in a timely
manner and keep all issues within a centralized collaborative program
Do's:
Learn all of the different ways to add issues, modify issues, add
information and markup documents and photos
Synchronize prior to starting work in the morning and at the end of
everyday to ensure you have the most current information and to ensure others have
the most current information
Be consistent and detailed in the information you enter into issues,
checklists and other modules. Incorrect
or inaccurate information could result in issues not being distributed as
desired
Follow up with subcontractors and show them the correct way to respond
to issues using an iPad, or the Web interface.
Don'ts:
Don't be afraid of using the tools and adding too much information
Do not allow subs to print and markup which items are complete because
this defeats the purpose of the application. Subs will then be relying on Swinerton to change the status of their
issues
All subcontractors should have access to the internet either at the
jobsite or at their local offices and thus should have no excuse for responding
to the status of their issues
Don't be afraid to submit a ticket to autodesk with the help of your
360 Field project champion. Review the issue with your project champion and
have them submit the ticket and copy you. This way, they are a part of the solution should others have a similar
issue.