Job Billing - Process Owner Billing
Job Billing - Process Owner Billing
Preparing the Contract
This step should have been completed during the Job Setup process. The Contract setup should be confirmed prior to the first Owner Billing.
Navigation:

Job Billing – Contracts – Enter Contract
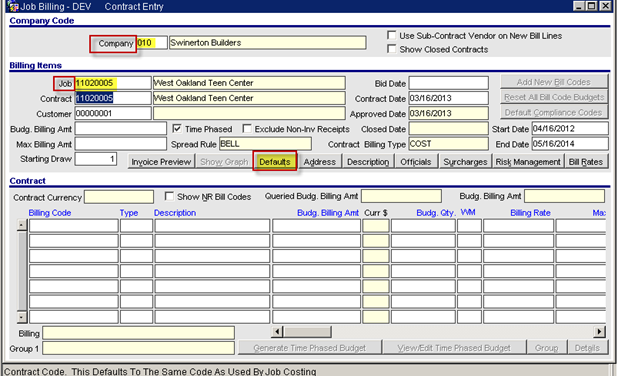
Ensure that the Company
is correct, and press F11 then F9 in the Job field. Select the proper job. Alternatively, press F11, enter the
job number, then press F12.
Press the Defaults
button.
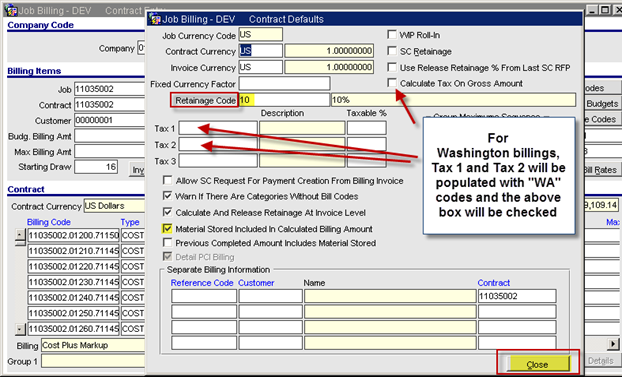
Validate/update
the settings for Retainage Code (initially setup by the FM).
If the job is
located in Washington, there will be “WA” codes in the Tax 1 and Tax
2 fields so the system will calculate Washington sales taxes for each
billing. Also, the box will be checked
in the Calculate Tax on Gross
Amount field.
For jobs located
in Canada, the “CN” code will show in the Tax 1 field. The box will be unchecked in the Calculate
Tax on Gross Amount field so the system will calculate tax based on the net
billings amount.
Click the Close
button.
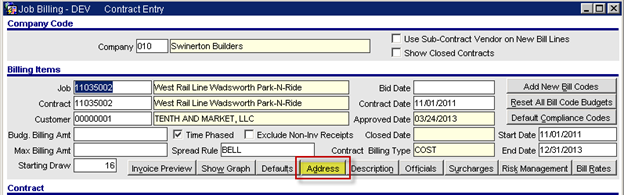
Click
the Address button to see what will be displayed on the Job Billing AIA
form as the Project Address.

Note
that for go-live and several months thereafter, Swinerton will process
“one-line” billings in CMiC and continue to present Excel-based billings to
owners. When the company decides to use
more detailed invoice formats and present system-generated billings to owners,
then you may need to change the customer address information (e.g. sending
billings to alternative locations).
Click
the Close button.
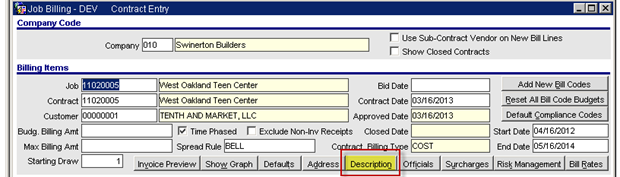
Click on
the Description button.
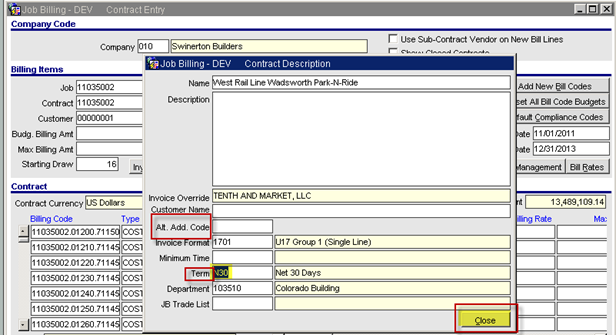
The
existing contract name will appear in the Name field.
The Description
field can be used to enter notes and will not be printed anywhere.
Invoice
Format 1701
should be displayed. If not, press F9 or double-click in the field.
In the Term
field, press F9 and select the billing terms (typically N30).
Click
the Close button.
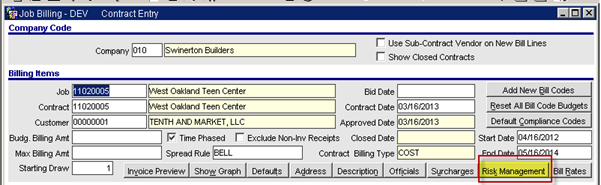
Click
the Risk Management button to validate/update insurance and GRT (if
applicable) rates, which may have already been selected by the Financial
Manager.

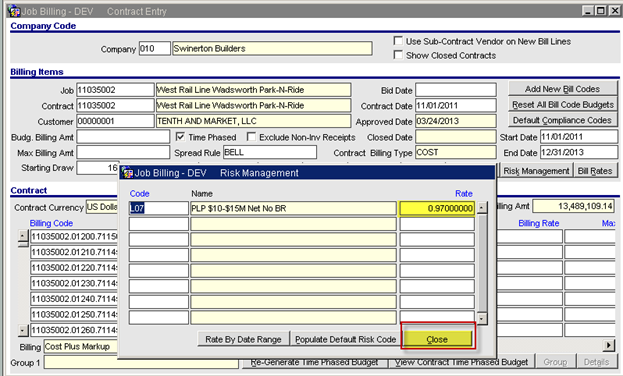
The
system will automatically generate insurance and GRT (if applicable) job cost
transactions based on the gross billing amount.
The costs will land
in the current period and, by default, will be billed in the next accounting
period.
Click
the Close button.
Note: Bill Rates are setup to equal Charge Rates
(except for SMC). So, there is no need
to click the Bill Rates button and
make changes.
The remaining steps in this section
should be performed after the PM has loaded the job budget.
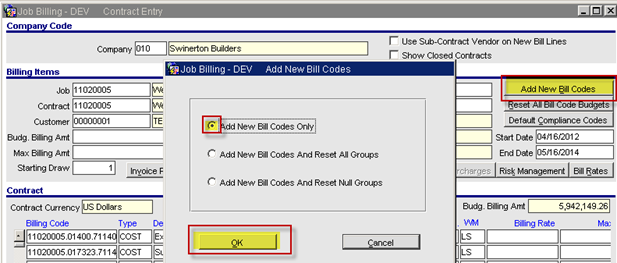
Click
the Add New Bill Codes button. This step adds any phases or categories
to the Contract that may have been added by the Project Manager since the
Billing Contract was entered or last updated, and must be performed before every billing.
Click
OK (the default “Add New Bill Codes Only” is appropriate).
Press
the Page Down key on your keyboard or click on the button near the top of the screen to populate
the Contract.
button near the top of the screen to populate
the Contract.
Click Page Down and click the Generate (or
Re-Generate) Time Phased Budget button.
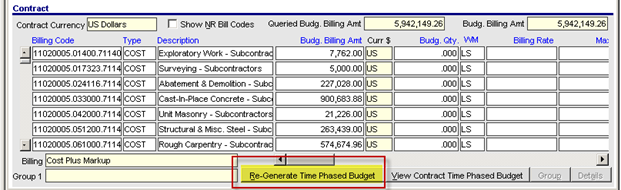
Time phasing of revenue must be
performed before WIP is processed for the first time.
If the Synchronize
button is red, click it to adjust the projected revenue amount.
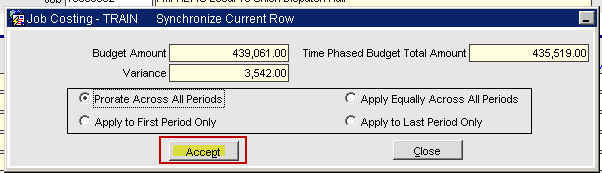
You will then be
prompted to choose how to spread the adjustment, or if additional periods are
needed. Just click the Accept
button.
Press F3
or the Save icon and then F4 to exit the screen.
Preparing the Billing
Navigation:
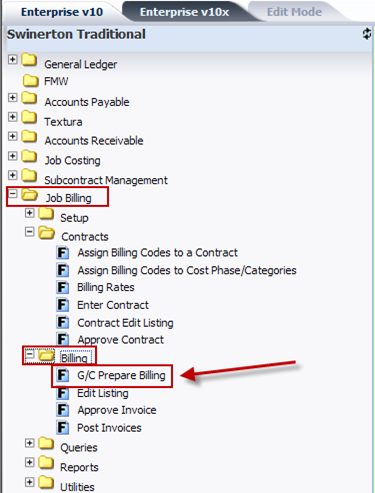
Job Billing - Billing – G/C Prepare
Billing
Ensure the
appropriate Company number displays in the top block.
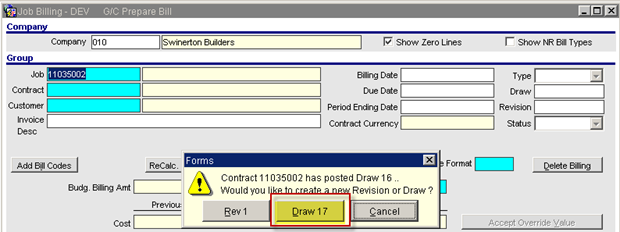
In the next
block, input the Job number, press F12 or click the Draw #
button.
If you are
prompted, click OK.
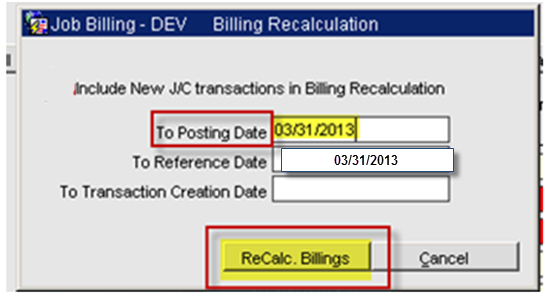
A pop-up box
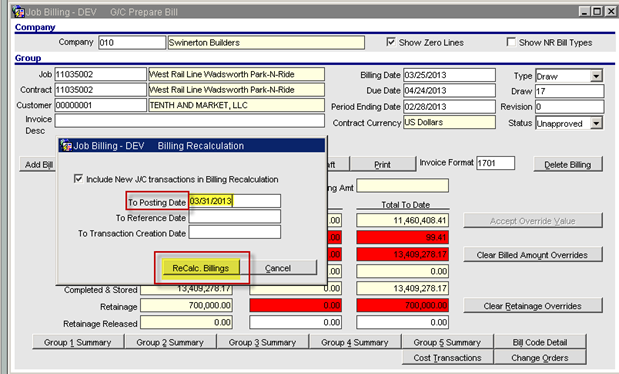
appears and the user must “recalculate” the billing amount. By default, “Include New J/C (Job Cost)
transactions in Billing Recalculation” is checked.
Delete
the date in the “To Reference Date” field.
In the “To
Posting Date” field, input the date as follows:
If you are
entering a billing during the early part of a month (e.g. June 3rd) prior to
billing cutoff, enter the last day of the prior month (05/31/2013) to
capture transactions posted in the open period.
If you are entering a billing
after billing cutoff, simply enter the current day’s date (e.g. June
9th) to capture cost transactions for the billing through that date.
Click ReCalc.
Billings.

By default, the
system shows the date that the billing is created in the Billing Date
field, the Due Date is based on contract terms, and the Period End Date is
the last day of the open period.
If you are entering a billing
after billing cutoff, simply enter the current day’s date (e.g. June
9th).
Note: The posting date of the transaction is
selected in the posting process (see page 14).
Enter a
description (job #, draw #, GL date, etc.) in the Description field.
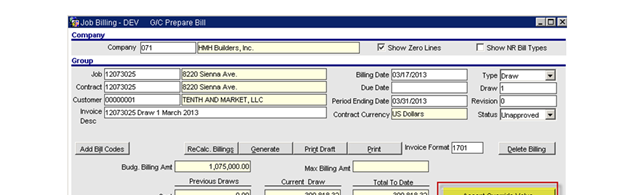
In the screen
shot above, note that the system displays Previous, Current and Total
To Date amounts for Cost, Billing (gross) and Retainage, as
well as other data.
If you get a
pop-up box that says “Warning: Job/Phase/Categories exist without being mapped to Contract (Job #),” just
click OK.
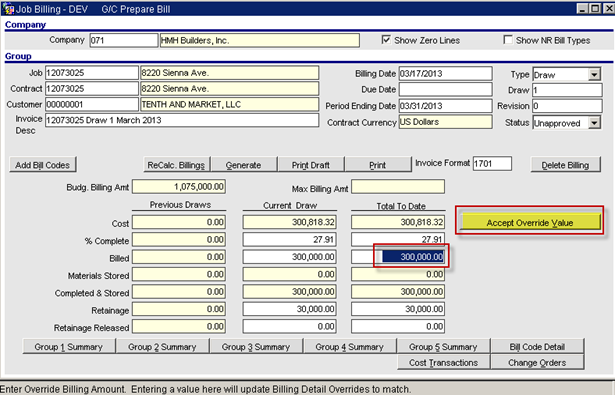
On the main
screen of G/C Prepare Bill, you may override amounts in the Current Draw or Total to Date
“Billed” white fields by entering new amounts and immediately clicking the Accept
Override Value button.
Overrides will
be displayed in a red background and do not represent errors.
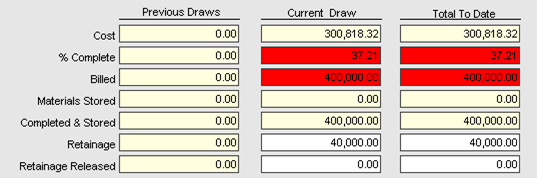
Total To Date
Billed amount overridden from $300,000 to $400,000. Retainage automatically recalculated
but that amount may be overridden.
Click the ReCalc. Billings
button.
At the pop-up box, simply click the ReCalc. Billings button again (no
changes needed).
Next, click the Generate
button and click OK at the pop-up
box.

Next, click the Print
button and then click Run Report.
Check that billing amounts
match your input screen.
Click Cancel at next prompt.
The main screen shows the
billing amounts.
Finally, press F3
to save and F4 to exit (click OK if prompted).
Posting the Billing
Navigation:
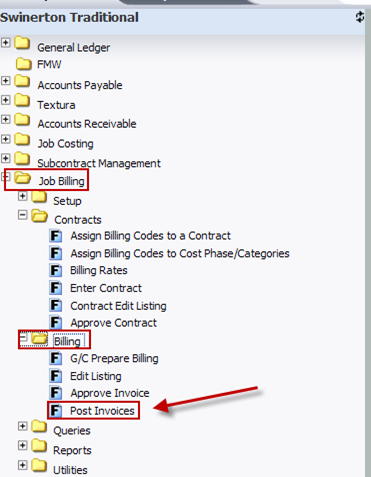
Job Billing - Billing – Post
Invoices
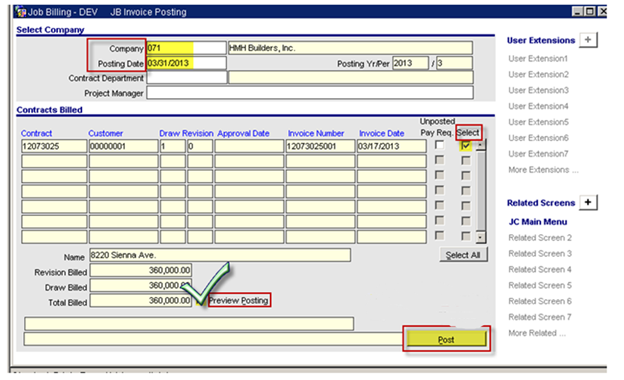
Ensure the Company
number is correct.
If you are
posting a billing during the early part of a month (e.g. June 3rd) prior to
billing cutoff, enter the last day of the prior month (05/31/2013).
If you are entering a billing
after billing cutoff, simply enter the current day’s date (e.g. June
9th).
Click Page Down,
check the box in the Select column
, and the click in the box next to Preview
Posting.
Click Post. That will create three pre-posting reports and does not actually
post the billing.
When prompted,
click Run Reports.
Ensure
that the proper GL date, gross billing and retention amounts, and other
details are correct. Close the reports screen and return to the
posting screen.
Finally, just click the Post button to post the transactions.